+91 7976 955 311
hello@fbipool.com

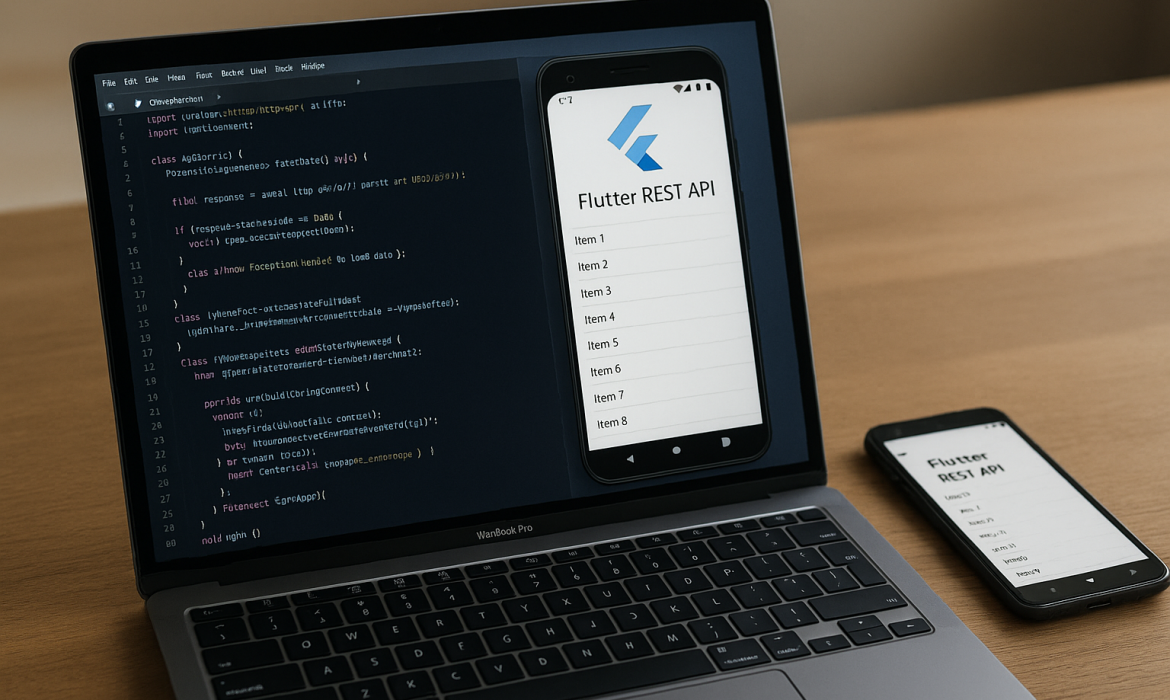
In today’s interconnected digital landscape, mobile applications rarely function in isolation. Whether you’re building a social media app, e-commerce platform, or productivity tool, your Flutter application will likely need to communicate with external servers to fetch, send, and synchronize data. This is where REST APIs become your gateway to the vast ecosystem of web services and backend systems.
Flutter, Google’s revolutionary cross-platform framework, has transformed how developers approach mobile app development. However, many beginners find themselves puzzled when it comes to integrating REST APIs effectively. If you’ve ever wondered how to make your Flutter app communicate seamlessly with backend services, fetch real-time data, or synchronize user information across devices, you’re in the right place.
This comprehensive guide will demystify REST API integration in Flutter, providing you with practical knowledge, real-world examples, and best practices that will elevate your app development skills. By the end of this tutorial, you’ll confidently implement HTTP requests, handle responses, manage errors, and create robust Flutter applications that leverage the power of REST APIs.
REST (Representational State Transfer) APIs serve as the communication bridge between your Flutter application and backend servers. Think of REST APIs as translators that allow your mobile app to request information, send data, and perform operations on remote servers using standard HTTP methods.
In the context of Flutter development, REST APIs enable your applications to:
Flutter’s architecture makes API integration straightforward through its built-in HTTP client and robust asynchronous programming model. The framework’s reactive nature perfectly complements REST API calls, allowing you to update your user interface seamlessly as data flows from external sources.
Understanding the fundamental principles of REST APIs is crucial for Flutter developers. REST follows a stateless, client-server architecture where each API endpoint represents a specific resource or action. The most common HTTP methods you’ll encounter include GET (retrieve data), POST (create new resources), PUT (update existing resources), and DELETE (remove resources).
Before diving into REST API integration, ensure your Flutter development environment is properly configured. Start by adding the necessary dependencies to your pubspec.yaml file. The primary package you’ll need is the http package, which provides essential HTTP client functionality for making API requests.
dependencies:
flutter:
sdk: flutter
http: ^1.1.0
Additionally, consider including these complementary packages that enhance API integration capabilities:
Import the HTTP package in your Dart files where you’ll implement API calls:
import ‘package:http/http.dart’ as http;
import ‘dart:convert’;
Configure your development environment to handle different API endpoints for development, staging, and production environments. Create a configuration class that manages base URLs, API keys, and other environment-specific variables.
Ensure your Flutter app has appropriate permissions for internet access. For Android, verify that your android/app/src/main/AndroidManifest.xml includes the internet permission. iOS applications have internet access by default, but you may need to configure App Transport Security settings for HTTP endpoints.
Creating your first HTTP request in Flutter is an exciting milestone that opens the door to endless possibilities. Let’s start with a simple GET request to fetch data from a public API.
Here’s a basic example of making an HTTP GET request:
Future<Map<String, dynamic>> fetchUserData() async {
final response = await http.get(
Uri.parse(‘https://jsonplaceholder.typicode.com/users/1’),
headers: {‘Content-Type’: ‘application/json’},
);
if (response.statusCode == 200) {
return json.decode(response.body);
} else {
throw Exception(‘Failed to load user data’);
}
}
This function demonstrates several key concepts in Flutter API integration. The async and await keywords handle asynchronous operations, ensuring your app remains responsive while waiting for API responses. The Uri.parse() method constructs a proper URL object, while headers provide additional request metadata.
Status code checking is crucial for robust API integration. HTTP status codes communicate the success or failure of your requests. Codes in the 200-299 range indicate success, while 400-499 suggest client errors, and 500-599 indicate server problems.
Implement proper error handling to create resilient applications. Wrap your API calls in try-catch blocks and provide meaningful error messages to users. Consider implementing retry logic for temporary network failures and graceful degradation when APIs are unavailable.
JSON (JavaScript Object Notation) serves as the standard data exchange format for REST APIs. Flutter provides excellent support for JSON parsing through the dart:convert library, but handling complex data structures requires careful consideration of serialization and deserialization patterns.
Create model classes that represent your API data structures. This approach provides type safety, improves code maintainability, and enables better IDE support with auto-completion and error detection.
class User {
final int id;
final String name;
final String email;
final String phone;
User({
required this.id,
required this.name,
required this.email,
required this.phone,
});
factory User.fromJson(Map<String, dynamic> json) {
return User(
id: json[‘id’] ?? 0,
name: json[‘name’] ?? ”,
email: json[’email’] ?? ”,
phone: json[‘phone’] ?? ”,
);
}
Map<String, dynamic> toJson() {
return {
‘id’: id,
‘name’: name,
’email’: email,
‘phone’: phone,
};
}
}
Implement null safety considerations when parsing JSON data. API responses may contain null values or missing fields, so your model classes should handle these scenarios gracefully. Use null-aware operators and provide default values where appropriate.
For complex applications with numerous model classes, consider using code generation tools like json_serializable. These tools automatically generate serialization code, reducing boilerplate and minimizing human errors in JSON handling.
REST APIs utilize various HTTP methods to perform different operations on server resources. Understanding when and how to use each method is essential for effective API integration in Flutter applications.
GET requests fetch data from servers without modifying any resources. They’re idempotent, meaning multiple identical requests produce the same result. Use GET requests for retrieving user profiles, fetching product catalogs, or loading configuration data.
Future<List<Product>> fetchProducts() async {
final response = await http.get(
Uri.parse(‘https://api.example.com/products’),
headers: {‘Authorization’: ‘Bearer $token’},
);
if (response.statusCode == 200) {
List<dynamic> jsonList = json.decode(response.body);
return jsonList.map((json) => Product.fromJson(json)).toList();
} else {
throw Exception(‘Failed to fetch products’);
}
}
POST requests send data to servers to create new resources. They’re commonly used for user registration, creating new posts, or submitting forms. POST requests can modify server state and are not idempotent.
Future<User> createUser(Map<String, dynamic> userData) async {
final response = await http.post(
Uri.parse(‘https://api.example.com/users’),
headers: {‘Content-Type’: ‘application/json’},
body: json.encode(userData),
);
if (response.statusCode == 201) {
return User.fromJson(json.decode(response.body));
} else {
throw Exception(‘Failed to create user’);
}
}
PUT requests replace entire resources, while PATCH requests modify specific fields. Choose PUT for complete resource updates and PATCH for partial modifications. Both methods require careful consideration of data consistency and validation.
DELETE requests remove resources from servers. Implement proper confirmation dialogs and error handling, as delete operations are typically irreversible.
Future<bool> deleteUser(int userId) async {
final response = await http.delete(
Uri.parse(‘https://api.example.com/users/$userId’),
headers: {‘Authorization’: ‘Bearer $token’},
);
return response.statusCode == 204;
}
Robust error handling distinguishes professional Flutter applications from amateur projects. Network requests can fail for numerous reasons: poor connectivity, server downtime, invalid credentials, or malformed requests. Implementing comprehensive error handling ensures your app remains stable and provides meaningful feedback to users.
Create custom exception classes that represent different types of API errors:
class ApiException implements Exception {
final String message;
final int? statusCode;
ApiException(this.message, [this.statusCode]);
@override
String toString() => ‘ApiException: $message (Status: $statusCode)’;
}
class NetworkException implements Exception {
final String message;
NetworkException(this.message);
}
Implement timeout handling to prevent your app from hanging indefinitely on slow or unresponsive servers. The HTTP package allows you to specify timeout durations for different scenarios:
Future<http.Response> makeApiCall(String url) async {
try {
final response = await http.get(
Uri.parse(url),
headers: {‘Content-Type’: ‘application/json’},
).timeout(Duration(seconds: 30));
return response;
} on TimeoutException {
throw NetworkException(‘Request timeout’);
} on SocketException {
throw NetworkException(‘No internet connection’);
} catch (e) {
throw ApiException(‘Unexpected error: $e’);
}
}
Implement retry logic for transient failures. Network issues are often temporary, and automatic retries can improve user experience significantly. However, be mindful of retry strategies to avoid overwhelming servers or draining device batteries.
Monitor network connectivity status using packages like connectivity_plus. This allows your app to detect when devices go offline and queue API requests for later execution when connectivity is restored.
Effective state management becomes crucial when integrating REST APIs into Flutter applications. API responses need to be stored, updated, and accessed across different widgets and screens. Flutter offers several state management solutions, each with distinct advantages for API integration scenarios.
The Provider pattern excels at managing API-related state changes. Create provider classes that encapsulate API calls and expose data through reactive streams:
class UserProvider extends ChangeNotifier {
List<User> _users = [];
bool _isLoading = false;
String? _errorMessage;
List<User> get users => _users;
bool get isLoading => _isLoading;
String? get errorMessage => _errorMessage;
Future<void> fetchUsers() async {
_isLoading = true;
_errorMessage = null;
notifyListeners();
try {
_users = await ApiService.getUsers();
} catch (e) {
_errorMessage = e.toString();
} finally {
_isLoading = false;
notifyListeners();
}
}
}
For applications with complex state requirements, the BLoC (Business Logic Component) pattern provides excellent separation of concerns and testability. BLoC manages API calls through events and states, creating predictable and maintainable code architectures.
Implement local caching to improve app performance and provide offline functionality. Cache API responses using packages like hive or sqflite, and set up cache invalidation strategies based on how fresh your data needs to be. This ensures users always see relevant content without unnecessary network calls.
Consider implementing optimistic updates for a smoother user experience. This means updating the UI instantly when users take an action (like adding a comment), then syncing with the server in the background. If the server call fails, you can gracefully revert the change and notify the user.
Many developers hesitate due to Common Myths About Flutter Development – Debunked, such as thinking Flutter apps can’t handle complex state or offline scenarios. In reality, with proper caching and thoughtful update patterns, Flutter can deliver robust, high-performance apps that work seamlessly online and offline.
Let’s create a comprehensive example that demonstrates REST API integration in a real Flutter application. We’ll build a user management app that performs CRUD (Create, Read, Update, Delete) operations through REST API calls.
Organize your project with a clean architecture that separates concerns:
lib/
models/
user.dart
services/
api_service.dart
providers/
user_provider.dart
screens/
user_list_screen.dart
user_detail_screen.dart
widgets/
user_card.dart
Create a centralized API service class that handles all HTTP requests:
class ApiService {
static const String baseUrl = ‘https://jsonplaceholder.typicode.com’;
static Future<List<User>> getUsers() async {
final response = await http.get(Uri.parse(‘$baseUrl/users’));
if (response.statusCode == 200) {
List<dynamic> jsonList = json.decode(response.body);
return jsonList.map((json) => User.fromJson(json)).toList();
} else {
throw Exception(‘Failed to load users’);
}
}
static Future<User> createUser(User user) async {
final response = await http.post(
Uri.parse(‘$baseUrl/users’),
headers: {‘Content-Type’: ‘application/json’},
body: json.encode(user.toJson()),
);
if (response.statusCode == 201) {
return User.fromJson(json.decode(response.body));
} else {
throw Exception(‘Failed to create user’);
}
}
}
Create responsive UI components that handle loading states, error conditions, and empty data scenarios:
class UserListScreen extends StatelessWidget {
@override
Widget build(BuildContext context) {
return Scaffold(
appBar: AppBar(title: Text(‘Users’)),
body: Consumer<UserProvider>(
builder: (context, userProvider, child) {
if (userProvider.isLoading) {
return Center(child: CircularProgressIndicator());
}
if (userProvider.errorMessage != null) {
return Center(
child: Column(
mainAxisAlignment: MainAxisAlignment.center,
children: [
Text(‘Error: ${userProvider.errorMessage}’),
ElevatedButton(
onPressed: () => userProvider.fetchUsers(),
child: Text(‘Retry’),
),
],
),
);
}
return ListView.builder(
itemCount: userProvider.users.length,
itemBuilder: (context, index) {
return UserCard(user: userProvider.users[index]);
},
);
},
),
);
}
}
Optimizing API integration performance ensures your Flutter app delivers exceptional user experiences across various network conditions and device capabilities. Implement these strategies to create efficient and responsive applications.
Minimize API calls by implementing intelligent caching mechanisms. Store frequently accessed data locally and implement cache-first strategies where appropriate. Use conditional requests with ETag headers to reduce bandwidth usage when data hasn’t changed.
Implement request batching for scenarios where multiple related API calls are needed. Instead of making several individual requests, combine them into single batch requests when your API supports this functionality.
Optimize image loading from APIs by implementing progressive loading, thumbnail generation, and lazy loading techniques. Use packages like cached_network_image for efficient image caching and display.
For file uploads, implement chunked upload strategies for large files and provide progress indicators to keep users informed about upload status.
Utilize Flutter’s background processing capabilities for API synchronization tasks. Implement background fetch functionality that updates local data when the app is not actively in use, ensuring users always see fresh content when they open your app.
Consider implementing offline-first strategies where your app remains fully functional without internet connectivity, synchronizing changes when connectivity is restored.
Comprehensive testing ensures your API integration remains reliable as your Flutter application evolves. Implement unit tests, integration tests, and mock API responses to create a robust testing strategy.
Create unit tests for your API service classes using the mockito package to mock HTTP responses:
void main() {
group(‘ApiService’, () {
test(‘should return users when API call is successful’, () async {
final mockResponse = ‘{“id”: 1, “name”: “John Doe”}’;
// Mock HTTP client and test API service methods
when(mockClient.get(any)).thenAnswer(
(_) async => http.Response(mockResponse, 200),
);
final result = await ApiService.getUsers();
expect(result, isA<List<User>>());
});
});
}
Implement integration tests that verify the complete flow from API calls to UI updates. Use Flutter’s integration testing framework to simulate user interactions and validate that your app correctly handles various API scenarios.
Test error scenarios extensively, including network failures, server errors, and malformed responses. Ensure your app handles these situations gracefully without crashing or leaving users in confusing states.
Security should be a primary concern when integrating REST APIs in Flutter applications. Implement proper authentication, data encryption, and secure storage practices to protect user data and maintain application integrity.
Implement secure authentication mechanisms using industry-standard protocols like OAuth 2.0 or JWT tokens. Store authentication tokens securely using packages like flutter_secure_storage rather than plain text storage.
Encrypt sensitive data both in transit and at rest. Ensure all API communications occur over HTTPS and implement certificate pinning for critical applications to prevent man-in-the-middle attacks.
Validate all user inputs before sending data to APIs. Implement both client-side and server-side validation to prevent security vulnerabilities and ensure data integrity.
Mastering REST API integration in Flutter opens the door to creating powerful, data-driven mobile applications that leverage the vast ecosystem of web services and backend systems. Throughout this comprehensive guide, we’ve explored the fundamental concepts, practical implementation techniques, and best practices that will enable you to build robust Flutter applications with seamless API connectivity.
The journey from making your first HTTP request to implementing complex state management patterns with API data represents a significant milestone in your Flutter development skills. By understanding JSON serialization, error handling, performance optimization, and security considerations, you’re now equipped with the knowledge to tackle real-world mobile app development challenges.
Remember that effective API integration extends beyond simply making HTTP requests. It encompasses thoughtful architecture decisions, user experience considerations, and ongoing maintenance practices that ensure your applications remain performant and reliable as they scale.
The Flutter ecosystem continues to evolve, with new packages, tools, and best practices emerging regularly. Stay engaged with the Flutter community, experiment with different approaches, and continuously refine your API integration techniques based on the specific requirements of your projects.
As you apply these concepts to your own Flutter applications, remember that practice and experimentation are key to mastering these skills. Start with simple API integrations and gradually tackle more complex scenarios as your confidence and expertise grow.
Ready to transform your Flutter development skills and create amazing applications that leverage the power of REST APIs? Start implementing these techniques in your next project and experience the satisfaction of building truly connected mobile experiences.
The http package provides basic HTTP functionality, while dio offers advanced features like interceptors, request/response transformation, automatic JSON conversion, better error handling, and built-in support for FormData uploads, making it ideal for complex applications.
Store authentication tokens using flutter_secure_storage instead of SharedPreferences. Implement token refresh logic automatically, use short-lived access tokens with longer refresh tokens, and always validate tokens before making API calls to ensure security.
Implement multi-layer caching using packages like Hive for structured data and cached_network_image for images. Use cache-first strategies for static content, implement TTL-based invalidation, and provide offline-first functionality for better user experience.
Create separate service classes for each API domain, use a repository pattern to abstract data sources, implement proper dependency injection, and organize models by feature. This structure improves maintainability and testability significantly.
Use state management solutions like Provider or BLoC to manage loading states. Implement proper loading indicators, skeleton screens for better UX, error retry mechanisms, and empty state handling to create professional user experiences.
 Optimized by Seraphinite Accelerator