+91 7976 955 311
hello@fbipool.com

Building a mobile app isn’t magic, but it does require a clear plan and the right tools. At FBIP, we use Flutter to create apps that work seamlessly on both iOS and Android. Our Flutter development process balances speed with quality, turning ideas into functional products that people actually want to use.
Let’s walk through how we build Flutter apps from start to finish, showing you what happens at each stage and why it matters.
Flutter is Google’s UI toolkit for building natively compiled applications from a single codebase. Instead of writing separate code for iPhone and Android users, we write once and deploy everywhere. This saves time and money, but more importantly, it creates consistency across platforms.
The framework uses Dart as its programming language. Dart compiles to native code, which means Flutter apps run fast. No intermediary layers slowing things down. When you tap a button, it responds instantly. When you scroll through a feed, it feels smooth.
Flutter’s widget-based architecture gives us fine control over every pixel on the screen. Everything you see in a Flutter app is a widget, from buttons to entire screens. This modular approach makes apps easier to build, test, and maintain.
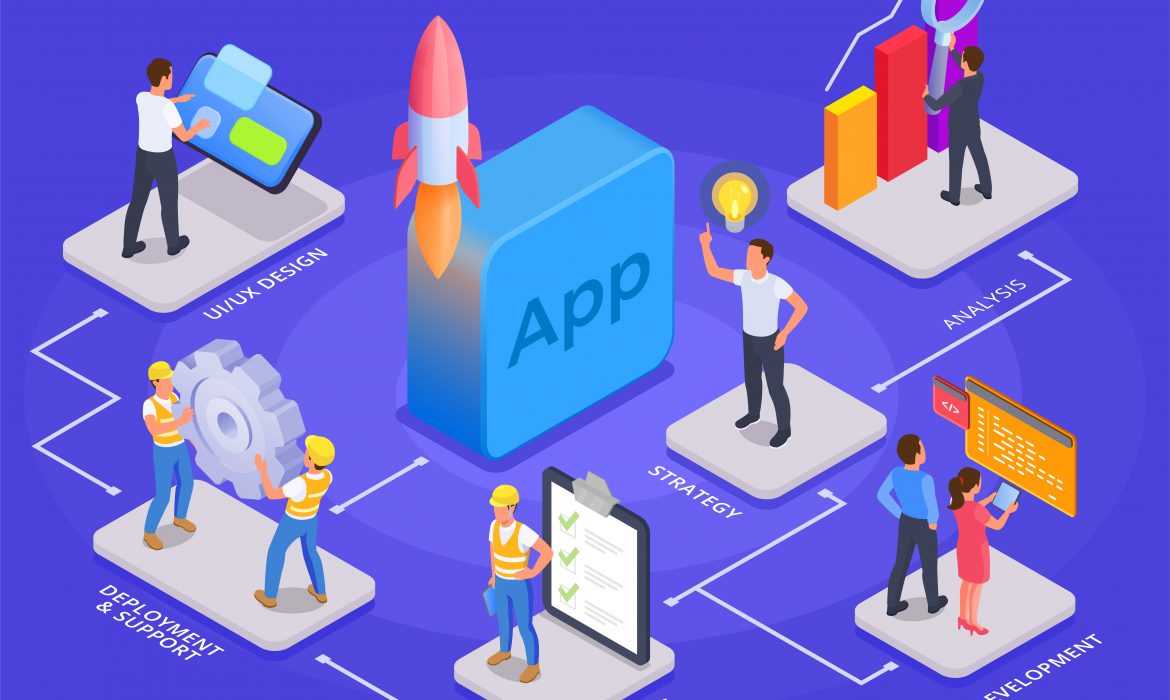
Every project at FBIP starts with questions, not code. We need to understand what problem you’re solving and who will use your app. This discovery phase typically takes one to two weeks, depending on project complexity.
We hold kickoff meetings where stakeholders share their vision. What does success look like? Who are your competitors? What features are must-haves versus nice-to-haves? These conversations shape everything that follows.
Our team creates user personas based on your target audience. A fitness app for college students needs different features than one for retirees. We map out user journeys to identify friction points and opportunities.
Technical feasibility comes next. Can Flutter handle your specific requirements? Do you need native modules for certain features? We assess third-party integrations, API availability, and any platform-specific constraints. Sometimes Flutter isn’t the right choice, and we’ll tell you upfront.
The discovery phase ends with a project brief that outlines scope, timelines, and deliverables. Everyone signs off before we move forward. This document becomes our north star throughout development.
Once we know what we’re building, our designers create the visual language for your app. This isn’t just about making things pretty. Good design guides users through tasks without confusion.
We start with wireframes, which are basic layouts showing where elements go on each screen. Think of wireframes as blueprints. They establish information hierarchy and user flow without getting caught up in colors or fonts.
After wireframes get approved, we move to high-fidelity mockups. These look like the finished product, complete with your brand colors, typography, and imagery. We create mockups for different screen sizes to ensure the design adapts properly.
Flutter’s design system capabilities shine here. We build a design system with reusable components that maintain consistency across your app. Buttons, cards, input fields, they all follow the same visual rules. Users learn the interface once and apply that knowledge everywhere.
Interactive prototypes come next. We use tools like Figma or Adobe XD to link screens together, creating clickable demos. You can tap through the app flow before we write a single line of code. This catches usability issues early when they’re cheap to fix.
Before coding starts, our developers prepare their workspace. This setup phase matters more than you might think. A well-configured environment prevents bugs and speeds up development.
We initialize the Flutter project using the latest stable version of the framework. Each project gets its own Git repository for version control. Every code change gets tracked, reviewed, and documented.
Project structure follows Flutter best practices. We organize code into logical folders: screens, widgets, models, services, and utilities. This structure makes the codebase easy to navigate, especially as it grows.
Dependencies get added carefully. Flutter has a rich ecosystem of packages that extend functionality. Need to handle images? There’s a package. Want to connect to Firebase? Another package. We evaluate each dependency for quality, maintenance status, and licensing before adding it.
Environment configurations get set up for development, staging, and production. Each environment connects to different backend services and uses different API keys. This separation prevents test data from mixing with real user data.
Now we get to the actual coding. Our Flutter development process follows agile methodology with two-week sprints. Each sprint delivers working features that stakeholders can review.
We break down the project into user stories. A user story describes a feature from the end user’s perspective: “As a shopper, I want to save items to my cart so I can buy them later.” Each story gets estimated for complexity and assigned to a sprint.
Developers work on features in parallel when possible. One person might build the authentication system while another creates the product listing screen. Flutter’s architecture makes this parallel work feasible without constant conflicts.
Code reviews happen daily. Before any code merges into the main branch, another developer reviews it. They check for bugs, adherence to style guides, and opportunities for improvement. This peer review catches issues that automated tests miss.
We write tests as we go, not after the fact. Unit tests verify individual functions work correctly. Widget tests ensure UI components render properly. Integration tests check that different parts of the app work together. FBIP typically aims for 70-80% code coverage, which means most of the codebase has corresponding tests.
Flutter’s hot reload feature speeds up development considerably. Developers can change code and see results in seconds without restarting the app. This tight feedback loop makes experimentation easy and helps refine interactions quickly.
Most apps need to communicate with servers. Our Flutter development process includes careful integration with backend services, whether we’re building the backend or connecting to existing systems.
We use REST APIs or GraphQL for data exchange. Flutter’s HTTP libraries make these connections straightforward. We implement proper error handling because networks fail. Users on slow connections or in spotty coverage areas should still have a decent experience.
Authentication and authorization get implemented early. Whether it’s email/password, social login, or biometric authentication, securing user data is non-negotiable. We follow industry standards like OAuth 2.0 and JWT tokens.
Data persistence happens locally and remotely. We use SQLite for local databases and shared preferences for simple key-value storage. This local storage lets apps work offline and sync when connectivity returns.
State management deserves special attention. As apps grow, managing data flow becomes tricky. We use proven patterns like Provider, Riverpod, or BLoC to keep state predictable and maintainable. The choice depends on project complexity and team preferences.
A Flutter app might work perfectly on one device and crash on another. We test across a representative sample of real devices and screen sizes.
Our testing matrix includes recent iPhone models, popular Android phones, tablets, and different OS versions. We test on physical devices, not just simulators. Real devices reveal performance issues and platform-specific quirks that emulators hide.
Automated testing runs on every code push. Our continuous integration pipeline builds the app, runs all tests, and flags failures immediately. This automation catches regressions before they reach human testers.
Manual testing focuses on user experience. Testers go through complete user flows, trying to break things. They test edge cases: what happens with a 100-character username? What if someone rotates their device mid-action? What if the network drops during a transaction?
Performance profiling identifies bottlenecks. We measure frame rates, memory usage, and app startup time. Flutter’s performance overlay helps spot janky animations or excessive rebuilds. Apps should feel responsive even on older devices.
Getting an app into app stores involves more than uploading files. Both Apple’s App Store and Google Play Store have review processes and requirements.
We prepare store listings with compelling descriptions, screenshots, and preview videos. These marketing materials influence download decisions, so they get the same attention as the app itself.
App signing and certificates get configured properly. Each platform has its own process for securely signing apps. We handle this setup so your app can receive updates smoothly.
Beta testing through TestFlight (iOS) and Google Play Beta (Android) lets real users try the app before public launch. We gather feedback, fix bugs, and make adjustments based on actual usage patterns.
The FBIP team submits the app for review, addressing any feedback from store reviewers promptly. Apple’s review typically takes one to three days, while Google’s is often faster but can occasionally take longer.
Launch day isn’t the finish line. Apps need ongoing maintenance, bug fixes, and feature updates.
We monitor crash reports and analytics to identify issues quickly. Firebase Crashlytics and similar tools alert us when users encounter problems. We prioritize fixes based on impact and frequency.
User feedback guides future development. App store reviews, support tickets, and usage analytics reveal what’s working and what needs improvement. The best features often come from listening to actual users.
Performance monitoring continues post-launch. We track load times, API response rates, and user engagement metrics. This data helps us optimize the app over time.
Regular updates keep the app fresh and secure. We update Flutter and third-party packages to get bug fixes and new features. We also add capabilities based on your roadmap and market demands.
Our Flutter development process balances structure with flexibility. The framework provides clear stages, but we adapt based on project needs. A simple app moves faster through these phases than a complex enterprise solution.
Transparency matters throughout. You’re not waiting months to see progress. Sprint demos happen every two weeks. You see working features, provide feedback, and influence direction.
Quality doesn’t happen by accident. It comes from careful planning, rigorous testing, and constant refinement. Every decision considers long-term maintainability, not just short-term convenience.
The single codebase advantage of Flutter means we’re not duplicating effort across platforms. Updates reach all users simultaneously. Bug fixes solve problems for everyone at once. This efficiency translates to faster delivery and lower costs.
How long does the Flutter development process typically take?
Project timelines vary widely based on complexity and features. A simple app with basic functionality might take 8-12 weeks from discovery to launch. More sophisticated apps with custom features, complex backend integration, and extensive testing often require 4-6 months. We provide detailed estimates after the discovery phase when we fully understand your requirements.
Can you add native platform features to a Flutter app?
Yes, Flutter supports platform-specific code through platform channels. If you need iOS-specific features like Apple Pay or Android-specific capabilities like home screen widgets, we can integrate them. We write native code (Swift for iOS, Kotlin for Android) when necessary and connect it to your Flutter app through well-defined interfaces.
What happens if we need changes during development?
Changes are normal and expected. Agile methodology accommodates evolving requirements. We assess each change request for impact on timeline and budget. Small tweaks often fit within existing sprints. Larger changes might extend the project or require adjusting other features. Clear communication ensures you make informed decisions about scope changes.
How do you ensure our Flutter app performs well?
Performance is built in from the start, not bolted on later. We follow Flutter best practices, avoid common performance pitfalls, and profile the app regularly. We test on lower-end devices to ensure acceptable performance across the device spectrum. Before launch, we conduct thorough performance testing and optimization to deliver a smooth user experience.
Do you provide training on managing the app after launch?
Absolutely. We offer documentation and training tailored to your team’s technical level. If you have developers who will maintain the app, we provide code walkthroughs and technical documentation. For non-technical stakeholders, we focus on using analytics dashboards and understanding user feedback. Ongoing support packages are available if you prefer we handle maintenance.

When you’re planning your next mobile app project, the big question isn’t just about features or design. It’s about return on investment. Will this technology choice actually save you money? Will it help you launch faster? And most importantly, will it deliver results that justify the initial spend?
The data tells a clear story: Flutter apps consistently deliver better ROI than traditional native development. But don’t take my word for it. Let’s look at the real numbers from companies that made the switch.
Return on investment for mobile apps goes beyond simple cost calculations. You’re looking at development expenses, time to market, maintenance costs, and user satisfaction. Flutter addresses all these factors through its single codebase approach.
Cross-platform development with Flutter means writing code once and deploying it across iOS and Android. This isn’t just convenient. It’s a fundamental shift in how businesses approach mobile app development costs and timelines.
Development costs represent the most immediate ROI impact. Companies switching to Flutter report cost reductions between 40-50% compared to maintaining separate native teams. When FBIP works with clients on Flutter projects, we consistently see these savings materialize in real budgets.
Here’s why the math works out:
One development team instead of two separate iOS and Android teams means cutting your payroll expenses in half. A Flutter developer costs between $48-75 per hour depending on experience level, but you only need one team.
Google’s 2024 Developer Insights revealed that Flutter apps ship 35% faster than native builds on average. The Hamilton musical app achieved a remarkable 70% reduction in development time. That’s not a minor improvement. That’s transformational for businesses trying to hit market windows.
Let me break down typical cost ranges based on 2025 data:
Compare this to native development where you’d multiply these figures by roughly 1.8-2x for both platforms.
BMW implemented Flutter for their automotive mobile applications and saw immediate results. The company reduced release cycles by 33% while maintaining consistent experiences across both platforms.
Their development team eliminated redundant workflows that previously required separate native teams for each platform. The app handles complex automotive data integration and real-time vehicle diagnostics. All from a single codebase that FBIP and similar development companies can maintain efficiently.
Alibaba’s Xianyu secondhand marketplace serves over 50 million users, built entirely with Flutter. The company needed an interface that loaded faster and provided intuitive navigation for mobile-first customers.
They achieved this while developing for both iOS and Android simultaneously. Without Flutter, building separate native apps for this scale would have required massive teams and extended timelines.
Brazil’s leading fintech company Nubank saw a 22% improvement in customer satisfaction scores after implementing Flutter. The design consistency and superior performance across mobile devices created a unified brand experience.
For financial apps where trust and reliability matter, this satisfaction boost directly translates to customer retention and lifetime value.
KFC needed to digitize business processes across over 21,000 restaurants worldwide. They built an ERP system using Flutter that consolidated data and provided centralized statistics.
The mobile applications enabled tracking metrics and making real-time adjustments to restaurant operations. Building this with native development would have taken significantly longer and cost substantially more.
The ROI of Flutter apps shines brightest when you look at development timelines. Projects using Flutter reduce development time by 30% according to industry data. Some projects show even more dramatic improvements.
Hot reload functionality lets developers see code changes instantly without rebuilding the entire app. This feature alone saves countless hours during development and testing phases.
FBIP has observed that Flutter projects consistently hit milestones faster than native alternatives. This speed advantage means earlier market entry, faster feedback loops, and quicker revenue generation.
Initial development costs only tell part of the story. Maintenance represents ongoing expenses that can quickly exceed original development budgets.
Companies report 25% reductions in app maintenance costs with Flutter. Here’s why:
Bug fixes get implemented once across all platforms. Updates roll out simultaneously to iOS and Android users. Quality assurance testing covers one codebase instead of two separate applications.
A single development team can handle all maintenance and feature additions. Compare this to maintaining separate iOS and Android teams indefinitely, and the long-term savings become substantial.
Flutter’s widget library enables pixel-perfect UI consistency across devices. This matters for brands focused on customized experiences, especially in eCommerce and fintech sectors.
The framework compiles to native code, delivering performance that matches or exceeds native apps. Users can’t tell they’re using a cross-platform app, which means no compromise on user experience.
Google Ads rebuilt their mobile app with Flutter and reported a 33% increase in customer satisfaction scores. The smooth transitions, animations, and responsive interface all contributed to this improvement.
Major companies don’t gamble with unproven technology. The enterprise adoption of Flutter provides strong evidence of its ROI potential.
Companies using Flutter for production apps include:
According to Statista, 46% of developers globally chose Flutter in 2024. This represents significant growth from just a few years ago and signals market confidence in the framework’s ROI proposition.
Let’s work through a realistic example. Say you need a mid-complexity app with custom UI, user authentication, payment processing, and backend integration.
Native Development:
Flutter Development:
These numbers reflect actual project data that development companies like FBIP see regularly. Your specific project may vary, but the pattern holds across different complexity levels.
Several factors influence the ultimate return on your Flutter investment:
Start with a minimum viable product to test your concept. Flutter makes MVP development particularly cost-effective since you can launch on both platforms simultaneously.
Work with development partners who understand Flutter’s strengths. FBIP specializes in Flutter application development and can guide you through the process from planning to deployment.
Plan for the long term. The ROI of Flutter apps compounds over time as maintenance savings accumulate and you avoid the ongoing costs of dual native teams.
Looking ahead, Flutter’s ROI advantages will likely increase. The framework continues adding features that expand its capabilities while maintaining the core benefit of single-codebase development.
Web and desktop support means one Flutter codebase can potentially serve mobile, web, and desktop users. This versatility creates additional ROI opportunities for businesses targeting multiple platforms.
According to recent projections, over 50% of mobile applications will use cross-platform frameworks by 2025, with Flutter capturing approximately 30% of this market. These trends suggest growing confidence in Flutter’s ROI proposition.
The ROI of Flutter apps isn’t theoretical. Real companies are achieving real savings while delivering high-quality applications their users love.
If you’re evaluating frameworks for your next mobile project, the data points clearly toward Flutter. Lower development costs, faster time to market, reduced maintenance expenses, and strong user satisfaction create a compelling ROI story.
Companies like FBIP help businesses realize these benefits through expert Flutter application development. Whether you’re a startup launching your first app or an enterprise modernizing legacy systems, Flutter offers a proven path to positive ROI.
The question isn’t whether Flutter can deliver ROI. The question is how much ROI you can capture by making the switch. Based on current data and real-world case studies, the answer is: quite a bit.
How much does Flutter app development typically cost?
Flutter app development costs range from $15,000 for simple MVPs to $200,000+ for complex enterprise solutions. The exact price depends on features, design requirements, and team location. Most mid-sized projects fall between $40,000-80,000, which is 40-50% less than building separate native apps for iOS and Android.
Is Flutter actually faster than native development?
Yes, real-world data confirms this. Flutter apps ship 35% faster on average according to Google’s 2024 Developer Insights. Some projects like the Hamilton app achieved 70% time reductions. The single codebase and hot reload feature let developers work more efficiently than managing separate iOS and Android projects.
Will I sacrifice app quality to save money with Flutter?
No. Flutter compiles to native code, delivering performance that matches native apps. Major companies like BMW, Alibaba, and Google use Flutter for production apps serving millions of users. The framework’s rich widget library creates pixel-perfect UI that looks and feels native on both platforms.
What’s the long-term maintenance cost for Flutter apps?
Flutter apps show 25% lower maintenance costs compared to maintaining separate native applications. You’re fixing bugs once, updating one codebase, and managing a single development team. These savings accumulate year after year, making the long-term ROI even more attractive than initial development savings.
Does Flutter work for enterprise-level applications?
Absolutely. Enterprise adoption proves Flutter’s scalability and reliability. Companies like BMW, Alibaba, and Toyota use Flutter for complex applications handling millions of users. The framework supports advanced features including real-time data processing, complex animations, and integration with existing enterprise systems.

Building mobile apps for iOS and Android usually means double the work, double the team, and double the budget. That’s the traditional approach, at least. But what if there was a way to cut those costs significantly without sacrificing quality?
Enter Flutter. This framework has transformed how businesses approach mobile app development, and the numbers back it up. Companies using Flutter report cutting their development costs by 30-40% compared to building separate native apps. That’s not marketing hype. That’s real budget saved.
Let’s break down exactly how Flutter for mobile app development delivers these savings and why it’s becoming the go-to choice for businesses that want quality apps without burning through their entire budget.
Flutter is Google’s open-source framework that lets developers build apps for iOS, Android, web, and desktop from a single codebase. Instead of maintaining separate projects in Swift for iOS and Kotlin for Android, developers write the code once.
The framework includes everything needed to build complete apps. You get a software development kit with compiling tools, a library of reusable UI components, and a rendering engine that creates pixel-perfect interfaces across all platforms.
Here is why this matters for your budget: when you only need to write and maintain one codebase instead of two, you need fewer developers, less time, and less money. Simple math.
Writing code once and deploying it everywhere is Flutter’s biggest cost-saver. When Universal Studios rebuilt their theme park app using Flutter, they reduced their codebase by 45% and pushed releases 44% faster. That translates to direct savings on development hours and ongoing maintenance costs.
Virgin Money took a similar approach when combining their separate apps into one financial product. Their developers, who came from Kotlin, Swift, and Java backgrounds, quickly adapted to Flutter. The unified toolkit simplified quality assurance, user experience design, and development across the board.
Cost breakdown: Traditional native development requires two separate teams or at least developers proficient in both iOS and Android platforms. With Flutter, you need one team. If in-house development typically ranges from $80,000 to $250,000, Flutter can cut that by focusing resources on a single codebase instead of maintaining parallel development tracks.
Flutter’s Hot Reload feature is a productivity game-changer. Developers can see code changes reflected in the app instantly, without restarting or losing the current state. If you’re testing a checkout flow and need to adjust a button color, you change it, hit save, and see the result while staying on the same screen with all your data intact.
Research shows developers using Hot Reload report productivity increases averaging 30%. Some teams cut their development time by the same percentage on routine tasks. When ByteDance, the company behind TikTok and 80+ other apps, adopted Flutter, they chose it specifically to reduce duplicated work and accelerate development across Android, iOS, and web versions.
Time is money: If a project would normally take 6 months with traditional development, Flutter’s Hot Reload and faster iteration cycles could reduce that to 4-5 months. That’s one or two months of developer salaries saved right there.
Quality assurance is where hidden costs pile up in traditional development. You need to test the same features twice: once on iOS, once on Android. Different devices, different screen sizes, different edge cases.
Flutter apps run from a single codebase, which means your QA process consolidates into one phase. Test it once, and it works consistently across platforms. This cuts testing time and catches issues earlier in the development cycle.
Teams report that 80% of their iterations can be handled with Hot Reload, reducing testing time by approximately 30%. When you’re not constantly rebuilding and retesting separate codebases, your QA team can focus on quality over repetition.
Apps don’t stop costing money after launch. Ongoing maintenance, bug fixes, and feature updates are where long-term costs add up. With traditional native development, every update means touching two codebases, testing twice, and coordinating releases across platforms.
Flutter simplifies this entirely. Updates happen once. Bug fixes happen once. New features get added once. You roll them out simultaneously across iOS and Android, which means:
FBIP, a leading development company in Udaipur, has seen firsthand how Flutter reduces ongoing maintenance overhead for their clients. When you’re managing one codebase instead of two, the math is straightforward.
Development costs vary dramatically based on location. Hiring Flutter developers in regions like India, Eastern Europe, or Latin America offers quality work at lower rates than North America or Western Europe.
Average hourly rates for Flutter developers:
Strategic savings: A 1,000-hour project that would cost $100,000 in North America could cost $35,000-$50,000 with a skilled team in India or Eastern Europe. That’s another 50-65% saved on top of Flutter’s inherent cost advantages.
When you work with companies like FBIP that specialize in Flutter for mobile app development, you get access to experienced developers who understand both the technical framework and business cost considerations.
Every month your app sits in development is a month you’re not generating revenue or gathering user feedback. Flutter’s accelerated development timeline means you can launch sooner, validate your product faster, and start earning back your investment.
Google’s 2024 Developer Insights found that Flutter apps ship 35% faster on average than native builds. For a startup or business launching a new product, that speed can be the difference between capturing market share and watching competitors move first.
Let’s put actual numbers to a mid-complexity mobile app:
Traditional Native Development:
Flutter Development:
Savings: $63,000 (66%)
That’s a conservative estimate. Many projects see even higher savings, especially when factoring in ongoing maintenance costs over the app’s lifetime.
Flutter isn’t always the answer for every project, but it’s particularly cost-effective for:
Startups and MVPs: When you need to validate your product quickly without burning through funding, Flutter lets you build and test across platforms with minimal investment.
Business apps: If you’re building internal tools, customer-facing apps, or e-commerce platforms, Flutter’s consistent UI and performance work perfectly.
Cross-platform requirements: Any time you need your app on both iOS and Android (which is almost always), Flutter eliminates the need for parallel development.
Companies like FBIP focus on Flutter development because it delivers the best value proposition for most business needs. When clients need quality mobile apps without enterprise-level budgets, Flutter consistently wins.
While we’re focused on the financial benefits, it’s worth noting that Flutter doesn’t just save money. You also get:
The framework has reached a maturity level where major companies like Alibaba, BMW, and Toyota trust it for production apps. When FBIP works with clients on Flutter projects, they’re choosing a framework with proven reliability and strong long-term support.
A 40% cost reduction isn’t just possible with Flutter for mobile app development. It’s expected. Between the single codebase, faster development cycles, reduced testing requirements, and lower maintenance costs, the savings compound at every stage of the project.
For businesses watching their budgets, Flutter offers a rare combination: lower costs without compromising quality, speed without cutting corners, and a framework backed by one of the world’s largest tech companies.
Whether you’re building your first mobile app or looking to modernize existing applications, Flutter deserves serious consideration. The question isn’t whether it can save you money. The question is how much.
Looking for expert Flutter development services? FBIP specializes in building high-quality, cost-effective mobile apps using Flutter. Visit FBIP to learn more about how we can help bring your app idea to life.
How much does it actually cost to build an app with Flutter in 2025?
Flutter app development typically ranges from $15,000 to $200,000 depending on complexity. Simple apps with basic features start around $15,000-$40,000, while complex apps with advanced features like real-time data processing, custom animations, or integrations can exceed $100,000. The wide range reflects project scope, but Flutter consistently costs 30-40% less than building separate native apps for iOS and Android.
Can Flutter really match the quality of native apps?
Yes. Flutter compiles to native ARM code for mobile, delivering performance that’s nearly indistinguishable from apps built with Swift or Kotlin. Major companies like Alibaba, BMW, and Google Ads use Flutter for production apps with millions of users. The framework’s rendering engine ensures pixel-perfect UIs across platforms. You’re not sacrificing quality for cost savings.
What are the ongoing maintenance costs for Flutter apps?
Maintenance costs for Flutter apps run approximately 40-50% lower than maintaining separate native codebases. Since you’re updating one codebase instead of two, bug fixes and feature additions require fewer developer hours. Annual maintenance typically costs 15-20% of the initial development cost. With Flutter, that percentage applies to your already-reduced initial investment.
Is it difficult to find Flutter developers?
Flutter has grown rapidly since 2017, with over 1 million active developers worldwide. In 2024, 46% of cross-platform developers use Flutter, making it the most popular framework. Finding skilled developers is easier than ever, especially through development companies like FBIP that specialize in Flutter projects. The learning curve for developers coming from other languages is manageable.
How long does it take to build a Flutter app compared to native development?
Flutter apps typically take 30-35% less time to develop than building separate native apps. A project that would take 6 months with traditional native development might take 4 months with Flutter. Hot Reload speeds up development cycles, and the single codebase eliminates duplicated work. Faster development directly translates to lower costs and quicker time-to-market.

The SaaS market is exploding. Projections show growth from $317.55 billion in 2024 to approximately $1,228.87 billion by 2032, and businesses are racing to deliver platforms that work everywhere. But here’s the problem: building separate apps for iOS, Android, web, and desktop drains budgets and slows down launches.
That’s where Flutter comes in. Google’s open-source framework lets you build once and deploy everywhere. In 2023, 46% of global developers used Flutter, and for SaaS companies, it’s becoming the obvious choice. Let’s explore why Flutter for SaaS platforms makes sense in 2025.
Flutter isn’t just another development tool. It’s a complete UI toolkit that changes how you approach building software. Instead of managing multiple codebases for different platforms, you write once and ship to mobile, web, desktop, and even embedded devices.
Here’s what sets it apart: Flutter uses its own rendering engine. This means your app looks and behaves the same whether someone opens it on an iPhone, Android tablet, or desktop browser. No surprises, no platform-specific bugs that eat up your support team’s time.
The framework comes with a massive library of pre-built widgets. These aren’t basic buttons and forms. We’re talking about complex components that handle everything from animations to gesture controls. For SaaS dashboards where users need to process information quickly, this matters.
This is the big one. Traditional development means hiring separate teams for iOS, Android, and web. Each team works in different languages, faces different challenges, and takes different amounts of time to ship features.
Flutter deploys to multiple devices from a single codebase: mobile, web, desktop, and embedded devices. Your developers write in Dart, and that same code runs everywhere. When you need to add a feature or fix a bug, you do it once.
The cost savings are real. Companies building Flutter for SaaS platforms can cut development expenses by 30-40% compared to native development. You’re not paying multiple teams to build the same thing three different ways.
But it’s not just about money. It’s about speed. When a competitor launches a new feature, you can respond fast. When you spot a bug, you patch it everywhere at once. This agility is necessary for saas platforms that must keep changing based on customer needs.
SaaS companies live and die by how fast they ship. Your users expect constant updates. Your roadmap has 50 features waiting. Your competitors aren’t sleeping.
Flutter’s hot reload feature changes the game. Developers make a change in the code and see it instantly in the running app. No waiting for compilation. No restarting the entire application. This faster iteration cycle allows businesses to launch their SaaS applications quicker, which means you can beat competitors to market.
Testing happens faster too. When you’re working with one codebase instead of three, your QA team can move through testing cycles quicker. They’re not finding the same bug on iOS, then Android, then web. They find it once, developers fix it once, and you move on.
SaaS platforms need to handle growth. Today you might have 100 users. Next month, 10,000. Next year, a million. Your app can’t slow down as you scale.
Flutter apps run fast because they compile to native code. Flutter uses the Dart programming language, which compiles ahead of time for production. This means your app isn’t interpreting code at runtime. It’s running machine code, just like a native app would.
The framework’s rendering engine handles graphics directly. It doesn’t rely on platform-specific UI components that can bottleneck performance. When users are working with data-heavy dashboards or real-time features, they get smooth, responsive experiences.
Companies like FBIP have built Flutter applications that handle thousands of concurrent users without performance degradation. The framework’s architecture supports this kind of load from day one.
Your SaaS platform is your product. If it looks dated or behaves inconsistently across devices, users notice. They compare you to competitors. They wonder if you’re keeping up with modern standards.
Flutter gives you complete control over every pixel. The widget system lets designers create exactly what they envision, and developers can implement it without compromises. Design directly affects user adoption and retention.
More importantly, that design stays consistent. Your Android users see the same interface as your iOS users. Your web app looks like your mobile app. This consistency builds trust. Users know what to expect when they switch devices.
The framework includes Material Design and Cupertino widgets out of the box. If you want platform-specific looks, you can have them. If you want a unique brand identity that’s the same everywhere, you can do that too.
Let’s talk numbers. Building three separate apps with native tools means:
Flutter for SaaS platforms eliminates this multiplication. You need one team that knows Dart and Flutter. They build one app that works everywhere. Your maintenance costs drop. Your bug count drops. Your time to market drops.
For startups and growing SaaS companies, this changes what’s possible. You can launch an MVP across all platforms with a small team. You can compete with bigger companies that have more resources. You can redirect saved budget toward marketing, customer success, or building more features.
FBIP helps businesses recognize these savings when building Flutter applications. The initial development costs are lower, and the ongoing operational expenses stay manageable as you grow.
This isn’t theoretical. Major platforms are already running on Flutter:
Edtech saas platforms use learning features with live classes, quizzes, and gamification. These apps need real-time interactions, multimedia content, and work across every device students and teachers use.
Healthcare SaaS platforms handle patient management, telehealth appointments, and secure medical data. They need rock-solid security, smooth video calls, and interfaces that work for everyone from doctors to elderly patients.
Project management tools, CRM platforms, analytics dashboards. The list keeps growing because Flutter handles the complexity these applications demand.
SaaS platforms serve multiple customers from a single instance. Each customer needs their own data space, their own users, their own permissions. This multi-tenancy setup is non-negotiable.
Flutter works seamlessly with backend services that handle this architecture. Whether you’re using Firebase, AWS, or a custom backend, Flutter apps can connect and manage complex data flows. The framework’s state management solutions keep track of user sessions, permissions, and data boundaries.
Building role-based access controls, handling subscription tiers, managing team hierarchies. These are table stakes for SaaS, and Flutter provides the tools to implement them without starting from scratch.
Your SaaS platform doesn’t exist in isolation. It needs to connect to databases, payment processors, authentication services, analytics tools, and probably a dozen other systems.
Flutter connects to Google’s app development ecosystem with Firebase, Google Ads, Google Play, Google Pay, Google Wallet, Google Maps. But it’s not limited to Google services. The Flutter ecosystem includes packages for Stripe, Twilio, SendGrid, and virtually every major API you’d want to use.
RESTful APIs, GraphQL, WebSockets for real-time data. Flutter handles all of it. The async/await pattern in Dart makes network calls clean and maintainable. Your developers aren’t fighting the framework to make integrations work.
When you’re handling customer data, security can’t be an afterthought. SaaS platforms face constant scrutiny around data protection, encryption, and compliance.
Flutter apps can implement end-to-end encryption, secure storage, and proper authentication flows. The framework doesn’t introduce security vulnerabilities, and because you’re working with one codebase, you can audit and secure it more thoroughly than managing three separate apps.
Integration with identity providers like Auth0, Firebase Authentication, or custom OAuth implementations is straightforward. Two-factor authentication, biometric login, SSO for enterprise customers all work smoothly.
Quality matters in SaaS. A bug doesn’t just annoy one user. It affects everyone on your platform. Finding and fixing issues needs to be efficient.
Flutter provides a rich set of testing features, including unit tests, widget tests, and integration tests. Your team can write tests that run across platforms, catching issues before they reach production.
The testing framework is built into Flutter. You’re not bolting on third-party tools and hoping they work. Unit tests validate your business logic. Widget tests check UI components. Integration tests verify entire user flows. All from the same testing suite.
Flutter isn’t always the right choice for every project. But for SaaS platforms, it hits the sweet spot more often than not.
Choose Flutter when you need to:
Skip Flutter if you’re building a platform that needs deep integration with a single platform’s unique hardware features, or if your entire team is already expert in native development and changing would slow you down.
Open-source projects live or die by their communities. Flutter has one of the strongest developer ecosystems out there. Over 1 million developers use Flutter and it powers more than 150,000 apps on play store.
This means when you run into problems, solutions exist. Stack Overflow has answers. GitHub has examples. pub.dev (Flutter’s package repository) has over 40,000 packages covering almost any functionality you’d need.
Google backs Flutter with ongoing development and regular updates. The framework isn’t going anywhere. Companies building long-term SaaS platforms can trust that Flutter will keep evolving and improving.
Not every team has Flutter expertise in-house. That’s fine. The framework’s popularity means finding skilled developers isn’t hard. Companies like FBIP specialize in Flutter application development and understand how to build scalable SaaS platforms.
When evaluating development partners, look for:
The right development partner doesn’t just code. They help architect your platform, suggest best practices, and set you up for long-term success.
Technology changes fast. What works today might be obsolete in three years. SaaS companies need to think long-term.
Flutter trends in 2025 showcase evolution beyond mobile into AI integration, Web Assembly support, IoT expansion, and enterprise-grade solutions. The framework keeps expanding its capabilities without breaking existing code.
Desktop support keeps improving. Web performance gets better with each release. New platforms like wearables and embedded systems become viable targets. Your Flutter investment grows more powerful over time, not less.
Ready to build? Here’s how to start:
First, define your MVP scope clearly. What features absolutely need to be in version one? Flutter’s speed is an advantage, but don’t waste it building everything at once.
Second, set up your development environment properly. Choose an Integrated Development Environment that supports Flutter development like Android Studio and Visual Studio Code. Get your team trained or hire developers who already know Flutter.
Third, plan your backend architecture. Flutter handles the frontend beautifully, but your SaaS needs solid backend infrastructure. Think about databases, authentication, payment processing, and hosting early.
Fourth, build iteratively. Use Flutter’s hot reload to test ideas quickly. Get feedback from real users early and often. Don’t wait until you have a perfect product to start learning what users actually want.
The SaaS market rewards companies that move fast and deliver great experiences. Flutter for SaaS platforms gives you both. One codebase that works everywhere, development speed that keeps you competitive, and performance that scales with your growth.
You don’t need separate teams for iOS, Android, and web anymore. You don’t need to sacrifice quality for speed or vice versa. Flutter lets you build the platform your users deserve without the complexity that usually comes with multi-platform development.
Whether you’re launching a new SaaS product or modernizing an existing one, Flutter deserves serious consideration. The framework has proven itself with real companies serving real users at scale. If you’re ready to explore what Flutter can do for your platform, companies like FBIP can help you plan and execute your vision.
Is Flutter suitable for large-scale SaaS applications with thousands of users?
Yes, Flutter handles enterprise-scale applications effectively. The framework compiles to native code and performs well under heavy loads. Major companies run production SaaS platforms on Flutter serving millions of users. The key is proper backend architecture and following performance best practices during development, not framework limitations.
How long does it take to build a SaaS platform with Flutter compared to native development?
Flutter development is typically 30-40% faster than building separate native apps. A SaaS MVP that might take six months with native development could launch in three to four months with Flutter. The single codebase approach eliminates duplicate work and lets teams move faster through iterations and updates.
Can Flutter integrate with existing backend systems and databases?
Flutter connects easily to any REST API, GraphQL endpoint, or WebSocket service. Whether you’re using PostgreSQL, MongoDB, MySQL, or cloud services like AWS or Google Cloud, Flutter has packages and tools for integration. The Dart language handles async operations cleanly, making backend communication straightforward to implement and maintain.
What are the ongoing maintenance costs for a Flutter SaaS application?
Maintenance costs run significantly lower than native development because you’re updating one codebase instead of three. Bug fixes, feature additions, and security updates happen once and deploy everywhere. Most businesses see 50-60% reduction in ongoing development costs compared to maintaining separate iOS, Android, and web applications.
Does Flutter support the payment processing and subscription features SaaS platforms need?
Flutter works with all major payment processors including Stripe, PayPal, and Razorpay through well-maintained packages. Implementing subscription billing, trial periods, tier management, and payment flows is straightforward. The framework doesn’t limit your monetization options, and many successful SaaS businesses already run their entire payment infrastructure through Flutter applications.

The fintech industry stands at a crossroads. With millions of users demanding instant transactions, bulletproof security, and smooth experiences across devices, financial technology companies need app development frameworks that can keep pace. Flutter has emerged as the answer that banks and fintech startups alike have been searching for.
Google’s open-source framework isn’t just another development tool. It’s reshaping how financial apps get built, deployed, and scaled. From Nubank serving over 100 million users to Google Pay processing countless daily transactions, Flutter proves itself where it matters most: in real-world financial applications handling sensitive data at scale.
Building fintech apps presents challenges that don’t exist in other industries. You’re juggling rigorous security audits, multi-platform consistency, real-time data updates, and strict regulatory compliance. All while racing against competitors to launch features faster.
Traditional native development means building separate apps for iOS and Android. That doubles your development team, doubles your timeline, and multiplies your maintenance headaches. Every feature gets built twice. Every bug fix happens twice. Every security patch rolls out twice.
Flutter changes the game with a single codebase that runs on both platforms. Write your code once, and it automatically works on Android and iOS with nearly identical performance. No more fragmented teams. No more versions mismatches. No more choosing which platform gets features first.
Companies using Flutter for fintech report development time cuts of 40-70%. Nubank, Latin America’s largest digital bank, achieved a 30% higher merge success rate after switching to Flutter. Google Pay reduced its codebase by 35% while adding features, saving engineering effort by 70%.
When money’s involved, security isn’t optional. Flutter for fintech applications brings multiple security layers that make it suitable for handling sensitive financial data.
The framework compiles to native ARM code, creating an extra protection layer that makes reverse engineering extremely difficult. Unlike hybrid solutions that rely on intermediary apps, Flutter banking apps compile directly into computer-executable code. This makes them more secure than many native solutions.
Flutter supports industry-standard encryption protocols like AES-256 for data protection. The framework enables biometric authentication through fingerprint scanning and Face ID, giving users quick access while maintaining security. Certificate pinning for API requests prevents man-in-the-middle attacks, protecting data in transit.
The architecture allows developers to implement secure storage for credentials and sensitive information. Combined with code obfuscation features in Dart, Flutter makes it harder for attackers to understand app functionality even if they somehow access the code.
Financial institutions must meet strict compliance standards like GDPR, PCI-DSS, and PSD2. Flutter’s design supports these requirements through built-in features for audit trails, data encryption, and secure authentication flows. When FBIP works on fintech projects, we ensure these compliance measures integrate seamlessly from day one.
In fintech, being first matters. Regulatory changes happen overnight. Competitors launch features weekly. Users expect instant updates. Your development framework needs to match this pace.
Flutter’s hot reload feature lets developers see changes instantly in the running app. No waiting for compilation. No restarting the app. Changes appear in seconds. This speeds up the entire development cycle from initial build to bug fixes to feature additions.
Credit Agricole found their Flutter app easier and cheaper to maintain because they eliminated duplicated work between platforms. What used to take separate iOS and Android teams now happens with one unified team.
The framework includes rich widgets for building complex interfaces without platform-specific code. Input forms, animated charts, transaction cards, dynamic gauges these financial app essentials come ready to use. Designers can implement pixel-perfect designs without waiting for custom platform components.
For fintech companies, this speed translates directly to competitive advantage. Nubank launched their insurance feature in just three months using Flutter, marking their quickest product rollout. When you can move this fast, you respond to market changes before competitors even start planning.
Users judge financial apps harshly. If your app lags during a transaction or freezes while checking a balance, they switch to competitors. Flutter delivers near-native performance that keeps users confident.
The framework uses the Skia graphics engine, the same rendering engine that powers Chrome. This gives Flutter apps smooth animations and responsive interfaces even when displaying real-time market data or processing complex calculations.
Flutter compiles to native code for each platform, not JavaScript that runs in a web view. This means your app runs at the same speed as apps built directly in Swift or Kotlin. For users, the difference is invisible. They get the performance they expect from a native app with the development efficiency of a cross-platform framework.
Mobile fintech apps need to handle real-time updates, stock prices changing by the second, transaction confirmations arriving instantly, account balances updating live. Flutter’s reactive framework and state management tools like Bloc and Riverpod make these real-time interfaces possible without performance lag.
Your first 100 users look nothing like your first million users. Flutter for fintech apps scales with you, handling growth without requiring architectural overhauls.
The framework’s modular architecture lets you build different services independently. Want to add investment tools to your payment app? Build it as a separate module that integrates cleanly with existing features. Need to roll out cryptocurrency trading? Add it without touching your core banking features.
This modularity makes testing easier. You can A/B test new features with specific user segments without risking your stable features. It speeds up deployment since teams can work on different modules simultaneously without stepping on each other’s code.
Flutter supports microservices architecture on the backend. As your user base grows, you scale specific services independently rather than your entire infrastructure. API caching, load balancing, and continuous deployment tools work seamlessly with Flutter, ensuring your app remains responsive even during traffic spikes.
Companies like Axis Bank built enterprise-grade banking apps on Flutter that handle millions of transactions without lag or downtime. The framework proves itself at scale, not just for MVPs.
The proof sits in production apps serving millions of users daily. These aren’t experiments, they’re billion-dollar businesses trusting Flutter with their core products.
Nubank transformed their entire mobile development process with Flutter. Before the switch, features launched at different times on iOS and Android due to separate development teams. After Flutter, they achieved feature parity across platforms, 600% faster pull request processing, and 30% higher merge success rates. Their 100+ million users experience consistent, reliable banking regardless of device.
Google Pay rebuilt their app in Flutter, consolidating Android and iOS development. The result? A 35% smaller codebase despite adding hundreds of features. The app handles sensitive payment data for millions of daily transactions across dozens of countries while maintaining top-tier security and performance.
Tide, the UK business banking app, uses Flutter to manage complex features like invoicing, cash flow tracking, and multi-account management. Their modular Flutter architecture lets them roll out features quickly while maintaining the security and reliability business customers demand.
These companies didn’t choose Flutter because of hype. They chose it because it delivers on three things fintech companies care about most: security, speed, and scale.
Building separate native apps means hiring separate teams. iOS developers command certain salaries. Android developers command similar ones. You need two complete teams for feature development, two for testing, two for maintenance.
Flutter cuts these costs dramatically. One development team builds for both platforms. One set of tests covers both versions. One codebase gets maintained. Companies report cost savings of 60-70% compared to dual native development.
For startups, this means stretching the runway further. For enterprises, it means reallocating budget to features that matter: enhanced fraud detection, better UX research, improved customer support, expanded marketing.
The savings don’t stop at development. Maintenance costs drop because you fix bugs once, not twice. Feature additions take half the time. Updates roll out simultaneously across platforms. Your team stays lean while delivering more.
When FBIP builds Flutter apps for clients, we see these savings firsthand. Projects that would take 12 months native often complete in 6-8 months with Flutter, without sacrificing quality or security.
Most financial institutions aren’t starting from scratch. You have core banking systems, payment processors, compliance tools, CRM platforms, and analytics dashboards. Your new app needs to work with all of them.
Flutter handles backend integration smoothly through REST APIs, WebSockets, and GraphQL. Whether you’re connecting to legacy banking systems or modern cloud services, the framework provides the tools you need.
Firebase integration gives you authentication, real-time databases, and cloud storage out of the box. Need AWS, Google Cloud, or Microsoft Azure? Flutter works with all major cloud platforms. Third-party APIs for payment processing, KYC verification, fraud detection, and analytics plug in cleanly.
The framework supports both monolithic and microservices architectures. If you’re running legacy systems, Flutter apps can communicate with them while you gradually modernize. If you’re building cloud-native from the start, Flutter fits perfectly into that architecture too.
Your development team’s productivity directly impacts your time to market. Flutter makes developers more productive through thoughtful tooling and clear documentation.
The hot reload feature we mentioned earlier changes how developers work. Instead of making a change, waiting for compilation, and checking results, they see changes instantly. This tight feedback loop accelerates development and reduces frustration.
Flutter’s widget-based architecture makes code reusable. Build a custom transaction card once, use it everywhere. Create a secure input field, apply it across all forms. This reusability speeds development and ensures consistency.
The framework comes with comprehensive testing tools. Unit tests, widget tests, and integration tests all work smoothly. You catch bugs earlier when they’re cheaper to fix. The testing infrastructure helps meet compliance requirements for financial apps.
Google backs Flutter with consistent updates, security patches, and new features. The global developer community contributes packages, plugins, and solutions to common problems. When your team faces a challenge, chances are someone’s already solved it.
Financial apps operate under intense scrutiny. Regulators demand transparency, security, and user protection. Non-compliance brings fines, shutdowns, and reputational damage.
Flutter supports the audit trails and logging that regulators require. Every transaction, every data access, every user action can be tracked and reported. The framework’s architecture makes it straightforward to implement the data protection measures GDPR mandates.
Strong Customer Authentication requirements in the European Economic Area? Flutter handles multi-factor authentication flows cleanly. PCI-DSS standards for payment processing? The secure storage and encryption features support compliance. ISO 27001 information security management? Flutter’s security-first design aligns with these standards.
When regulations change and they will Flutter’s single codebase means updating once rather than twice. You push compliance updates to all users simultaneously, reducing risk windows.
Flutter isn’t the right choice for every project, but it shines in specific situations common to fintech companies.
If you need to launch on both iOS and Android quickly, Flutter accelerates your timeline significantly. Startups racing to market with MVPs benefit most. You validate your concept on both platforms without doubling resources.
Budget-conscious projects gain from Flutter’s development efficiency. Whether you’re bootstrapped or watching burn rate carefully, the framework stretches your budget further without cutting corners on security or performance.
Projects requiring frequent updates and iterations match Flutter’s strengths. Fintech moves fast. Regulations change. User expectations evolve. Competitors launch features. Flutter lets you respond quickly across platforms.
Apps with complex, custom UIs work beautifully in Flutter. If your design vision goes beyond standard platform components, Flutter’s widget system and customization options bring that vision to life consistently across devices.
Building secure financial applications requires more than just knowing Flutter. It demands understanding financial regulations, security requirements, user expectations, and business realities.
FBIP has been developing Flutter applications since the framework’s early days. We’ve built apps handling sensitive financial data, processing transactions, managing investments, and more. Our team understands both the technical requirements and the business context of fintech applications.
We implement security from the ground up, not as an afterthought. Every app we build includes proper encryption, secure authentication, protected storage, and compliance measures appropriate to your jurisdiction and use case.
Our development process emphasizes testing and quality assurance. We catch issues before users do. We ensure performance under load. We validate security measures. We document everything for audits.
We work with your timeline and budget constraints. Whether you need an MVP in three months or a full-featured platform in a year, we structure our process to deliver value at each milestone. You see working features regularly, not after months of invisible backend work.
Flutter’s trajectory in financial services points upward. Adoption has grown 217% since 2021, with finance leading all industries. More banks and fintech companies switch to Flutter each quarter.
The framework continues evolving. Flutter 3 added web and desktop support, expanding beyond mobile. Future updates will bring more performance improvements, additional security features, and better tooling.
AI integration opens new possibilities for fintech apps. Fraud detection powered by machine learning. Personalized financial advice from AI assistants. Predictive analytics for investment recommendations. Flutter supports the APIs and processing needed for these AI features.
Blockchain and cryptocurrency features integrate smoothly with Flutter. As decentralized finance grows, Flutter provides the tools to build crypto wallets, DeFi platforms, and blockchain-powered applications.
The financial industry isn’t slowing down. Users demand more features, better experiences, stronger security. Regulations increase. Competition intensifies. Flutter gives fintech companies the tools to meet these challenges head-on.
If Flutter matches your needs, starting the right way matters. Here are the first steps:
Define your requirements clearly. What features do you need at launch? What regulatory requirements apply? What integrations are necessary? Clear requirements prevent scope creep and guide development.
Choose a development partner with fintech experience. Generic app developers might understand Flutter, but fintech brings unique challenges. Find a team that understands both.
Start with an MVP that proves your core concept. Don’t try to build everything at once. Get a working version in users’ hands quickly. Gather feedback. Iterate.
Plan for security and compliance from day one. Adding these later costs more and risks oversights. Build them into your foundation.
Test thoroughly before launch. Financial apps leave little room for errors. Test on real devices. Test under load. Test security measures. Test compliance workflows.
The fintech landscape demands speed, security, and scale. Flutter delivers all three without the compromises that plagued previous cross-platform solutions. From startups launching their first MVPs to enterprises serving millions of users, financial companies are choosing Flutter because it works where it matters.
Your users don’t care what framework you used. They care about security, speed, and reliability. Flutter lets you deliver these while building faster, spending less, and scaling confidently. That’s why the biggest names in fintech trust it with their most valuable asset: their users’ financial data.
Ready to explore how Flutter could transform your fintech application? FBIP brings years of Flutter expertise and fintech domain knowledge to every project. We build apps that meet regulatory requirements, protect user data, and scale with your business. Connect with FBIP today to discuss your fintech app development needs.
How does Flutter ensure data security in fintech applications?
Flutter compiles to native ARM code rather than running in a browser-like environment, making reverse engineering extremely difficult. The framework supports AES-256 encryption for data storage, certificate pinning for API security, and hardware-backed biometric authentication. Flutter apps can implement secure storage using platform-specific key stores, protecting sensitive information even if a device gets compromised. The framework’s architecture lets developers follow security best practices without fighting against the technology.
Can Flutter handle the transaction volume of large-scale financial apps?
Yes. Nubank serves over 100 million users on Flutter. Google Pay processes millions of daily transactions. Axis Bank handles enterprise-grade banking operations without performance issues. Flutter compiles to native code and uses efficient rendering, giving it performance comparable to native apps. The framework supports microservices architecture and scales horizontally as your user base grows. Load balancing, caching, and optimized API design work seamlessly with Flutter apps.
How long does it typically take to build a fintech app with Flutter?
Timeline depends on complexity and features. A basic MVP with core banking features might take 3-4 months. A full-featured platform with payment processing, investment tools, and advanced security could take 6-12 months. Flutter typically reduces development time by 40-70% compared to building separate native apps. Companies report launching features in weeks instead of months after adopting Flutter for their development process.
Does Flutter support integration with existing banking systems and third-party services?
Flutter integrates smoothly with legacy banking systems through REST APIs, WebSockets, and other standard protocols. The framework works with major cloud platforms like AWS, Google Cloud, and Azure. Third-party services for payment processing, KYC verification, fraud detection, and analytics all have Flutter-compatible SDKs or APIs. Whether you’re connecting to decades-old mainframes or cutting-edge microservices, Flutter provides the integration capabilities you need.
What regulatory compliance standards does Flutter support?
Flutter supports implementing features required by GDPR, PCI-DSS, PSD2, and other financial regulations. The framework enables audit logging, data encryption, secure authentication, and user consent management that these standards require. Flutter’s architecture makes it straightforward to implement region-specific compliance measures for different markets. When regulations change, the single codebase means updating compliance features once rather than maintaining separate implementations for iOS and Android.
Speed determines survival in today’s startup world. Entrepreneurs race against time to validate ideas, secure funding, and capture market share before competitors do. The framework you choose for building your Minimum Viable Product (MVP) directly impacts how quickly you can test your concept with real users.
Flutter has emerged as a game-changing solution for startups seeking rapid MVP development. This Google-backed framework cuts development time dramatically while maintaining quality and performance. Let’s explore how Flutter accelerates your path from concept to market-ready product.
A Minimum Viable Product represents your product’s simplest version with just enough features to satisfy early users and gather feedback. The goal isn’t perfection but validation. Research shows that 70% of tech startups fail, usually about 20 months after their first round of financing, often due to no market need following a lack of proper market research.
Time-to-market matters because your competitive advantage diminishes with every passing week. Competitors may launch similar solutions, investor interest might shift, or market conditions could change. Getting a working version into users’ hands quickly helps you stay ahead.
Companies like Instagram proved this approach works. They launched with minimal features, focusing on square photos and limited filters on iOS only. This lean strategy helped them capture the market before competitors could react.
Flutter’s biggest advantage for MVP development lies in its cross-platform capability. Flutter is a cross-platform mobile app development framework that uses a single codebase to build apps for iOS and Android. You write code once and deploy it across multiple platforms.
This approach eliminates the traditional dilemma of choosing between iOS and Android for your initial launch. Why limit your potential user base when you can reach both markets from day one?
Here’s what this means for your timeline:
FBIP specializes in Flutter app development, helping startups launch cross-platform MVPs efficiently. The single codebase approach means you can gather feedback from a broader audience faster, refining your product based on diverse user insights.
The Hot Reload feature revolutionizes how developers build apps. This tool allows developers to see code changes reflected immediately in the running application without restarting it. The impact on development speed is substantial.
Flutter’s rapid development cycle, thanks to features like Hot Reload, enables businesses to bring their MVP to market 2-4 weeks faster than traditional methods.
Traditional development requires stopping the app, recompiling code, and relaunching to see changes. This process consumes minutes each time. Over weeks of development, these minutes accumulate into days of lost productivity.
Flutter’s Hot Reload happens in seconds. Developers can:
This speed advantage becomes particularly valuable during the critical refinement phase when you’re polishing your MVP based on early testing feedback.
Flutter comes with an extensive library of pre-built, customizable widgets that match both iOS and Android design standards. These ready-made components accelerate UI development dramatically.
Flutter provides high-performing features and accesses numerous tools to make exceptional web applications, with pre-built customizable widgets and a UI kit.
Instead of designing every button, form, or navigation element from scratch, developers can select from Flutter’s widget collection and customize them to match your brand. The widgets cover:
This building-block approach means FBIP developers can construct sophisticated interfaces in days rather than weeks. The widgets also ensure your app looks native on each platform, providing users with familiar, comfortable experiences.
Testing typically consumes 20-30% of development time. With traditional native development, teams must test each platform separately, doubling the QA effort and timeline.
Flutter’s single codebase changes this equation. When you test the Flutter app on one platform, you’re largely testing the codebase that runs on all platforms. Flutter reduces bug fixes by 60% during MVP development.
The framework’s architecture catches many errors during compilation rather than runtime. This means developers identify and fix issues earlier in the development process when corrections are simpler and cheaper.
Automated testing tools work seamlessly with Flutter applications. Teams can write tests once and run them across platforms, creating a comprehensive testing suite without redundant effort.
Backend development often becomes a bottleneck in MVP projects. Building servers, databases, and APIs from scratch takes weeks. Flutter’s tight integration with Firebase eliminates this obstacle.
Because Flutter is compatible with Firebase, you don’t need to build your own backend for a simple MVP. Firebase provides ready-to-use services including:
This integration means you can launch an MVP with full backend functionality in days. Firebase Remote Config even allows you to modify app behavior without submitting updates to app stores, enabling rapid A/B testing and feature experiments.
FBIP leverages Firebase integration to deliver complete, market-ready solutions faster. This approach lets startups focus resources on their unique value proposition rather than rebuilding standard infrastructure.
Time savings translate directly into cost savings. Every week of reduced development time means:
Startups that launch an MVP in less than 8 weeks raise 1.6 times more at pre-seed than those still prototyping when they pitch.
Flutter’s efficiency extends beyond initial development. The single codebase requires only one development team instead of separate iOS and Android teams. This consolidation reduces:
For startups operating with limited funding, these savings can mean the difference between running out of capital and reaching profitability.
Your MVP is just the beginning. The framework you choose should support growth as your product evolves. Flutter for MVP development helps you scale your product to all devices, web, and desktop, as well as even embedded devices, using a single code.
This scalability offers several advantages:
FBIP builds MVPs with this growth path in mind, ensuring your initial investment remains valuable as your product matures.
Major companies have validated Flutter’s effectiveness for building successful products. Google has developed Google Ads using Flutter, and Alibaba developed Xianyu based on the Flutter framework.
These examples demonstrate Flutter’s capability to support products at scale. If Flutter handles applications serving millions of users for companies like Google and Alibaba, it certainly meets the demands of MVP development.
Spotify provides another instructive example. After their successful experiment on the desktop, Spotify scaled up to other platforms and developed mobile apps. This gradual, validated expansion represents the ideal MVP journey that Flutter facilitates.
A strong developer community accelerates problem-solving and learning. Flutter boasts one of tech’s most active communities, with over 153,000 stars on GitHub. This popularity means:
Flutter’s ecosystem offers over 26,000 packages, including pre-built widgets and plugins for Firebase, payment gateways, and analytics.
When developers encounter challenges, they can typically find solutions quickly within the community. This support network reduces development delays and helps teams maintain momentum.
Flutter excels for MVPs when you need:
The framework might not suit every project. Consider alternatives if you need:
For most modern MVPs, Flutter provides the optimal balance of speed, cost, and quality. The framework’s maturity and Google’s backing ensure it will remain relevant as your product grows.
Building an MVP with Flutter requires expertise in the framework’s best practices and patterns. FBIP brings deep experience in Flutter development, helping startups and businesses launch their products efficiently.
The team at FBIP understands the unique pressures facing MVP projects. They focus on delivering working products quickly while maintaining code quality that supports future growth. Their approach combines technical excellence with business understanding, ensuring your MVP serves both immediate validation needs and long-term product vision.
Your innovative idea deserves a launchpad that matches its potential. Flutter provides that foundation, combining speed, cost efficiency, and technical capability in one framework.
The difference between market success and missed opportunity often comes down to timing. Every week spent in development is a week your competitors might be gaining traction. Flutter helps you compress that timeline without compromising quality.
Ready to bring your MVP to life? FBIP specializes in turning concepts into market-ready Flutter applications. Visit FBIP to discuss your project and discover how Flutter development can accelerate your path to market.
How long does it take to build an MVP with Flutter?
Most Flutter MVPs take 6-12 weeks to develop, depending on feature complexity. This timeline includes design, development, testing, and deployment. The single codebase approach means you get both iOS and Android versions simultaneously. Flutter’s Hot Reload feature and pre-built widgets accelerate the process compared to native development, which typically requires 16-20 weeks for both platforms.
Is Flutter suitable for complex applications or just simple MVPs?
Flutter handles both simple MVPs and complex, feature-rich applications effectively. Major companies like Google, Alibaba, and BMW use Flutter for production applications serving millions of users. The framework supports advanced features including complex animations, real-time data synchronization, and hardware integrations. Your MVP built with Flutter can grow into a full-scale application without requiring a complete rebuild.
What are the cost savings of using Flutter versus native development?
Flutter typically reduces development costs by 30-50% compared to building separate native iOS and Android apps. You need only one development team instead of two, reducing salary expenses and coordination overhead. The faster development timeline also means lower total project costs. Maintenance costs remain lower long-term since updates apply to both platforms simultaneously through the shared codebase.
Can I add platform-specific features to a Flutter app if needed?
Yes, Flutter provides robust platform channels that allow integration of platform-specific code when necessary. You can access native iOS and Android APIs for device-specific features like camera controls, sensors, or specialized hardware. The framework includes plugins for most common platform features, and developers can create custom platform integrations when unique requirements arise without abandoning the cross-platform benefits.
How does Flutter performance compare to native apps?
Flutter apps achieve near-native performance through direct compilation to machine code. The framework renders at 60fps on most devices, matching native app smoothness. Unlike frameworks that use JavaScript bridges, Flutter communicates directly with platform APIs, eliminating performance bottlenecks. For most use cases, users cannot distinguish between Flutter and native apps in terms of speed and responsiveness.
Cross-platform mobile development has reshaped how businesses approach digital solutions. Companies now seek frameworks that deliver quality without requiring separate teams for iOS and Android platforms. Google’s Flutter framework addresses this need with a single codebase approach that works across multiple platforms.
Flutter accounts for nearly 30% of all new free iOS apps, showing its widespread adoption among developers worldwide. The framework’s ability to create native-like experiences while reducing development time has made it attractive across diverse sectors. FBIP recognizes this shift and works with businesses to build Flutter applications that meet modern user expectations.
Let’s explore which industries gain the most from this technology and why Flutter continues to grow in popularity.
Before examining specific sectors, understanding Flutter’s core strengths helps explain its cross-industry appeal. The framework offers several advantages that translate to business value.
Development speed stands out as a primary benefit. Flutter’s hot reload feature enables developers to capture changes and implement code adjustments, which accelerates the testing process. Teams can iterate faster and launch products sooner.
Cost efficiency matters too. Writing code once for multiple platforms reduces resource requirements. Businesses save money by maintaining one development team instead of hiring separate iOS and Android specialists. This approach appeals to startups with limited budgets and enterprises looking to optimize spending.
User experience remains consistent across devices. Flutter applications deliver smooth animations and native performance on both operating systems. This consistency strengthens brand identity and user satisfaction.
The healthcare sector faces unique challenges that make Flutter an ideal choice. Flutter apps assist healthcare providers by providing platforms for telehealth, patient management, and encrypted data communication.
Telemedicine has grown rapidly in recent years. Patients expect seamless video consultations, prescription management, and appointment scheduling through mobile apps. Flutter enables developers to build these features with real-time capabilities and secure data transmission.
Patient monitoring applications need to work reliably across different devices. Healthcare providers require apps that maintain HIPAA compliance while offering intuitive interfaces. Flutter prioritizes improved security tools and compliance support to offer secure data storage, encrypted communication, and compliance readiness (HIPAA, GDPR).
FBIP has observed healthcare clients benefit from Flutter’s ability to integrate with existing hospital management systems. The framework supports API connections to electronic health records while maintaining strict security standards.
Wearable device integration represents another growth area. Flutter’s support for IoT devices allows healthcare apps to collect data from fitness trackers and medical monitors. This real-time information helps doctors make informed decisions about patient care.
Financial technology demands the highest security standards and regulatory compliance. When developing a fintech app, developers should implement secure data storage, encrypted communication, and compliance readiness.
Mobile banking applications must handle sensitive transactions while providing smooth user experiences. Flutter enables fintech companies to build apps with biometric authentication, real-time transaction updates, and encrypted data transmission. These features build user trust and meet regulatory requirements.
Payment processing needs instant feedback and reliability. Users expect confirmation within seconds when transferring money or making purchases. Flutter’s native performance ensures transactions process quickly without lag or delays.
Flutter helps developers create apps based on market trends and customer needs, which is particularly relevant in fintech. The industry evolves rapidly with new features like cryptocurrency wallets, digital lending, and buy-now-pay-later services. Flutter’s modular architecture allows teams to add these features without rebuilding entire applications.
FBIP helps fintech clients implement robust security measures while maintaining user-friendly interfaces. The framework’s widget system enables customization that matches brand guidelines while meeting banking regulations.
Startups in the fintech space particularly benefit from Flutter’s cost efficiency. Development budgets can be reduced by 60-80% compared to native app development, allowing new companies to allocate resources toward customer acquisition instead of technical infrastructure.
Online shopping has become the primary revenue channel for many retailers. Mobile commerce continues growing as consumers prefer browsing and purchasing through smartphones.
Flutter-based retail and e-commerce applications drive sales with personalized shopping experiences, integrated payment systems, and real-time analytics. Product catalogs need to load quickly and display beautifully across different screen sizes. Flutter’s rendering engine ensures images appear crisp and animations run smoothly.
Shopping cart functionality must work flawlessly. Users abandon purchases when apps crash or payments fail. Flutter’s stable framework reduces technical issues that lead to lost sales.
Inventory management connects to backend systems through APIs. Retail apps need real-time stock updates to prevent customers from ordering unavailable items. Flutter supports these integrations while maintaining fast load times.
Push notifications drive customer engagement. Retailers send personalized offers based on browsing history and purchase patterns. Flutter apps can implement notification systems that increase conversion rates.
FBIP develops e-commerce solutions using Flutter that include features like wishlist management, multiple payment gateways, and order tracking. The framework’s flexibility allows customization for different business models, from marketplace platforms to brand-specific stores.
Educational technology has transformed how students learn and teachers instruct. Mobile apps provide access to courses, study materials, and interactive content anywhere students have internet connections.
Learning management systems require video streaming, document viewing, and quiz features. Flutter handles multimedia content efficiently while maintaining responsive interfaces. Students can watch lectures, submit assignments, and participate in discussions through single applications.
Flutter enables features such as real-time predictive analytics, intelligent decision support, and personalized content recommendations when combined with AI tools. Educational apps can adapt content based on student performance and learning styles.
Gamification increases student engagement. Educational apps with progress tracking, achievement badges, and leaderboards motivate learners to complete courses. Flutter’s animation capabilities make these features visually appealing and fun.
Language learning apps particularly benefit from Flutter’s multimedia support. Applications need audio playback, speech recognition, and interactive exercises. The framework handles these requirements while maintaining smooth performance.
FBIP works with educational institutions to create apps that support both synchronous and asynchronous learning. Flutter enables features like live classroom sessions, recorded lectures, and collaborative workspaces.
Travel planning involves multiple steps from research to booking to navigation. Mobile apps simplify this process by consolidating information and services in one place.
Flutter applications can be created for travel and hospitality with features like virtual tours and automated operations. Booking engines need to search flights, hotels, and activities while displaying results quickly. Flutter’s performance ensures search results appear without frustrating delays.
Real-time updates matter during travel. Flight status changes, gate assignments, and baggage claim information need immediate delivery. Flutter apps can implement push notifications and real-time data synchronization.
Map integration helps travelers navigate unfamiliar locations. Flutter supports Google Maps and other mapping services with smooth panning and zooming. Location-based recommendations for restaurants and attractions enhance user experiences.
Payment processing must support multiple currencies and international transactions. Travel apps need secure payment gateways that work globally. Flutter’s modular architecture allows integration with various payment providers.
Universal Destinations & Experiences uses Flutter for their iOS and Android Apps at their parks in Orlando, Hollywood, and Osaka, demonstrating the framework’s capability to handle enterprise-scale travel applications.
Mobile gaming represents one of the fastest-growing entertainment sectors. Games need to run smoothly, otherwise users will become frustrated and leave your app. Flutter addresses this challenge with superior performance.
Flutter game development in 2D is gaining popularity and will continue through 2025 and beyond. The framework’s rendering engine delivers smooth animations at 60 frames per second, which is essential for responsive gameplay.
Game developers appreciate Flutter’s hot reload feature during development. Making adjustments to game mechanics, graphics, or user interfaces happens instantly without recompiling the entire project. This speeds up the creative process.
With advancements in AR and VR technology, Flutter is poised to play a significant role in creating immersive experiences. Gaming apps can incorporate augmented reality features that blend digital content with real-world environments.
Multiplayer functionality requires real-time synchronization between players. Flutter supports WebSocket connections and cloud services that enable competitive and cooperative gameplay.
FBIP helps game developers create engaging experiences that work across platforms. Flutter allows teams to reach both iOS and Android users simultaneously, expanding potential player bases.
Supply chain management requires real-time tracking and communication between multiple parties. Flutter applications optimize logistics and supply chain processes with features ranging from route optimization to inventory management.
Delivery tracking apps need GPS integration and map displays. Customers want to see exactly where packages are and when they will arrive. Flutter supports location services that provide accurate real-time updates.
Fleet management requires monitoring vehicle locations, fuel consumption, and maintenance schedules. Mobile apps help dispatchers assign routes and drivers report issues. Flutter enables these features with reliable backend connections.
Warehouse management apps help workers scan barcodes, update inventory counts, and locate products. Flutter apps help businesses manage warehouses better by finding things fast, keeping track of stock, and making shipping easier.
Communication between drivers, dispatchers, and customers happens through in-app messaging. Flutter supports chat features with image sharing and status updates.
FBIP creates logistics applications that connect multiple stakeholders in supply chains. The framework’s cross-platform nature ensures everyone uses consistent interfaces regardless of device preferences.
Streaming services and media platforms require robust applications that handle high traffic volumes. NotebookLM, a new AI-powered research and writing assistant made by Google Labs, just launched their mobile apps built with Flutter, showing the framework’s capability for content-focused applications.
Video streaming needs efficient buffering and playback controls. Users expect minimal loading times and smooth playback across different connection speeds. Flutter’s performance optimization ensures satisfying viewing experiences.
Content recommendation engines personalize what users see based on viewing history and preferences. Flutter apps can integrate machine learning models that improve suggestions over time.
Social features encourage user engagement. Commenting, sharing, and creating watchlists build communities around content. Flutter’s UI components make these features intuitive and visually consistent.
Live streaming requires low latency and stable connections. Sports events, concerts, and news broadcasts need reliable delivery. Flutter supports real-time protocols that minimize delays between broadcast and viewing.
FBIP develops media applications that scale to accommodate growing user bases. Flutter’s architecture supports the infrastructure needed for content delivery networks and user management systems.
Food delivery apps have changed dining habits worldwide. Customers expect easy browsing, quick ordering, and accurate delivery tracking.
Menu displays need appetizing photos and clear descriptions. Flutter’s image optimization ensures food looks appealing while apps load quickly. Restaurants can update menus in real-time without app store submissions.
Order customization allows customers to specify preferences and dietary restrictions. Flutter’s form components make it easy to build interfaces for complex orders with multiple options.
Real-time order tracking shows preparation progress and delivery routes. Customers appreciate transparency about when food will arrive. Flutter’s location services and push notifications keep users informed.
Payment integration must support multiple methods from credit cards to digital wallets. Flutter enables secure payment processing that protects customer financial information.
FBIP creates restaurant applications that handle high order volumes during peak hours. The framework’s performance ensures smooth operation when demand spikes.
Service marketplaces connect customers with professionals for various needs. On-demand apps connect customers with different service providers, like Uber does for transportation and Zomato for food delivery.
Booking systems need calendar integration and availability management. Service providers update schedules while customers select convenient time slots. Flutter’s date-time components simplify these interactions.
Rating and review systems build trust between parties. Customers share experiences while providers maintain reputations. Flutter enables review displays that influence booking decisions.
In-app communication protects privacy while facilitating coordination. Customers and providers exchange messages without sharing personal contact information. Flutter supports chat features with read receipts and typing indicators.
Payment splitting and tipping options add flexibility. Customers appreciate convenient ways to handle transactions. Flutter’s payment integrations support various scenarios.
FBIP develops on-demand platforms that balance user needs with business requirements. The framework allows customization for different service categories from home repairs to professional consulting.
Property technology has transformed how people buy, sell, and rent real estate. Flutter solutions in real estate streamline property management, improve client engagement, and offer advanced features like virtual tours.
Property listings need high-quality images and detailed information. Virtual tours allow potential buyers to explore homes remotely. Flutter’s multimedia capabilities support 360-degree photos and video walkthroughs.
Search filters help users find properties matching specific criteria. Location, price range, number of bedrooms, and amenities narrow results. Flutter’s UI components make filtering intuitive and responsive.
Mortgage calculators provide instant affordability estimates. Real estate apps with financial tools help buyers understand budgets. Flutter enables complex calculations that update in real-time as users adjust parameters.
Appointment scheduling connects buyers with agents for property viewings. Calendar integration ensures everyone sees available time slots. Flutter supports synchronization with external calendar services.
FBIP creates real estate applications that serve multiple stakeholders including buyers, sellers, agents, and property managers. Flutter’s flexibility accommodates diverse workflows within single platforms.
As a website development company in Udaipur, FBIP has observed how Flutter transforms project timelines and outcomes. The framework’s single codebase approach reduces development time by 40% compared to building separate native apps.
Clients appreciate consistent experiences across devices. When businesses launch products simultaneously on iOS and Android, they reach wider audiences without staggered releases. This market timing advantage can determine competitive positioning.
Maintenance becomes simpler with unified codebases. Updates and bug fixes apply to all platforms at once. Teams spend less time managing multiple versions and more time adding features users want.
Performance remains comparable to native applications. Users cannot distinguish between Flutter apps and those built with platform-specific tools. This native-like quality maintains professional standards while gaining development efficiency.
FBIP works across industries from healthcare to e-commerce, adapting Flutter’s capabilities to specific business needs. The framework’s widget library allows customization that matches brand guidelines and user expectations.
Businesses considering Flutter should evaluate their specific requirements against the framework’s strengths. Projects requiring deep platform-specific features might face limitations, but most applications benefit from cross-platform development.
Startups with limited budgets find Flutter particularly attractive. Lower development costs allow more investment in marketing and customer acquisition. Faster time-to-market helps capture opportunities before competitors.
Established companies benefit from Flutter when expanding mobile presences. Existing web platforms can extend to mobile apps without massive resource allocation. The framework supports gradual adoption through modular integration.
Development teams appreciate Flutter’s learning curve. Dart programming language resembles other modern languages, making onboarding straightforward. Documentation and community resources support developers at all skill levels.
FBIP guides clients through technology decisions based on project goals and constraints. Flutter often emerges as the optimal choice for businesses seeking quality, speed, and cost efficiency.
By 2025, Flutter developers will increasingly use tools like Google ML Kit and TensorFlow Lite for features such as real-time predictive analytics, intelligent decision support, and personalized content recommendations. Artificial intelligence integration will become standard rather than exceptional.
The increasing prevalence of IoT devices makes Flutter a preferred framework for developing IoT applications. Smart home controls, wearable devices, and industrial sensors will connect through Flutter-based interfaces.
Flutter implementation in Wear OS demonstrates the framework’s capabilities for wearable app development. Smartwatches and fitness trackers will rely on Flutter for user interfaces.
Desktop and web support continues improving. Flutter 4.0 and subsequent updates are expected to bring refined cross-platform performance, smaller app sizes, and improved web and desktop support. This expansion means truly universal applications become practical.
FBIP stays current with these developments to offer clients cutting-edge solutions. The framework’s evolution ensures today’s investments remain relevant as technology advances.
Flutter app development serves industries ranging from healthcare to entertainment because it solves universal challenges. Businesses need fast development, consistent user experiences, and cost efficiency. The framework delivers these benefits while maintaining professional quality.
Healthcare providers reach patients through telemedicine apps. Financial institutions build secure banking platforms. Retailers create engaging shopping experiences. Educators deliver interactive learning. Each sector finds value in Flutter’s capabilities.
FBIP has seen how Flutter transforms client projects across diverse industries. The technology enables businesses to compete effectively in mobile-first markets. Companies that embrace cross-platform development position themselves for growth as mobile usage continues expanding.
Consider Flutter for your next mobile project. The framework’s maturity, Google’s backing, and widespread adoption make it a reliable choice for businesses of all sizes.
Ready to build a Flutter application that grows your business? Connect with FBIP to discuss how cross-platform development can meet your specific needs. Our team brings technical expertise and industry knowledge to every project, ensuring your mobile presence supports business objectives.
Q: What makes Flutter different from other cross-platform frameworks?
Flutter compiles to native code rather than using bridges or interpreters. This approach delivers performance comparable to platform-specific development. The framework includes its own rendering engine, ensuring consistent appearance across devices. Hot reload accelerates development by showing changes instantly. These technical advantages translate to faster development and better user experiences than many alternatives.
Q: How long does it take to develop a Flutter app?
Development timelines depend on complexity and features. Simple applications with basic functionality might take 2-3 months. Complex apps with backend integration, payment processing, and advanced features could require 4-6 months. Flutter typically reduces development time by 30-40% compared to building separate native apps. Reusing code across platforms significantly impacts project schedules and allows faster market entry.
Q: Can Flutter apps access all device features?
Flutter provides plugins for most common device features including camera, GPS, sensors, and notifications. Platform channels allow integration with native code when specialized functionality is needed. Some cutting-edge features might require custom development, but the vast majority of app requirements work directly through Flutter. The plugin ecosystem continues growing as developers contribute new capabilities.
Q: Is Flutter suitable for enterprise applications?
Many large companies including Google, BMW, and Alibaba use Flutter for production apps. The framework handles enterprise requirements like security, scalability, and maintainability. Code sharing reduces long-term maintenance costs for companies managing large app portfolios. Enterprise teams appreciate Flutter’s testing capabilities and CI/CD integration. The framework matures continuously with Google’s ongoing investment and support.
Q: How does Flutter handle app updates and maintenance?
Single codebases simplify maintenance since changes apply to all platforms simultaneously. Bug fixes and feature additions require less effort than managing separate native codebases. App store submission processes remain unchanged, but development work decreases. Teams can respond faster to user feedback and market changes. This efficiency allows businesses to iterate quickly and maintain competitive applications.
The mobile app development arena has witnessed a shift in how businesses approach their digital strategies. Companies are now looking beyond traditional development methods and turning to frameworks that deliver speed, quality, and cost savings. Flutter has become the most popular cross-platform mobile framework, with over 46% of developers worldwide choosing it for their projects. This rising adoption signals a broader transformation happening across the business world.
What makes Flutter stand out is not just its technical features but how well it addresses real business challenges. Enterprises want apps that work seamlessly across platforms, require less maintenance, and can adapt quickly to market demands. Flutter checks all these boxes and more. Let’s break down why so many companies are making this switch.
Flutter is Google’s open-source UI toolkit that lets developers build natively compiled applications for mobile, web, and desktop from a single codebase. When Google introduced this framework in December 2018, it changed how development teams approached multi-platform projects.
As of 2023, over 2 million developers have embraced this framework, marking a substantial increase in its developer community. The growth trajectory shows no signs of slowing down. Written in the Dart programming language, Flutter provides developers with a fast and expressive way to create visually appealing applications.
What sets Flutter apart is its rendering engine. The framework doesn’t rely on platform intermediaries to display UI elements. Instead, it renders directly on the device, which gives apps that smooth, native-like feel users expect. This approach allows Flutter apps to deliver high performance without the typical compromises seen in other cross-platform solutions.
The most compelling reason enterprises adopt Flutter is straightforward: write once, deploy everywhere. Development teams can create one codebase that runs on iOS, Android, web, and desktop platforms. This approach cuts development time significantly and makes the entire process more manageable.
Companies no longer need separate teams working on different versions of the same app. A unified codebase means coordinated updates, consistent user experiences, and easier maintenance. Developers write one codebase, which can then be deployed on multiple platforms, resulting in a substantial reduction in the cycle time for development.
For businesses watching their budgets, this translates to real savings. You’re paying for one development cycle instead of two or three. The resources previously split between platform-specific development can now focus on improving features and user experience.
Time is money in business. The faster you can get your app to users, the sooner you can start generating value. Flutter’s hot reload feature accelerates the development process in ways that traditional methods simply can’t match.
Hot reload lets developers see code changes reflected in the app immediately without restarting it. This means developers can experiment with new features, fix bugs, and iterate based on user feedback at a pace that keeps projects moving forward. Teams can test ideas quickly, discard what doesn’t work, and refine what does.
This speed advantage becomes even more pronounced during the testing and refinement phases. Changes that might take hours in a traditional setup can be done in minutes with Flutter. For enterprises operating in fast-moving markets, this agility can be the difference between leading and following.
Budget constraints affect every business decision, and app development is no exception. Flutter helps enterprises stretch their development budgets further without cutting corners on quality.
With Flutter for mobile app development, companies can significantly reduce their overall development costs. The single codebase model means fewer developers needed, shorter timelines, and reduced testing requirements. Maintenance becomes simpler too, as updates roll out across all platforms simultaneously.
According to IBM’s Data Breach Report, data breaches cost businesses an average of $4.45 million per incident in 2024. Flutter’s ability to patch vulnerabilities and deploy updates simultaneously across platforms reduces the window of exposure, helping enterprises protect themselves from costly security incidents.
Companies like FBIP understand these economics. As a leading website designing and development company, they’ve seen firsthand how Flutter helps businesses achieve their digital goals while managing costs effectively.
Performance concerns often stop enterprises from considering cross-platform solutions. Flutter addresses this head-on. Apps built with Flutter 3.10 showed a 20% improvement in rendering speed and a 15% reduction in app size, thanks to ongoing optimizations.
The framework compiles directly to native code, which means apps run smoothly without the interpretation layer that can slow down other cross-platform frameworks. Users get the responsive, fluid experience they expect from native apps, while developers get the productivity benefits of a unified codebase.
Complex animations, smooth transitions, and data-intensive operations all run efficiently in Flutter apps. This makes the framework suitable for demanding enterprise applications that need to handle real-time data, complex workflows, and intensive user interactions.
Enterprise apps come with complicated requirements. They need to integrate with existing systems, handle sensitive data, and scale to support thousands of users. Flutter’s architecture accommodates these demands.
The framework uses a widget-centric approach where every UI element is a widget. This modular design makes code more maintainable and easier to understand. Teams can work on different parts of the app without stepping on each other’s toes.
Flutter supports common architectural patterns like BLoC (Business Logic Components), which helps separate business logic from UI code. This separation makes apps easier to test, maintain, and scale as requirements grow. Large development teams can work efficiently because the code structure remains clear and organized.
Flutter has a war chest of over 4,000 libraries that developers can use to build apps. This extensive ecosystem means teams don’t have to build everything from scratch. Need authentication? There’s a package for that. Want to add analytics? Multiple options exist.
The Flutter community is active and responsive. When developers encounter problems, they can find solutions in forums, documentation, and code examples. This strong support network reduces the learning curve and helps teams solve issues quickly.
Google continues investing in Flutter’s development, regularly releasing updates that add new features and improve performance. This ongoing support gives enterprises confidence that the framework will remain relevant and well-maintained for years to come.
Major companies like BMW, Google Pay, and Credit Agricole Bank have successfully deployed Flutter for large-scale production applications. These aren’t simple apps. They handle complex features, serve millions of users, and meet strict enterprise standards.
Credit Agricole Bank Polska developed a completely new application with many features in just one year using Flutter technology. By 2024, over 1 million customers use their digital channels, demonstrating that Flutter can handle the demands of high-traffic, feature-rich enterprise applications.
According to research, 71.2% of technology leaders agree that Flutter has been ready for enterprise apps over the past three years, while 85% believe Flutter will be even more suitable for large-scale projects in the next two years. This growing confidence among decision-makers reflects Flutter’s proven track record.
Security cannot be an afterthought for enterprises. Flutter provides the tools and capabilities needed to build secure applications that meet regulatory requirements.
The framework supports controlled app distribution through private app stores and Mobile Device Management platforms. This ensures only authorized users can access sensitive enterprise applications. Companies can implement encryption, secure data storage, and other security measures using Flutter’s native capabilities or third-party packages.
When vulnerabilities are discovered, maintaining one codebase makes patching faster and more reliable. Updates can be deployed simultaneously across all platforms, reducing the window of exposure. This unified approach to security maintenance helps enterprises stay compliant and protect sensitive data.
For companies like FBIP, which provides web development and IT services, understanding these security considerations is part of delivering quality solutions that enterprises can trust.
Enterprises don’t operate in isolation. Their apps need to communicate with existing databases, APIs, and legacy systems. Flutter makes these integrations possible through its flexible architecture and extensive package ecosystem.
The framework can work with REST APIs, GraphQL, and other common data exchange formats. It supports integration with cloud services, on-premise systems, and hybrid setups. Teams can gradually incorporate Flutter into existing applications using platform-specific modules when necessary.
This flexibility means enterprises don’t have to replace their entire technology stack to benefit from Flutter. They can introduce Flutter apps that work alongside existing systems, creating a smooth transition path that minimizes disruption.
Flutter-powered apps now account for 16% of the complete app market, a testament to the framework’s growing acceptance and effectiveness. This market share continues expanding as more companies recognize Flutter’s benefits.
Looking ahead, Flutter is well-positioned to incorporate emerging technologies. The framework already supports machine learning integrations through TensorFlow Lite and other libraries. As augmented reality and Internet of Things applications become more common, Flutter’s adaptability will help enterprises stay current with technological trends.
Large organizations increasingly recognize the benefits of Flutter, leading to the development of specialized tools, frameworks, and best practices tailored for enterprise-level app development. This maturing ecosystem makes Flutter an even more attractive option for companies planning their long-term digital strategies.
Transitioning to a new development framework requires planning. Enterprises considering Flutter should start by assessing their current needs and future goals. What platforms do you need to support? What are your performance requirements? How important is time to market?
Teams will need time to learn Dart and understand Flutter’s widget-based approach. The good news is that developers with experience in JavaScript or other C-like languages can pick up Dart relatively quickly. The extensive documentation and active community make the learning process smoother.
Starting with a smaller project or proof of concept lets teams gain experience before committing to larger initiatives. This approach reduces risk and builds confidence in the framework’s capabilities.
Working with experienced development partners like FBIP can accelerate the transition. Their expertise in website designing, development, and mobile app solutions helps businesses make informed decisions about their Flutter adoption strategy.
The shift toward Flutter for mobile app development reflects a broader change in how enterprises approach digital transformation. Companies need solutions that deliver quality quickly without breaking the budget. Flutter meets these needs while providing the flexibility and performance modern applications require.
From single codebase efficiency to hot reload speed, from cost savings to robust security, Flutter offers tangible benefits that directly impact business outcomes. The framework has matured beyond its startup roots to become a reliable choice for enterprise-scale applications.
As more companies share their success stories and the ecosystem continues growing, Flutter’s position in enterprise development will only strengthen. For businesses planning their mobile strategy, now is the right time to consider what Flutter can offer.
Ready to take your mobile app development to the next level? FBIP brings years of experience in web development, mobile solutions, and digital services to help your business succeed. Our team understands the challenges enterprises face and can guide you through every step of your Flutter journey. Connect with FBIP today to discuss how we can bring your app vision to life with cutting-edge technology and expert development services.
Q1: Is Flutter suitable for large enterprise applications with complex requirements?
Yes, Flutter handles complex enterprise applications effectively. The framework supports sophisticated architectural patterns, integrates with existing systems, and scales to serve millions of users. Companies like BMW and Google Pay use Flutter for their production apps, proving it can meet demanding enterprise standards. The widget-based architecture keeps code organized even as apps grow in complexity.
Q2: How does Flutter app development compare in cost to native development?
Flutter typically costs 30-50% less than native development because you maintain one codebase instead of separate iOS and Android versions. You need fewer developers, shorter development timelines, and simplified testing processes. Maintenance costs decrease too since updates deploy simultaneously across platforms. These savings add up significantly over an app’s lifetime without sacrificing quality or performance.
Q3: Can existing native apps be migrated to Flutter?
Yes, you can migrate existing apps to Flutter gradually or completely. The framework supports incremental adoption, letting you replace parts of native apps with Flutter modules step by step. Some companies rewrite their apps entirely in Flutter to take full advantage of its features. The best approach depends on your app’s complexity, business requirements, and timeline constraints.
Q4: What kind of performance can enterprises expect from Flutter apps?
Flutter apps deliver near-native performance because they compile directly to machine code. The framework handles complex animations, real-time data processing, and intensive user interactions smoothly. Recent versions showed 20% improvements in rendering speed and reduced app sizes. For most use cases, users won’t notice any performance difference between Flutter and native apps.
Q5: Does Flutter provide adequate security for handling sensitive enterprise data?
Flutter offers strong security capabilities for enterprise applications. You can implement encryption, secure storage, authentication, and other security measures using native features or trusted packages. The framework supports controlled distribution through private app stores and Mobile Device Management platforms. Single codebase maintenance makes patching vulnerabilities faster across all platforms, reducing security risks for enterprise data.

Mobile app development has changed dramatically over the past few years. Developers now combine Flutter’s cross-platform capabilities with blockchain technology to create decentralized applications that work seamlessly across devices. This shift opens new possibilities for building secure, transparent apps that give users control over their data and digital assets.
Blockchain networks and mobile frameworks like Flutter create a powerful combination. Developers can build apps that run on Ethereum, Solana, or Polygon while maintaining a single codebase. This approach saves time and resources while delivering native-like performance on both Android and iOS platforms.
Traditional app development relies on centralized servers that store and manage user data. Blockchain changes this model completely. When you build a DApp with Flutter, you create applications that interact directly with distributed networks. Smart contracts handle business logic, and users maintain ownership of their information.
Flutter supports multiple blockchain platforms through specialized packages. Developers use web3dart for Ethereum-based networks, while the Solana package handles Solana blockchain interactions. Each blockchain offers different features, transaction speeds, and cost structures that affect your app design decisions.
Flutter brings several strengths to blockchain development. The framework provides hot reload functionality, letting you test blockchain interactions quickly without rebuilding your entire app. You get consistent UI components across platforms, and Flutter’s widget system makes it simple to display complex blockchain data like transaction histories and wallet balances.
Companies like FBIP recognize these advantages and specialize in Flutter development, helping businesses build modern mobile solutions that integrate with emerging technologies.
Building a DApp requires understanding several key elements that work together. Let’s break down each component and see how they fit into your Flutter application.
Smart contracts serve as the backbone of any DApp. These self-executing programs run on blockchain networks and contain the rules for your application. When users interact with your Flutter app, they trigger smart contract functions that process transactions, update states, or transfer tokens.
You can use the web3dart library to interact with blockchain platforms and deploy and execute smart contracts. Smart contracts written in Solidity for Ethereum-based networks define what actions users can take and how the system responds.
Your Flutter app never stores sensitive business logic locally. Everything runs on the blockchain, making it tamper-proof and transparent. Users can verify exactly what happens when they press a button in your app by reading the smart contract code.
Every DApp needs wallet functionality. Wallets store private keys, sign transactions, and manage digital assets. Flutter apps connect to existing wallet providers or implement custom wallet solutions.
Popular libraries like web3dart for Ethereum simplify wallet integration, handling the cryptographic operations required to sign transactions securely. Your app communicates with these wallets through standardized protocols, requesting user approval before executing any blockchain transaction.
Users appreciate when apps support multiple wallet options. Some prefer MetaMask for its widespread adoption, while others use Trust Wallet or WalletConnect for mobile-first experiences. Your Flutter app should accommodate these preferences through flexible integration patterns.
Flutter apps don’t directly access blockchain networks. Instead, they connect through RPC (Remote Procedure Call) endpoints that serve as gateways. These endpoints let your app read blockchain data, submit transactions, and listen for events.
You configure RPC connections in your Flutter project by specifying network URLs. Mainnet connections interact with live blockchains where real money and assets exist. Testnets provide safe environments for development and testing without financial risk.
Network selection affects your app’s performance. Public RPC endpoints work for prototypes but may have rate limits. Production apps often use dedicated RPC providers that offer faster response times and higher reliability.
Creating a DApp involves specific steps that differ from traditional mobile development. Here’s how to get started with your first Flutter blockchain project.
Start by installing Flutter and setting up your IDE. Android Studio and Visual Studio Code both work well for Flutter development. You’ll also need Node.js and npm to install blockchain development tools.
Add the required packages to your Flutter project’s pubspec.yaml file. The web3dart package provides Ethereum integration, while http handles network requests. Install Truffle or Hardhat for smart contract development and testing.
Configure your development blockchain using Ganache, which creates a local Ethereum network. This lets you test transactions without spending real cryptocurrency or waiting for network confirmations.
Your Flutter app interacts with smart contracts through ABI (Application Binary Interface) definitions. The ABI describes available functions, their parameters, and return types. Generate these files when you compile your Solidity contracts.
Load ABI files into your Flutter app using asset loading. Parse the JSON structure to create contract instances that you can call from Dart code. Each contract function becomes a method you invoke with appropriate parameters.
Error handling becomes critical when working with blockchain. Network failures, insufficient gas, or rejected transactions require proper user feedback. Implement try-catch blocks around blockchain calls and provide clear error messages.
Transactions change blockchain state and cost gas fees. Your Flutter app must prepare transactions, get user approval, submit them to the network, and wait for confirmation.
Build transaction objects that specify the contract address, function to call, and parameters. Calculate gas estimates to show users the expected transaction cost. Sign transactions with the user’s private key through their connected wallet.
Monitor transaction status by polling the network or subscribing to transaction events. Show loading indicators while transactions process, and update your UI once confirmations arrive. Users need to know when their actions complete successfully.
Moving beyond basic DApps requires mastering more sophisticated patterns and tools. These techniques help you build production-ready applications.
Blockchain data updates differently than typical REST APIs. You need state management that handles asynchronous updates, pending transactions, and network events. Provider and Riverpod work well for Flutter blockchain apps.
Create state classes that track wallet connection status, network selection, and pending transactions. Update state when blockchain events occur, triggering UI rebuilds that reflect current data. Cache blockchain queries to reduce RPC calls and improve app responsiveness.
Listen to smart contract events to detect state changes. When other users interact with your contract, your app should update automatically. WebSocket connections provide real-time event streams that keep your app synchronized with blockchain state.
Gas fees directly impact user experience. High transaction costs discourage users from interacting with your DApp. Optimize your smart contracts to minimize computational complexity and storage operations.
Batch multiple operations into single transactions when possible. Instead of making three separate token transfers, combine them into one function call. This reduces the overall gas cost and improves efficiency.
Let users customize gas prices based on transaction urgency. Show current network gas prices and let users choose between fast, standard, and slow processing. Display the estimated fee in familiar currency denominations alongside native token amounts.
Security takes on new dimensions in blockchain development. Your Flutter app handles private keys and valuable assets, making it a target for attacks. Implement security best practices at every layer.
Never store private keys in plain text or app preferences. Use secure storage solutions provided by the platform, or better yet, let dedicated wallet apps manage keys. Your app should only request signatures, never expose raw private keys.
Validate all user inputs before sending them to smart contracts. Malicious data could trigger unintended contract behavior or drain user funds. Implement input sanitization and range checks in your Flutter code.
Audit your smart contracts before deployment. Professional security reviews catch vulnerabilities that could compromise your users. Even small mistakes in contract code can lead to permanent loss of funds.
Flutter blockchain development powers diverse applications across industries. Understanding practical use cases helps you identify opportunities for your own projects.
Decentralized finance applications let users trade, lend, and borrow without intermediaries. Flutter apps provide intuitive interfaces for complex DeFi protocols. Users can swap tokens, provide liquidity, or stake assets through mobile-friendly experiences.
Payment apps built with Flutter and blockchain offer global transfers without traditional banking infrastructure. Users send money across borders with lower fees and faster settlement times. The combination of Flutter’s UI capabilities and blockchain’s transparency creates trustworthy financial tools.
NFT platforms require responsive interfaces that display digital art and collectibles. Flutter’s rich widget library makes it easy to build galleries, detail views, and trading interfaces. Connect to NFT smart contracts to handle minting, transferring, and marketplace functions.
Gaming applications integrate NFTs as in-game assets that players truly own. Flutter handles the game interface while blockchain manages item ownership and trading. This creates new economic models where players can buy, sell, and trade game items freely.
Track products from manufacture to delivery using Flutter apps that read blockchain records. Each step in the supply chain creates an immutable record that users can verify. Flutter interfaces make complex supply chain data accessible and understandable.
Certificate verification apps use blockchain to prevent fraud. Educational credentials, professional licenses, or product authenticity certificates stored on-chain become instantly verifiable through Flutter mobile apps.
Different blockchains offer different trade-offs. Your choice affects transaction costs, speed, and available features.
Ethereum remains the most established platform with extensive tooling and community support. Network congestion can cause high gas fees during peak times. Layer 2 solutions like Polygon provide Ethereum compatibility with lower costs and faster transactions.
Solana offers high throughput and low transaction fees. The network processes thousands of transactions per second, making it suitable for high-frequency applications. Solana’s programming model differs from Ethereum, requiring different development approaches.
Binance Smart Chain provides EVM compatibility with faster block times. Many developers choose BSC for its balance between cost, speed, and compatibility with Ethereum tooling.
Complex blockchain projects benefit from experienced development teams. Companies like FBIP bring expertise in both Flutter development and blockchain integration, helping you avoid common pitfalls and implement best practices.
Professional developers understand the nuances of different blockchain platforms. They can recommend the right network for your use case and implement efficient integration patterns. This expertise accelerates development and produces more reliable applications.
When evaluating development partners, look for portfolios that demonstrate blockchain experience. Ask about their approach to security, testing, and ongoing maintenance. Quality Flutter blockchain development requires knowledge of both mobile development and distributed systems.
Thorough testing prevents costly mistakes in production. Blockchain applications require testing at multiple levels.
Test smart contracts extensively before deployment. Write unit tests that verify each contract function behaves correctly. Use test networks to validate contract interactions under realistic conditions.
Security testing catches vulnerabilities that could compromise user funds. Run automated security scanners and conduct manual code reviews. Consider professional security audits for contracts handling significant value.
Test your Flutter app’s blockchain integration using mock contracts and test networks. Verify that transaction submission, status monitoring, and error handling work correctly. Test edge cases like network failures and rejected transactions.
Conduct user acceptance testing with real users on testnets. Gather feedback on the user experience when connecting wallets, signing transactions, and viewing blockchain data. Iterate based on this feedback before mainnet launch.
Deploy smart contracts to mainnet after thorough testing. Use contract verification services to publish your source code, building user trust. Initialize contract parameters carefully, as many settings become immutable after deployment.
Release your Flutter app through standard app stores. Include clear documentation about network requirements and wallet setup. Provide customer support channels for users encountering blockchain-related issues.
The intersection of Flutter and blockchain continues evolving. Several trends shape the future of DApp development.
Cross-chain applications that work across multiple blockchains become increasingly common. Flutter’s single codebase approach aligns well with multi-chain strategies. Developers build once and support Ethereum, Solana, and other networks simultaneously.
Layer 2 scaling solutions improve blockchain performance while maintaining security. Flutter apps can target these faster, cheaper networks without sacrificing Ethereum’s security guarantees. This makes DApps more accessible to mainstream users.
Improved wallet standards simplify authentication and transaction signing. WalletConnect and similar protocols provide consistent experiences across different wallet providers. Flutter apps benefit from these standardized integration points.
Building DApps requires specialized knowledge that combines mobile development expertise with blockchain understanding. FBIP offers comprehensive Flutter development services, including emerging technologies like blockchain integration. Their team stays current with the latest development practices and can guide your project from concept to deployment.
Whether you’re creating a DeFi platform, NFT marketplace, or supply chain solution, professional development support ensures your app meets security standards and delivers excellent user experiences. FBIP’s experience with Flutter development positions them to help you navigate the technical challenges of blockchain integration.
Ready to build your next decentralized application? Connect with FBIP to discuss your Flutter blockchain project and learn how professional development support can bring your vision to life. Visit https://fbipool.com/ to explore their Flutter development services and start your DApp journey today.
What are the main benefits of using Flutter for blockchain app development?
Flutter lets you build blockchain applications for both Android and iOS from a single codebase, cutting development time and costs in half. The framework’s hot reload feature speeds up testing of blockchain interactions, and its rich widget library creates polished interfaces for displaying complex blockchain data like transactions and wallet balances.
Which blockchain platforms work best with Flutter applications?
Ethereum and its compatible networks work particularly well with Flutter through the web3dart package. Solana offers another strong option with dedicated Flutter packages. Binance Smart Chain and Polygon provide EVM compatibility with lower transaction costs, making them popular choices for cost-sensitive applications that need Ethereum’s ecosystem.
How secure are Flutter-based decentralized applications?
Flutter DApps can be highly secure when developers follow best practices. Never store private keys in the app itself; instead, integrate with established wallet providers that handle key management. Always validate inputs before blockchain interactions, audit smart contracts thoroughly, and use secure storage mechanisms for sensitive data. Security depends more on implementation than the Flutter framework itself.
What development tools do I need to build Flutter blockchain apps?
You’ll need the Flutter SDK, an IDE like Android Studio or Visual Studio Code, and Node.js for blockchain tooling. Install packages like web3dart for Ethereum integration. Use Truffle or Hardhat for smart contract development, and run Ganache for local blockchain testing. These tools create a complete development environment for building and testing DApps.
How much does it cost to develop a Flutter blockchain application?
Development costs vary widely based on complexity, features, and blockchain choice. Simple wallet apps might cost less, while complex DeFi platforms with multiple smart contracts require larger investments. Factor in smart contract audits, RPC service subscriptions, and ongoing maintenance. Network choice affects operational costs, with Ethereum gas fees being higher than alternatives like Polygon or Solana.

Mobile app security has become a non-negotiable priority for developers and businesses. With cyber threats growing more sophisticated each day, protecting user data in your Flutter application demands attention and action. Cybercrime damages are projected to exceed $10.5 trillion annually by 2025, making security measures a business necessity rather than an optional feature.
Flutter security goes beyond basic password protection. It encompasses everything from data encryption to secure authentication methods. Whether you’re building a fintech platform, healthcare app, or e-commerce solution, understanding how to protect sensitive information can mean the difference between user trust and a data breach that damages your reputation.
This guide walks you through proven strategies to strengthen your Flutter app’s defenses. You’ll discover practical techniques for safeguarding user data, securing network communications, and preventing common vulnerabilities that attackers exploit.
Mobile applications handle increasingly sensitive information. Banking details, health records, personal communications, and authentication tokens all flow through apps daily. A single security flaw can expose thousands of users to identity theft, financial fraud, or privacy violations.
Flutter’s cross-platform nature brings unique security considerations. Code compiled for iOS and Android must protect data consistently across different operating systems. Each platform has native security features, but developers need to implement them correctly.
User trust drives app success. People abandon apps after security incidents, and negative reviews spread quickly. Conversely, apps with strong security reputations attract users who value their privacy. Companies like FBIP understand that security isn’t just technical debt, it’s a competitive advantage that influences user retention and growth.
Before securing your app, you need to know what threats exist. Common vulnerabilities in Flutter applications include insecure data storage, weak authentication, unencrypted network traffic, and reverse engineering attempts.
Insecure data storage happens when developers save sensitive information in plain text or use standard storage methods for confidential data. Attackers with device access can extract API keys, user credentials, and personal information stored improperly.
Man-in-the-middle attacks target network communications. Without proper encryption, attackers intercept data traveling between your app and backend servers. They can read, modify, or steal information during transmission.
Code obfuscation weaknesses allow reverse engineering. Skilled attackers decompile Flutter apps to understand logic, find security flaws, or extract hardcoded secrets. Apps without code protection reveal their inner workings to malicious actors.
Protecting data at rest starts with choosing the right storage solution. Flutter developers should never store sensitive information in shared preferences or standard file storage. These methods leave data vulnerable to extraction.
The flutter_secure_storage package provides encrypted storage for sensitive data. It uses Keychain on iOS and EncryptedSharedPreferences on Android. This package encrypts keys and values before storing them, adding a security layer that standard storage lacks.
Here’s what secure storage protects:
Runtime secrets require special handling. Debug builds should never contain production API keys or database credentials. Use environment variables and build configurations to separate development secrets from production values. This practice prevents accidental exposure when sharing code or during testing phases.
Biometric authentication adds another security layer. Flutter’s local_auth package enables fingerprint and face recognition features. Users appreciate biometric options because they balance security with convenience.
All network traffic must use HTTPS. Never send sensitive data over unencrypted HTTP connections. SSL/TLS encryption protects data during transmission and verifies server authenticity.
Certificate pinning strengthens HTTPS security. Standard SSL connections trust any valid certificate, but certificate pinning ensures your app only accepts specific certificates. This prevents man-in-the-middle attacks even with compromised certificate authorities.
API security requires authentication tokens rather than embedded credentials. Implement OAuth 2.0 or similar protocols for user authentication. Tokens expire and can be revoked, unlike hardcoded passwords that remain permanent vulnerabilities.
Request validation happens on both client and server sides. Validate input formats, check data types, and sanitize user input before processing. These checks prevent injection attacks and data corruption.
Code obfuscation makes reverse engineering difficult. Flutter’s built-in obfuscation renames classes, functions, and variables during compilation. Enable obfuscation for release builds using the –obfuscate flag with the –split-debug-info parameter.
Obfuscation doesn’t guarantee complete protection, but it raises the bar for attackers. Combined with other security measures, it creates multiple obstacles that discourage most threats.
Root and jailbreak detection protect against compromised devices. Rooted Android devices and jailbroken iPhones bypass operating system security features. Apps handling sensitive data should detect these conditions and either warn users or restrict functionality.
Debug mode detection prevents running production apps with debugging enabled. Debug builds expose logging information and allow runtime modifications. Check for debug mode and disable sensitive features when detected.
Strong authentication methods form your first defense line. Multi-factor authentication (MFA) combines something users know (password) with something they have (phone) or something they are (biometric). MFA dramatically reduces unauthorized access risks.
Password policies matter despite widespread password fatigue. Enforce minimum length requirements, character variety, and regular password updates. Consider passwordless authentication options like magic links or biometric-only access for improved security.
Token management requires careful attention. Store tokens securely, implement proper expiration, and refresh tokens before they expire. Never store refresh tokens alongside access tokens, and always transmit tokens over encrypted connections.
Firebase Authentication and similar services offer robust authentication frameworks. These platforms handle security concerns like token management, session handling, and password storage. FBIP often recommends Firebase for projects requiring reliable authentication without building everything from scratch.
Flutter framework updates include security patches. Keep your Flutter SDK current to benefit from the latest security improvements. Outdated Flutter versions may contain known vulnerabilities that attackers exploit.
Package dependencies create security risks. Third-party packages might contain vulnerabilities or malicious code. Audit dependencies regularly, review package permissions, and prefer packages with active maintenance and security records.
Automated scanning tools identify vulnerabilities in your code and dependencies. Tools like Snyk, OWASP Dependency-Check, and GitHub’s security alerts flag known issues. Address critical vulnerabilities immediately and monitor for new threats.
Security testing should happen throughout development, not just before release. Penetration testing, code reviews, and vulnerability assessments catch issues early when they’re easier to fix. FBIP incorporates security testing into development workflows to catch problems before they reach production.
Fintech applications require heightened security measures. Financial apps must comply with regulations like PCI DSS and protect transaction data rigorously. Implement transaction signing, fraud detection algorithms, and secure payment gateways.
Healthcare apps handle protected health information subject to HIPAA and similar regulations. Encrypt all health data, implement audit logging, and restrict access based on user roles. Privacy isn’t optional in healthcare, it’s legally mandated.
E-commerce platforms protect customer payment information and personal details. Secure checkout processes, encrypt stored payment methods, and implement fraud prevention measures. Customer confidence drives online purchases, and security breaches destroy that confidence quickly.
Security doesn’t end at deployment. Monitoring tools track suspicious activities, failed authentication attempts, and unusual data access patterns. Real-time alerts enable quick responses to potential security incidents.
Logging practices balance security with privacy. Log security-relevant events like authentication attempts and data access, but avoid logging sensitive information itself. Logs help investigate incidents without creating new vulnerabilities.
Incident response plans prepare teams for security breaches. Document procedures for containing breaches, notifying affected users, and restoring services. Quick, organized responses minimize damage when incidents occur.
Security by design incorporates protection measures from project inception. Requirements should include security specifications, and architecture reviews should identify potential vulnerabilities before coding begins.
Developer training keeps teams current with security practices. Regular workshops, security champions within teams, and code review processes spread security knowledge. Every developer should understand basic security principles.
Companies like FBIP recognize that security isn’t a single person’s responsibility. Development teams, QA engineers, and project managers all contribute to secure applications. Building security culture ensures consistent attention to protection measures throughout projects.
Securing Flutter applications requires expertise, time, and vigilance. While these best practices provide a foundation, professional development partners bring specialized knowledge and experience that accelerates secure app development.
FBIP offers Flutter development services with security built into every project phase. From initial planning through deployment and maintenance, security considerations guide development decisions. The team stays current with emerging threats and evolving best practices to protect client applications.
Whether you’re starting a new Flutter project or enhancing existing app security, expert guidance helps avoid costly mistakes and potential breaches. Professional developers understand the nuances of platform-specific security features and cross-platform challenges.
Ready to build or secure your Flutter application? Connect with FBIP to discuss your project requirements and learn how professional development services protect your app and your users. Visit https://fbipool.com/ to explore services and start a conversation about your mobile app security needs.
What is the most secure way to store sensitive data in Flutter apps?
The flutter_secure_storage package provides the most secure storage option for sensitive data. It uses platform-specific encryption with iOS Keychain and Android EncryptedSharedPreferences. This approach encrypts both keys and values, protecting information like authentication tokens, API keys, and user credentials even if someone gains device access.
How often should I update my Flutter app for security purposes?
Update your Flutter app whenever new SDK versions release with security patches, typically every few months. Check dependencies monthly for vulnerabilities using automated scanning tools. Critical security issues require immediate updates regardless of your regular release schedule. Staying current with updates prevents attackers from exploiting known vulnerabilities in outdated versions.
Can Flutter apps be reverse engineered, and how do I prevent it?
Yes, Flutter apps can be reverse engineered by skilled attackers. Prevent this by enabling code obfuscation during release builds using the obfuscate flag. Combine obfuscation with root detection, certificate pinning, and never hardcode sensitive information. While complete protection is impossible, these measures make reverse engineering significantly more difficult and time-consuming for attackers.
What authentication method provides the best security for Flutter apps?
Multi-factor authentication combined with biometric verification offers the strongest security. This approach requires users to provide something they know, something they have, and something they are. For practical implementation, combine secure password requirements with biometric authentication using Flutter’s local_auth package. Consider Firebase Authentication or OAuth providers for robust, tested authentication frameworks.
How do I secure API communications in my Flutter application?
Always use HTTPS for all network communications to encrypt data in transit. Implement certificate pinning to prevent man-in-the-middle attacks by accepting only specific certificates. Use OAuth tokens rather than embedded credentials, validate all API responses, and implement proper error handling that doesn’t expose sensitive information. Never trust client-side validation alone, always validate data on your backend servers.
 Optimized by Seraphinite Accelerator
