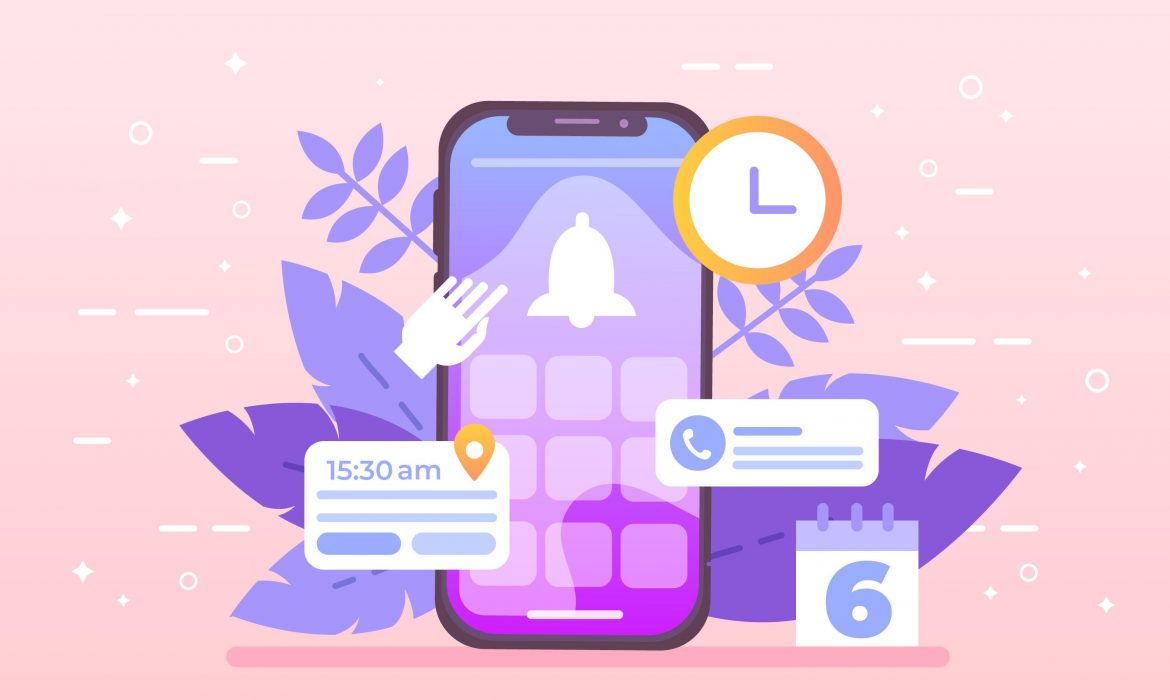
Flutter Push Notifications with Firebase: Step-by-Step Tutorial
Ever opened an app and wondered how it magically knows to buzz your phone with the perfect message at just the right moment? That’s the power of Flutter Firebase push notifications working behind the scenes.
Picture this: your user just abandoned their shopping cart, and 30 minutes later, they get a gentle nudge about those items waiting for them. Or imagine sending breaking news alerts that actually get opened because they’re timed perfectly.
Push notifications aren’t just alerts – they’re your direct line to user engagement, retention, and ultimately, business success.
In this tutorial, we’ll walk through implementing Firebase Cloud Messaging (FCM) in Flutter from scratch, covering everything from basic setup to advanced features like background notifications and deep linking.
What Are Flutter Firebase Push Notifications?
Firebase Cloud Messaging Flutter integration allows you to send targeted messages to users across Android and iOS devices, whether your app is running in the foreground, background, or completely closed.
Think of FCM as your app’s personal messenger service. It handles the heavy lifting of message delivery while you focus on crafting the perfect user experience.
Here’s what makes FCM special:
- Free and reliable: Google’s infrastructure ensures your messages reach users
- Cross-platform: One codebase works for both Android and iOS
- Smart delivery: Messages arrive even when your app isn’t running
- Advanced targeting: Send messages to specific users, groups, or topics
Prerequisites and Setup Requirements
Before diving into FCM integration in Flutter, let’s make sure you have everything ready.
Essential Requirements:
- Flutter SDK (2.0 or higher)
- Firebase project (free tier works perfectly)
- Android Studio or Xcode for platform-specific setup
- Physical devices for testing (push notifications don’t work on simulators)
Firebase Project Setup:
- Head to the Firebase Console
- Click “Create a project” or select an existing one
- Enable Cloud Messaging in the project settings
- Download the configuration files (we’ll use these shortly)
Pro tip: Create a test project first. This way, you can experiment freely without affecting any production apps.
Installing Firebase Messaging Package
Let’s get the Firebase messaging package setup sorted. This is where the magic begins.
Step 1: Add Dependencies
Open your pubspec.yaml file and add these packages:
dependencies:
flutter:
sdk: flutter
firebase_core: ^2.24.2
firebase_messaging: ^14.7.10
flutter_local_notifications: ^16.3.0
Run flutter pub get to install everything.
Step 2: Initialize Firebase Core
In your main.dart file, initialize Firebase before running your app:
import ‘package:firebase_core/firebase_core.dart’;
import ‘package:firebase_messaging/firebase_messaging.dart’;
void main() async {
WidgetsFlutterBinding.ensureInitialized();
await Firebase.initializeApp();
runApp(MyApp());
}
This ensures Firebase is ready before your app starts handling notifications.
Android Configuration and Notification Channels
Android notification channels Flutter setup requires some platform-specific configuration. Don’t worry – it’s simpler than it sounds.
Firebase Configuration:
- Download google-services.json from your Firebase project
- Place it in android/app/ directory
- Update android/build.gradle:
dependencies {
classpath ‘com.google.gms:google-services:4.3.15’
}
- Update android/app/build.gradle:
apply plugin: ‘com.google.gms.google-services’
android {
compileSdkVersion 33
defaultConfig {
minSdkVersion 21
targetSdkVersion 33
}
}
Android Notification Channels Flutter Setup:
Create notification channels for Android 8.0+ compatibility:
import ‘package:flutter_local_notifications/flutter_local_notifications.dart’;
class NotificationService {
static final FlutterLocalNotificationsPlugin _notifications =
FlutterLocalNotificationsPlugin();
static Future<void> initialize() async {
const AndroidInitializationSettings androidSettings =
AndroidInitializationSettings(‘@drawable/ic_notification’);
const InitializationSettings settings = InitializationSettings(
android: androidSettings,
);
await _notifications.initialize(settings);
// Create notification channel
const AndroidNotificationChannel channel = AndroidNotificationChannel(
‘high_importance_channel’,
‘High Importance Notifications’,
description: ‘This channel is used for important notifications.’,
importance: Importance.high,
);
await _notifications.resolvePlatformSpecificImplementation<
AndroidFlutterLocalNotificationsPlugin>()?.createNotificationChannel(channel);
}
}
This creates a dedicated channel for your high-priority notifications.
iOS Setup and Notification Permissions
iOS notification setup Flutter has its own quirks, but the payoff is worth it.
Firebase Configuration:
- Download GoogleService-Info.plist from Firebase
- Add it to ios/Runner/ in Xcode
- Ensure it’s included in your target
Permission Handling:
iOS requires explicit permission for notifications:
class PermissionService {
static Future<bool> requestNotificationPermissions() async {
FirebaseMessaging messaging = FirebaseMessaging.instance;
NotificationSettings settings = await messaging.requestPermission(
alert: true,
badge: true,
sound: true,
carPlay: false,
criticalAlert: false,
provisional: false,
);
return settings.authorizationStatus == AuthorizationStatus.authorized;
}
}
iOS-Specific Configuration:
Add these capabilities in Xcode:
- Push Notifications
- Background Modes (Background fetch, Remote notifications)
Update ios/Runner/AppDelegate.swift:
import Flutter
import UIKit
import Firebase
@UIApplicationMain
@objc class AppDelegate: FlutterAppDelegate {
override func application(
_ application: UIApplication,
didFinishLaunchingWithOptions launchOptions: [UIApplication.LaunchOptionsKey: Any]?
) -> Bool {
FirebaseApp.configure()
GeneratedPluginRegistrant.register(with: self)
return super.application(application, didFinishLaunchingWithOptions: launchOptions)
}
}
Handling Flutter Notification Permissions
Flutter notification permissions are crucial for user experience. Nobody likes apps that demand permissions without explanation.
Smart Permission Strategy:
class SmartPermissions {
static Future<void> requestWithContext(BuildContext context) async {
// Show explanation dialog first
bool shouldRequest = await showDialog<bool>(
context: context,
builder: (BuildContext context) {
return AlertDialog(
title: Text(‘Stay Updated!’),
content: Text(‘Get notified about new features, updates, and special offers.’),
actions: [
TextButton(
onPressed: () => Navigator.of(context).pop(false),
child: Text(‘Not Now’),
),
TextButton(
onPressed: () => Navigator.of(context).pop(true),
child: Text(‘Enable’),
),
],
);
},
) ?? false;
if (shouldRequest) {
await PermissionService.requestNotificationPermissions();
}
}
}
This approach explains the value before asking for permission, leading to higher acceptance rates.
Foreground Notification Handling
Foreground notification handling determines how your app responds when it’s actively being used.
Setting Up Foreground Listeners:
class ForegroundNotificationHandler {
static void initialize() {
FirebaseMessaging.onMessage.listen((RemoteMessage message) {
print(‘Received foreground message: ${message.messageId}’);
// Show local notification
_showLocalNotification(message);
// Update UI or navigate
_handleNotificationAction(message);
});
}
static void _showLocalNotification(RemoteMessage message) async {
const AndroidNotificationDetails androidDetails = AndroidNotificationDetails(
‘high_importance_channel’,
‘High Importance Notifications’,
channelDescription: ‘This channel is used for important notifications.’,
importance: Importance.high,
priority: Priority.high,
icon: ‘@drawable/ic_notification’,
);
const NotificationDetails details = NotificationDetails(
android: androidDetails,
);
await FlutterLocalNotificationsPlugin().show(
message.hashCode,
message.notification?.title,
message.notification?.body,
details,
payload: message.data.toString(),
);
}
}
This ensures users see notifications even when your app is open.
Background and Terminated State Notifications
Flutter background notifications work differently than foreground notifications. The system handles delivery, but you control the response.
Background Message Handler:
@pragma(‘vm:entry-point’)
Future<void> firebaseMessagingBackgroundHandler(RemoteMessage message) async {
await Firebase.initializeApp();
print(‘Handling background message: ${message.messageId}’);
// Process data or update local storage
await _processBackgroundData(message);
}
Future<void> _processBackgroundData(RemoteMessage message) async {
// Example: Update local database
if (message.data.containsKey(‘user_action’)) {
await LocalStorage.updateUserAction(message.data[‘user_action’]);
}
}
// Register the handler in main.dart
void main() async {
WidgetsFlutterBinding.ensureInitialized();
await Firebase.initializeApp();
FirebaseMessaging.onBackgroundMessage(firebaseMessagingBackgroundHandler);
runApp(MyApp());
}
Handling App Launch from Notification:
class NotificationLaunchHandler {
static Future<void> handleInitialMessage() async {
RemoteMessage? initialMessage = await FirebaseMessaging.instance.getInitialMessage();
if (initialMessage != null) {
_handleMessageNavigation(initialMessage);
}
}
static void _handleMessageNavigation(RemoteMessage message) {
// Navigate to specific screen based on notification data
if (message.data[‘screen’] == ‘product_detail’) {
NavigationService.navigateToProduct(message.data[‘product_id’]);
}
}
}
Customizing Flutter Notification Icons and Appearance
Flutter notification icons customization can significantly boost user engagement. A well-designed notification stands out in a crowded notification panel.
Android Icon Setup:
- Create notification icons in android/app/src/main/res/drawable/
- Use different sizes: drawable-mdpi, drawable-hdpi, drawable-xhdpi, etc.
- Keep icons monochrome with transparent backgrounds
Custom Notification Styling:
class NotificationStyling {
static const AndroidNotificationDetails richNotification = AndroidNotificationDetails(
‘rich_channel’,
‘Rich Notifications’,
channelDescription: ‘Styled notifications with images and actions’,
importance: Importance.high,
priority: Priority.high,
icon: ‘@drawable/custom_icon’,
color: Color(0xFF2196F3),
ledColor: Color(0xFF2196F3),
ledOnMs: 1000,
ledOffMs: 500,
enableVibration: true,
vibrationPattern: Int64List.fromList([0, 1000, 500, 1000]),
groupKey: ‘app_notifications’,
setAsGroupSummary: true,
);
static Future<void> showStyledNotification(String title, String body) async {
const NotificationDetails details = NotificationDetails(
android: richNotification,
);
await FlutterLocalNotificationsPlugin().show(
DateTime.now().millisecondsSinceEpoch ~/ 1000,
title,
body,
details,
);
}
}
iOS Badge Management:
class BadgeManager {
static Future<void> updateBadgeCount(int count) async {
await FirebaseMessaging.instance.setAutoInitEnabled(true);
// Badge count is handled automatically by FCM on iOS
// For custom logic, use flutter_local_notifications
}
static Future<void> clearBadge() async {
await FlutterLocalNotificationsPlugin().cancelAll();
}
}
Deep Linking with Notifications
Deep linking with notifications transforms simple alerts into powerful user journey triggers.
Setting Up Deep Links:
class DeepLinkHandler {
static void initialize() {
// Handle notification taps when app is running
FirebaseMessaging.onMessageOpenedApp.listen((RemoteMessage message) {
_processDeepLink(message.data);
});
// Handle app launch from notification
_handleInitialMessage();
}
static void _processDeepLink(Map<String, dynamic> data) {
String? route = data[‘route’];
String? productId = data[‘product_id’];
String? userId = data[‘user_id’];
switch (route) {
case ‘product’:
NavigationService.navigateToProduct(productId);
break;
case ‘profile’:
NavigationService.navigateToProfile(userId);
break;
case ‘chat’:
NavigationService.navigateToChat(data[‘chat_id’]);
break;
default:
NavigationService.navigateToHome();
}
}
static Future<void> _handleInitialMessage() async {
RemoteMessage? initialMessage = await FirebaseMessaging.instance.getInitialMessage();
if (initialMessage != null) {
_processDeepLink(initialMessage.data);
}
}
}
Advanced Navigation Logic:
class NavigationService {
static final GlobalKey<NavigatorState> navigatorKey = GlobalKey<NavigatorState>();
static void navigateToProduct(String? productId) {
if (productId != null) {
navigatorKey.currentState?.pushNamed(‘/product’, arguments: {‘id’: productId});
}
}
static void navigateToProfile(String? userId) {
if (userId != null) {
navigatorKey.currentState?.pushNamed(‘/profile’, arguments: {‘userId’: userId});
}
}
}
Grouping Notifications in Flutter
Grouping notifications in Flutter prevents notification spam and improves user experience.
Android Notification Grouping:
class NotificationGrouping {
static const String GROUP_KEY = ‘app_notifications’;
static int notificationId = 0;
static Future<void> showGroupedNotification(
String title,
String body,
String category
) async {
notificationId++;
const AndroidNotificationDetails androidDetails = AndroidNotificationDetails(
‘grouped_channel’,
‘Grouped Notifications’,
channelDescription: ‘Notifications that can be grouped together’,
importance: Importance.high,
priority: Priority.high,
groupKey: GROUP_KEY,
icon: ‘@drawable/ic_notification’,
);
const NotificationDetails details = NotificationDetails(
android: androidDetails,
);
// Show individual notification
await FlutterLocalNotificationsPlugin().show(
notificationId,
title,
body,
details,
);
// Show group summary if needed
if (notificationId > 1) {
await _showGroupSummary(category);
}
}
static Future<void> _showGroupSummary(String category) async {
const AndroidNotificationDetails summaryDetails = AndroidNotificationDetails(
‘grouped_channel’,
‘Grouped Notifications’,
channelDescription: ‘Summary of grouped notifications’,
importance: Importance.high,
priority: Priority.high,
groupKey: GROUP_KEY,
setAsGroupSummary: true,
icon: ‘@drawable/ic_notification’,
);
const NotificationDetails summaryNotificationDetails = NotificationDetails(
android: summaryDetails,
);
await FlutterLocalNotificationsPlugin().show(
0, // Use 0 for summary
‘$category Updates’,
‘You have $notificationId new notifications’,
summaryNotificationDetails,
);
}
}
Firebase Analytics and Notification Tracking
Notification analytics Firebase helps you understand what works and what doesn’t.
Setting Up Analytics Tracking:
import ‘package:firebase_analytics/firebase_analytics.dart’;
class NotificationAnalytics {
static final FirebaseAnalytics _analytics = FirebaseAnalytics.instance;
static Future<void> trackNotificationReceived(RemoteMessage message) async {
await _analytics.logEvent(
name: ‘notification_received’,
parameters: {
‘message_id’: message.messageId ?? ‘unknown’,
‘title’: message.notification?.title ?? ‘no_title’,
‘campaign’: message.data[‘campaign’] ?? ‘default’,
‘timestamp’: DateTime.now().millisecondsSinceEpoch,
},
);
}
static Future<void> trackNotificationOpened(RemoteMessage message) async {
await _analytics.logEvent(
name: ‘notification_opened’,
parameters: {
‘message_id’: message.messageId ?? ‘unknown’,
‘action’: message.data[‘action’] ?? ‘open_app’,
‘screen’: message.data[‘screen’] ?? ‘home’,
},
);
}
static Future<void> trackNotificationDismissed(String messageId) async {
await _analytics.logEvent(
name: ‘notification_dismissed’,
parameters: {
‘message_id’: messageId,
‘timestamp’: DateTime.now().millisecondsSinceEpoch,
},
);
}
}
Performance Monitoring:
class NotificationPerformance {
static Future<void> measureDeliveryTime(RemoteMessage message) async {
int sentTime = int.tryParse(message.data[‘sent_timestamp’] ?? ‘0’) ?? 0;
int receivedTime = DateTime.now().millisecondsSinceEpoch;
int deliveryTime = receivedTime – sentTime;
await FirebaseAnalytics.instance.logEvent(
name: ‘notification_delivery_time’,
parameters: {
‘delivery_time_ms’: deliveryTime,
‘message_type’: message.data[‘type’] ?? ‘general’,
},
);
}
}
Testing Push Notifications
Testing is crucial for ensuring your notifications work flawlessly across different scenarios.
Firebase Console Testing:
- Go to Firebase Console → Cloud Messaging
- Click “Send your first message”
- Enter title, text, and target (use your FCM token)
- Test different scenarios: foreground, background, terminated
Device Token Management:
class TokenManager {
static Future<String?> getToken() async {
try {
String? token = await FirebaseMessaging.instance.getToken();
print(‘FCM Token: $token’);
return token;
} catch (e) {
print(‘Error getting FCM token: $e’);
return null;
}
}
static void listenToTokenChanges() {
FirebaseMessaging.instance.onTokenRefresh.listen((String token) {
print(‘Token refreshed: $token’);
// Send updated token to your server
_sendTokenToServer(token);
});
}
static Future<void> _sendTokenToServer(String token) async {
// Implement your server communication logic
// This is crucial for maintaining accurate user targeting
}
}
How FBIP Enhances Your Flutter Development Experience
When it comes to implementing complex features like Flutter Firebase push notifications, having experienced developers makes all the difference.
FBIP brings years of Flutter development expertise to the table, specializing in creating robust, scalable mobile applications that keep users engaged.
Unlike generic development shops, FBIP understands the nuances of Firebase integration and mobile user experience. Their team has implemented push notification systems for e-commerce apps, social platforms, and business applications across various industries.
What sets FBIP apart is their end-to-end approach. They don’t just code the technical implementation – they help you design notification strategies that actually convert users and drive business results.
Their portfolio includes successful Flutter apps with sophisticated notification systems that handle everything from real-time chat messages to complex e-commerce workflows.
Whether you’re building your first Flutter app or scaling an existing one, FBIP’s expertise in Firebase integration, performance optimization, and user experience design ensures your push notification system works flawlessly from day one.
Their clients consistently praise their ability to deliver complex features on time while maintaining clean, maintainable code that scales with business growth.
Conclusion
Implementing Flutter Firebase push notifications transforms your app from a static tool into a dynamic, engaging platform that keeps users coming back.
We’ve covered everything from basic FCM integration to advanced features like deep linking, notification grouping, and analytics tracking.
The key to success lies in thoughtful implementation – requesting permissions gracefully, crafting relevant messages, and providing seamless user experiences across foreground, background, and terminated states.
Remember to test thoroughly on both Android and iOS devices, monitor your notification performance through Firebase Analytics, and continuously optimize based on user engagement metrics.
Start with the basics, then gradually implement advanced features as your app grows. Your users will appreciate the thoughtful notifications that add real value to their experience.
Ready to implement Flutter Firebase push notifications that actually engage your users? The techniques in this guide provide a solid foundation for building notification systems that drive results.
Ready to build Flutter apps with powerful push notification systems? Contact FBIP for expert Flutter development services that turn your mobile app ideas into engaging, notification-driven user experiences.
Frequently Asked Questions
Q: Why aren’t my push notifications working on iOS simulators?
Push notifications require physical devices with valid provisioning profiles and APNs certificates. iOS simulators don’t support push notifications, so always test on real devices during development.
Q: How do I handle notification permissions that were previously denied?
Once denied, you can’t programmatically re-request permissions. Direct users to device settings or show in-app explanations about enabling notifications manually through Settings → Your App → Notifications.
Q: What’s the difference between data and notification messages in Firebase?
Notification messages display automatically when the app is in background, while data messages always trigger your app code. Use data messages for custom handling and notification messages for simple alerts.
Q: How can I schedule local notifications instead of server-sent ones?
Use the flutter_local_notifications plugin with scheduling features. Create notifications locally based on user actions, time zones, or app events without requiring server infrastructure.
Q: Why do my background notifications sometimes not appear immediately?
Android and iOS implement battery optimization and doze modes that can delay notification delivery. This is normal behavior designed to preserve battery life and improve user experience.
How to Handle App Navigation in Flutter: GoRouter vs Navigator 2.0
Ever stared at your Flutter app wondering why navigation feels like solving a Rubik’s cube blindfolded? You’re not alone. Flutter app navigation can make even experienced developers scratch their heads, especially when choosing between GoRouter and Navigator 2.0.
Think of it this way: navigation is like the roads in your city. You need clear paths, proper signage, and the ability to get from point A to point B without getting lost. In Flutter, this translates to smooth user experiences, proper state management, and URL handling that actually works.
Let’s dive into the two main approaches and figure out which one fits your project like a glove.
Understanding Flutter Navigation Fundamentals
Before we jump into the GoRouter vs Navigator 2.0 debate, let’s get our bearings straight.
Flutter navigation has evolved from the simple Navigator.push() and Navigator.pop() methods to more sophisticated systems that handle complex scenarios. The old Navigator 1.0 worked great for simple apps, but struggled with things like:
- Deep linking that actually works
- Browser back button support
- Complex nested navigation
- State restoration after app restarts
That’s where Navigator 2.0 and GoRouter come into play. They’re like upgrading from a bicycle to a sports car – more power, but you need to know how to drive it.
Navigator 2.0 for Complex Routing: The Powerful but Complex Choice
Navigator 2.0 is Flutter’s official solution for declarative routing Flutter needs. It gives you complete control over your navigation stack, but with great power comes great complexity.
How Navigator 2.0 Works
Navigator 2.0 uses a declarative approach where you define your entire navigation state upfront. Instead of imperatively pushing and popping routes, you declare what your navigation stack should look like based on your app’s current state.
Here’s a basic example:
class MyApp extends StatefulWidget {
@override
_MyAppState createState() => _MyAppState();
}
class _MyAppState extends State<MyApp> {
final _routerDelegate = MyRouterDelegate();
final _routeInformationParser = MyRouteInformationParser();
@override
Widget build(BuildContext context) {
return MaterialApp.router(
routerDelegate: _routerDelegate,
routeInformationParser: _routeInformationParser,
);
}
}
When to Use GoRouter: The Sweet Spot
Navigator 2.0 shines when you need:
- Custom authentication flows with complex conditional routing
- Fine-grained control over navigation behavior
- Integration with state management solutions like Bloc or Riverpod
- Navigation state management that responds to external changes
The Learning Curve Reality
Let’s be honest – Navigator 2.0 has a steep learning curve. You’ll need to implement RouterDelegate, RouteInformationParser, and sometimes RouteInformationProvider. It’s like learning to fly a helicopter when you just wanted to cross town.
GoRouter Implementation Example: The Developer-Friendly Alternative
GoRouter is the community’s answer to Navigator 2.0’s complexity. Built by the Flutter team, it provides a simpler API while still supporting advanced features.
Setting Up GoRouter
First, add it to your pubspec.yaml:
dependencies:
go_router: ^12.1.3
Here’s how easy it is to get started:
final GoRouter _router = GoRouter(
routes: <RouteBase>[
GoRoute(
path: ‘/’,
builder: (BuildContext context, GoRouterState state) {
return const HomeScreen();
},
routes: <RouteBase>[
GoRoute(
path: ‘/details/:id’,
builder: (BuildContext context, GoRouterState state) {
return DetailsScreen(id: state.pathParameters[‘id’]!);
},
),
],
),
],
);
class MyApp extends StatelessWidget {
@override
Widget build(BuildContext context) {
return MaterialApp.router(
routerConfig: _router,
);
}
}
Deep Linking in Flutter Made Simple
GoRouter handles deep linking out of the box. When someone shares a link to your app, GoRouter automatically navigates to the correct screen with the right parameters.
No complex parsing, no manual state reconstruction – it just works.
Flutter Navigation Best Practices with GoRouter
1. Use Named Routes for Clarity
GoRoute(
name: ‘product-details’,
path: ‘/product/:productId’,
builder: (context, state) => ProductDetailsScreen(
productId: state.pathParameters[‘productId’]!,
),
)
2. Handle Authentication Gracefully
redirect: (BuildContext context, GoRouterState state) {
final isLoggedIn = AuthService.instance.isLoggedIn;
if (!isLoggedIn && state.location != ‘/login’) {
return ‘/login’;
}
return null;
},
3. Implement Proper Error Handling
errorBuilder: (context, state) => ErrorScreen(error: state.error),
Route Transitions Comparison: Visual Polish That Matters
Both approaches support custom transitions, but with different levels of complexity.
GoRouter Transitions
GoRouter keeps it simple with built-in transition types:
GoRoute(
path: ‘/profile’,
pageBuilder: (context, state) => CustomTransitionPage<void>(
key: state.pageKey,
child: ProfileScreen(),
transitionsBuilder: (context, animation, secondaryAnimation, child) =>
FadeTransition(opacity: animation, child: child),
),
)
Navigator 2.0 Transitions
Navigator 2.0 gives you complete control but requires more boilerplate:
Page buildPage(RouteSettings settings) {
return CustomTransitionPage(
settings: settings,
child: getPageForRoute(settings.name),
transitionsBuilder: (context, animation, secondaryAnimation, child) {
return SlideTransition(
position: animation.drive(
Tween(begin: const Offset(1.0, 0.0), end: Offset.zero),
),
child: child,
);
},
);
}
Web URL Handling in Flutter: Getting It Right
Web URL handling in Flutter is where the rubber meets the road. Your users expect URLs that make sense and work consistently across platforms.
GoRouter’s URL Magic
GoRouter automatically generates clean URLs based on your route structure:
- /home → HomeScreen
- /products/123 → ProductScreen with ID 123
- /profile/settings → ProfileSettingsScreen
Navigator 2.0 URL Control
With Navigator 2.0, you have complete control over URL structure through RouteInformationParser:
class MyRouteInformationParser extends RouteInformationParser<AppRouteState> {
@override
Future<AppRouteState> parseRouteInformation(RouteInformation routeInformation) async {
final uri = Uri.parse(routeInformation.location!);
// Custom parsing logic here
return AppRouteState.fromUri(uri);
}
}
Nested Navigation Solutions: Handling Complex App Structures
Modern apps often need nested navigation – think bottom navigation bars with their own navigation stacks.
GoRouter’s ShellRoute
GoRouter handles nested navigation with ShellRoute:
ShellRoute(
builder: (BuildContext context, GoRouterState state, Widget child) {
return ScaffoldWithNavBar(child: child);
},
routes: [
GoRoute(path: ‘/home’, builder: (context, state) => HomeScreen()),
GoRoute(path: ‘/profile’, builder: (context, state) => ProfileScreen()),
],
)
Navigator 2.0 Nested Navigation
Navigator 2.0 requires custom implementation:
class NestedNavigator extends StatelessWidget {
final Widget child;
final String initialRoute;
@override
Widget build(BuildContext context) {
return Navigator(
initialRoute: initialRoute,
onGenerateRoute: (settings) => generateNestedRoute(settings),
);
}
}
How FBIP Elevates Your Flutter Development Experience
When you’re wrestling with complex navigation decisions, having an experienced development partner makes all the difference.
FBIP brings years of Flutter expertise to the table, helping businesses in Udaipur and beyond build apps that users actually love to navigate.
Their team understands that navigation isn’t just about moving between screens – it’s about creating intuitive user experiences that keep people engaged. Whether you’re building a simple business app or a complex e-commerce platform, FBIP’s developers have hands-on experience with both GoRouter and Navigator 2.0 implementations.
What sets FBIP apart is their practical approach to technology choices. Instead of pushing the latest trends, they analyze your specific requirements and recommend the navigation solution that actually fits your project. Their track record with Flutter development in Udaipur shows they understand both technical excellence and business needs.
Plus, their ongoing support means you’re not left stranded when navigation requirements evolve as your app grows.
Making the Right Choice: GoRouter vs Navigator 2.0
Here’s the truth: there’s no universal “best” choice. Your decision should depend on your project’s specific needs.
Choose GoRouter if:
- You want to get navigation working quickly
- Deep linking and web support are priorities
- Your team prefers simpler, more maintainable code
- You’re building a typical business or consumer app
Choose Navigator 2.0 if:
- You need fine-grained control over navigation behavior
- Your app has complex, custom navigation requirements
- You’re integrating with sophisticated state management solutions
- You have the time and expertise to handle the complexity
Red flags for Navigator 2.0:
- Tight deadlines with navigation as a blocker
- Junior developers who need to maintain the code
- Simple navigation requirements that don’t justify the complexity
The Future of Flutter Navigation
The Flutter team continues improving both approaches. GoRouter is becoming more powerful with each release, while Navigator 2.0 is getting more developer-friendly APIs.
Recent updates have added better error handling, improved performance, and enhanced debugging tools to both solutions. The trend seems to be toward GoRouter for most use cases, with Navigator 2.0 reserved for truly custom requirements.
Conclusion
Navigation doesn’t have to be the hardest part of your Flutter development journey.
Whether you choose GoRouter for its simplicity or Navigator 2.0 for its power, the key is understanding your requirements and picking the tool that serves your users best.
Remember: good navigation is invisible navigation. Users shouldn’t think about how they move through your app – they should just flow naturally from screen to screen.
Start with GoRouter for most projects, and level up to Navigator 2.0 only when you genuinely need its advanced capabilities. Your future self (and your team) will thank you for making pragmatic choices over technically impressive ones.
Ready to build Flutter apps with navigation that actually works? The foundation you choose today will determine how easily you can evolve your app tomorrow, making Flutter app navigation a breeze for both developers and users.
Ready to Transform Your Flutter Navigation?
Don’t let navigation complexity slow down your Flutter development. Connect with FBIP’s experienced Flutter developers in Udaipur for expert guidance on choosing and implementing the right navigation solution for your project.
Contact FBIP today for a consultation on your Flutter app navigation needs.
Frequently Asked Questions
Q: Is GoRouter better than Navigator 2.0 for beginners?
Yes, GoRouter is significantly easier to learn and implement. It handles common navigation scenarios with minimal boilerplate code, making it ideal for developers new to Flutter navigation or teams working under tight deadlines.
Q: Can I switch from Navigator 2.0 to GoRouter later?
While possible, switching navigation systems requires substantial refactoring. The migration complexity depends on how deeply Navigator 2.0 is integrated with your state management and navigation logic. Plan your choice carefully upfront.
Q: Does GoRouter support all Navigator 2.0 features?
GoRouter covers most common navigation needs including deep linking, nested routes, and redirects. However, Navigator 2.0 offers more granular control for complex, custom navigation behaviors that GoRouter might not support directly.
Q: Which approach is better for web applications?
GoRouter excels at web development with automatic URL generation, browser back button support, and clean URL structures. Navigator 2.0 requires significant additional code to achieve the same web-friendly navigation experience.
Q: How do I handle authentication flows with both approaches?
GoRouter provides built-in redirect functionality for authentication. Navigator 2.0 requires implementing custom logic in your RouterDelegate. Both can handle complex authentication scenarios, but GoRouter makes simple cases much easier to implement.

Best Practices for Responsive Design in Flutter: Building Apps That Work Everywhere
Ever opened an app on your tablet only to find it looks like a blown-up phone app with awkward spacing and tiny buttons?
You’re not alone – and neither are your users who quickly delete apps that don’t adapt properly to their devices.
Responsive design Flutter isn’t just a nice-to-have feature anymore; it’s essential for creating apps that truly shine across phones, tablets, desktops, and everything in between.
Let’s dive into the practical strategies that’ll help you build Flutter apps your users will love, no matter what screen they’re using.
Understanding Flutter’s Responsive Foundation
Think of responsive design like water taking the shape of its container. Your Flutter app should flow seamlessly across different screen sizes without breaking its core functionality or visual appeal.
Flutter layout best practices start with understanding your building blocks:
- Flexible and Expanded widgets for dynamic spacing
- MediaQuery for screen dimension awareness
- LayoutBuilder for constraint-based decisions
- OrientationBuilder for handling device rotation
The key difference between responsive and adaptive design? Responsive design uses flexible layouts that scale proportionally. Adaptive design creates distinct layouts for specific screen sizes. Flutter excels at both approaches.
Mastering MediaQuery in Flutter for Screen Awareness
MediaQuery in Flutter is your app’s eyes and ears – it tells you everything about the user’s screen.
Here’s how to use it effectively:
Widget build(BuildContext context) {
final screenWidth = MediaQuery.of(context).size.width;
final screenHeight = MediaQuery.of(context).size.height;
final devicePixelRatio = MediaQuery.of(context).devicePixelRatio;
return screenWidth > 600 ? TabletLayout() : PhoneLayout();
}
Pro tip: Cache MediaQuery data at the top of your widget tree to avoid repeated calls:
class MyApp extends StatelessWidget {
@override
Widget build(BuildContext context) {
final mediaQuery = MediaQuery.of(context);
return MaterialApp(
home: Builder(
builder: (context) => HomeScreen(mediaQuery: mediaQuery),
),
);
}
}
This simple optimization can significantly improve your Flutter responsive performance.
Building Adaptive UI Flutter Components
Adaptive UI Flutter means creating components that automatically adjust their behavior based on the platform and screen size.
Consider this adaptive button example:
class AdaptiveButton extends StatelessWidget {
final String text;
final VoidCallback onPressed;
@override
Widget build(BuildContext context) {
final isLargeScreen = MediaQuery.of(context).size.width > 600;
return Container(
width: isLargeScreen ? 200 : double.infinity,
child: Platform.isIOS
? CupertinoButton(child: Text(text), onPressed: onPressed)
: ElevatedButton(child: Text(text), onPressed: onPressed),
);
}
}
This approach ensures your app feels native on every platform while maintaining consistent functionality.
Essential Flutter Responsive Widgets
Flutter responsive widgets are your toolkit for creating flexible layouts. Here are the must-know widgets and when to use them:
Flexible vs Expanded
- Use Flexible when you want widgets to take available space but not necessarily all of it
- Use Expanded when you want widgets to fill all available space in their parent
FractionallySizedBox
Perfect for percentage-based layouts:
FractionallySizedBox(
widthFactor: 0.8, // 80% of parent width
child: YourWidget(),
)
AspectRatio
Maintains consistent proportions across devices:
AspectRatio(
aspectRatio: 16/9,
child: Container(color: Colors.blue),
)
Wrap
Automatically wraps children to new lines when space runs out:
Wrap(
spacing: 8.0,
runSpacing: 4.0,
children: List.generate(20, (index) => Chip(label: Text(‘Item $index’))),
)
Implementing Mobile-First Design Flutter Strategy
Mobile-first design Flutter means starting with the smallest screen and progressively enhancing for larger displays.
This approach offers several advantages:
- Better performance on mobile devices
- Cleaner, more focused user interfaces
- Easier to scale up than scale down
Here’s a practical mobile-first layout structure:
class ResponsiveLayout extends StatelessWidget {
final Widget mobile;
final Widget? tablet;
final Widget? desktop;
const ResponsiveLayout({
required this.mobile,
this.tablet,
this.desktop,
});
@override
Widget build(BuildContext context) {
final screenWidth = MediaQuery.of(context).size.width;
if (screenWidth >= 1200 && desktop != null) {
return desktop!;
} else if (screenWidth >= 600 && tablet != null) {
return tablet!;
} else {
return mobile;
}
}
}
This widget encapsulates your responsive logic and makes it reusable throughout your app.
Setting Up Breakpoints in Flutter
Breakpoints in Flutter define when your layout should change based on screen size. Common breakpoint values include:
- Small (Mobile): < 600dp
- Medium (Tablet): 600dp – 1200dp
- Large (Desktop): > 1200dp
Create a constants file for consistent breakpoint usage:
class Breakpoints {
static const double mobile = 600;
static const double tablet = 1200;
static bool isMobile(BuildContext context) =>
MediaQuery.of(context).size.width < mobile;
static bool isTablet(BuildContext context) =>
MediaQuery.of(context).size.width >= mobile &&
MediaQuery.of(context).size.width < tablet;
static bool isDesktop(BuildContext context) =>
MediaQuery.of(context).size.width >= tablet;
}
Creating Flexible Grids Flutter Layouts
Flexible grids Flutter layouts adapt the number of columns based on available space.
The flutter_staggered_grid_view package offers excellent grid solutions, but you can also create responsive grids with built-in widgets:
class ResponsiveGrid extends StatelessWidget {
final List<Widget> children;
@override
Widget build(BuildContext context) {
final screenWidth = MediaQuery.of(context).size.width;
int crossAxisCount = 2; // Default for mobile
if (screenWidth > 1200) {
crossAxisCount = 4; // Desktop
} else if (screenWidth > 600) {
crossAxisCount = 3; // Tablet
}
return GridView.builder(
gridDelegate: SliverGridDelegateWithFixedCrossAxisCount(
crossAxisCount: crossAxisCount,
crossAxisSpacing: 10,
mainAxisSpacing: 10,
childAspectRatio: 1,
),
itemCount: children.length,
itemBuilder: (context, index) => children[index],
);
}
}
Mastering Orientation Handling Flutter
Orientation handling Flutter ensures your app works perfectly in both portrait and landscape modes.
Use OrientationBuilder for orientation-specific layouts:
OrientationBuilder(
builder: (context, orientation) {
if (orientation == Orientation.landscape) {
return Row(
children: [
Expanded(child: SidePanel()),
Expanded(flex: 2, child: MainContent()),
],
);
} else {
return Column(
children: [
MainContent(),
SidePanel(),
],
);
}
},
)
Pro tip: Consider disabling orientation changes for specific screens where it doesn’t make sense:
@override
Widget build(BuildContext context) {
SystemChrome.setPreferredOrientations([
DeviceOrientation.portraitUp,
]);
return YourWidget();
}
Optimizing Flutter Responsive Performance
Flutter responsive performance becomes crucial when dealing with complex layouts across multiple screen sizes.
Performance Optimization Techniques:
- Use const constructors wherever possible
- Cache expensive calculations like MediaQuery calls
- Implement lazy loading for large lists and grids
- Optimize image assets with multiple resolutions
- Use ListView.builder instead of ListView for long lists
Here’s a performance-optimized responsive widget:
class OptimizedResponsiveWidget extends StatelessWidget {
const OptimizedResponsiveWidget({Key? key}) : super(key: key);
@override
Widget build(BuildContext context) {
return LayoutBuilder(
builder: (context, constraints) {
// Cache the constraint values
final width = constraints.maxWidth;
final height = constraints.maxHeight;
// Use const widgets when possible
if (width > 600) {
return const DesktopLayout();
} else {
return const MobileLayout();
}
},
);
}
}
Avoiding Overflow Errors Flutter Solutions
Avoiding overflow errors Flutter issues is crucial for responsive design. Nothing ruins user experience like text or widgets getting cut off.
Common Overflow Solutions:
1. Use Flexible and Expanded widgets:
Row(
children: [
Expanded(
child: Text(
‘This text will wrap instead of overflow’,
overflow: TextOverflow.ellipsis,
),
),
],
)
2. Implement scrollable containers:
SingleChildScrollView(
scrollDirection: Axis.horizontal,
child: Row(
children: yourWidgets,
),
)
3. Use FittedBox for scaling:
FittedBox(
fit: BoxFit.scaleDown,
child: Text(‘This text scales to fit’),
)
Efficient Rendering Responsive UI Strategies
Efficient rendering responsive UI requires smart widget choices and layout strategies.
Key Strategies:
- Use AutomaticKeepAliveClientMixin for expensive widgets that shouldn’t rebuild
- Implement RepaintBoundary around widgets that repaint frequently
- Choose the right scroll physics for your use case
- Minimize widget rebuilds with proper state management
Example of efficient list rendering:
class EfficientResponsiveList extends StatefulWidget {
@override
_EfficientResponsiveListState createState() => _EfficientResponsiveListState();
}
class _EfficientResponsiveListState extends State<EfficientResponsiveList>
with AutomaticKeepAliveClientMixin {
@override
bool get wantKeepAlive => true;
@override
Widget build(BuildContext context) {
super.build(context); // Don’t forget this!
return ListView.builder(
itemCount: items.length,
itemBuilder: (context, index) {
return RepaintBoundary(
child: ResponsiveListItem(item: items[index]),
);
},
);
}
}
Testing Responsive Layouts Flutter
Testing responsive layouts Flutter ensures your app works across all target devices.
Testing Strategies:
- Use Flutter Inspector to debug layout issues
- Test on multiple screen sizes using device simulators
- Implement automated tests for different screen configurations
- Use golden tests to catch visual regressions
Example responsive test:
testWidgets(‘Widget adapts to different screen sizes’, (WidgetTester tester) async {
// Test mobile layout
tester.binding.window.physicalSizeTestValue = const Size(400, 800);
await tester.pumpWidget(MyResponsiveWidget());
expect(find.byType(MobileLayout), findsOneWidget);
// Test tablet layout
tester.binding.window.physicalSizeTestValue = const Size(800, 1200);
await tester.pumpWidget(MyResponsiveWidget());
expect(find.byType(TabletLayout), findsOneWidget);
});
How FBIP Elevates Your Flutter Development Experience
When building responsive Flutter applications, partnering with an experienced development team can make all the difference between a good app and a great one.
FBIP brings years of Flutter development expertise to the table, specializing in creating responsive applications that work seamlessly across all devices and platforms.
What sets FBIP apart is their comprehensive approach to Flutter development – they don’t just build apps; they craft digital experiences. Their team understands the nuances of responsive design and has successfully delivered Flutter projects for clients across various industries.
From their base in Udaipur, FBIP has helped businesses transform their mobile presence with Flutter applications that adapt beautifully to any screen size. Their expertise in MediaQuery implementation, adaptive UI components, and performance optimization ensures your app doesn’t just look good – it performs exceptionally well too.
The team at FBIP also offers ongoing support and maintenance, crucial for keeping responsive Flutter apps running smoothly as new devices and screen sizes enter the market. Their commitment to staying ahead of Flutter’s evolution means your app benefits from the latest responsive design techniques and performance optimizations.
Conclusion
Building responsive Flutter applications requires a thoughtful approach that combines technical expertise with user-centric design principles.
From mastering MediaQuery and implementing flexible layouts to optimizing performance and avoiding overflow errors, each technique plays a crucial role in creating apps that truly shine across all devices.
Remember, responsive design isn’t a one-time implementation – it’s an ongoing commitment to providing excellent user experiences regardless of how your users access your app.
Start with a mobile-first approach, implement proper breakpoints, test thoroughly across different screen sizes, and always prioritize performance alongside visual appeal.
Ready to build Flutter apps that adapt beautifully to any screen? Connect with FBIP’s expert Flutter development team to transform your app idea into a responsive reality that users will love.
With the right approach and expertise, responsive design Flutter becomes not just a technical requirement, but a competitive advantage that sets your app apart in today’s diverse device landscape.
Ready to build exceptional responsive Flutter applications? Contact FBIP today for expert Flutter development services that ensure your app looks and performs perfectly across all devices and screen sizes.
Frequently Asked Questions
Q: What’s the difference between responsive and adaptive design in Flutter?
Responsive design uses flexible layouts that scale proportionally across screen sizes, while adaptive design creates distinct layouts for specific breakpoints. Flutter excels at both approaches, allowing you to choose based on your app’s needs.
Q: How do I handle different screen densities in Flutter?
Flutter automatically handles screen density through device pixel ratios. Use MediaQuery.of(context).devicePixelRatio to access this information, and provide multiple image assets (1x, 2x, 3x) for crisp visuals across all devices.
Q: Should I use MediaQuery or LayoutBuilder for responsive design?
MediaQuery provides global screen information, while LayoutBuilder gives you the specific constraints of a widget’s parent. Use MediaQuery for app-wide decisions and LayoutBuilder for component-specific responsive behavior.
Q: How can I test my Flutter app’s responsiveness effectively?
Use Flutter’s device simulator with various screen sizes, implement automated tests with different screen configurations, utilize golden tests for visual regression, and test on actual devices whenever possible for real-world validation.
Q: What are the most common responsive design mistakes in Flutter?
Common mistakes include hardcoding dimensions instead of using relative sizing, ignoring overflow errors, not testing on actual devices, using too many breakpoints, and forgetting to optimize performance for different screen sizes.

