
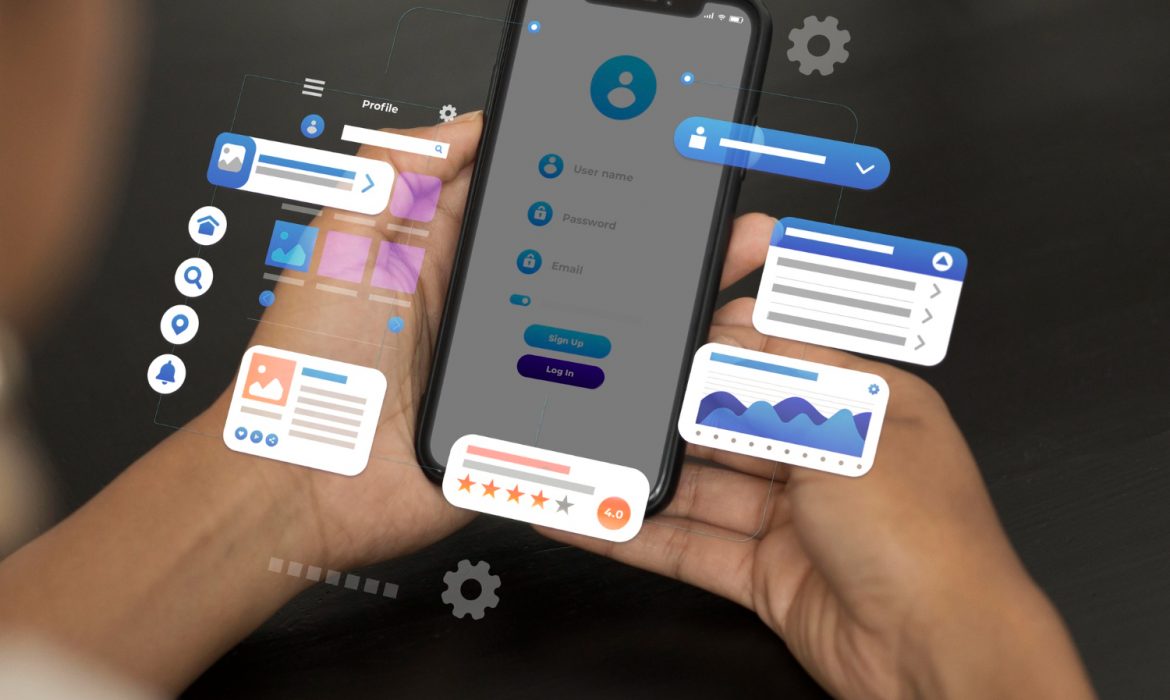
Flutter for Fintech: Secure, Fast, and Scalable Mobile Apps
The fintech industry stands at a crossroads. With millions of users demanding instant transactions, bulletproof security, and smooth experiences across devices, financial technology companies need app development frameworks that can keep pace. Flutter has emerged as the answer that banks and fintech startups alike have been searching for.
Google’s open-source framework isn’t just another development tool. It’s reshaping how financial apps get built, deployed, and scaled. From Nubank serving over 100 million users to Google Pay processing countless daily transactions, Flutter proves itself where it matters most: in real-world financial applications handling sensitive data at scale.
Why Flutter Matters for Financial Applications
Building fintech apps presents challenges that don’t exist in other industries. You’re juggling rigorous security audits, multi-platform consistency, real-time data updates, and strict regulatory compliance. All while racing against competitors to launch features faster.
Traditional native development means building separate apps for iOS and Android. That doubles your development team, doubles your timeline, and multiplies your maintenance headaches. Every feature gets built twice. Every bug fix happens twice. Every security patch rolls out twice.
Flutter changes the game with a single codebase that runs on both platforms. Write your code once, and it automatically works on Android and iOS with nearly identical performance. No more fragmented teams. No more versions mismatches. No more choosing which platform gets features first.
Companies using Flutter for fintech report development time cuts of 40-70%. Nubank, Latin America’s largest digital bank, achieved a 30% higher merge success rate after switching to Flutter. Google Pay reduced its codebase by 35% while adding features, saving engineering effort by 70%.
Security That Financial Apps Demand
When money’s involved, security isn’t optional. Flutter for fintech applications brings multiple security layers that make it suitable for handling sensitive financial data.
The framework compiles to native ARM code, creating an extra protection layer that makes reverse engineering extremely difficult. Unlike hybrid solutions that rely on intermediary apps, Flutter banking apps compile directly into computer-executable code. This makes them more secure than many native solutions.
Flutter supports industry-standard encryption protocols like AES-256 for data protection. The framework enables biometric authentication through fingerprint scanning and Face ID, giving users quick access while maintaining security. Certificate pinning for API requests prevents man-in-the-middle attacks, protecting data in transit.
The architecture allows developers to implement secure storage for credentials and sensitive information. Combined with code obfuscation features in Dart, Flutter makes it harder for attackers to understand app functionality even if they somehow access the code.
Financial institutions must meet strict compliance standards like GDPR, PCI-DSS, and PSD2. Flutter’s design supports these requirements through built-in features for audit trails, data encryption, and secure authentication flows. When FBIP works on fintech projects, we ensure these compliance measures integrate seamlessly from day one.
Speed That Gives You Market Advantage
In fintech, being first matters. Regulatory changes happen overnight. Competitors launch features weekly. Users expect instant updates. Your development framework needs to match this pace.
Flutter’s hot reload feature lets developers see changes instantly in the running app. No waiting for compilation. No restarting the app. Changes appear in seconds. This speeds up the entire development cycle from initial build to bug fixes to feature additions.
Credit Agricole found their Flutter app easier and cheaper to maintain because they eliminated duplicated work between platforms. What used to take separate iOS and Android teams now happens with one unified team.
The framework includes rich widgets for building complex interfaces without platform-specific code. Input forms, animated charts, transaction cards, dynamic gauges these financial app essentials come ready to use. Designers can implement pixel-perfect designs without waiting for custom platform components.
For fintech companies, this speed translates directly to competitive advantage. Nubank launched their insurance feature in just three months using Flutter, marking their quickest product rollout. When you can move this fast, you respond to market changes before competitors even start planning.
Performance That Users Trust
Users judge financial apps harshly. If your app lags during a transaction or freezes while checking a balance, they switch to competitors. Flutter delivers near-native performance that keeps users confident.
The framework uses the Skia graphics engine, the same rendering engine that powers Chrome. This gives Flutter apps smooth animations and responsive interfaces even when displaying real-time market data or processing complex calculations.
Flutter compiles to native code for each platform, not JavaScript that runs in a web view. This means your app runs at the same speed as apps built directly in Swift or Kotlin. For users, the difference is invisible. They get the performance they expect from a native app with the development efficiency of a cross-platform framework.
Mobile fintech apps need to handle real-time updates, stock prices changing by the second, transaction confirmations arriving instantly, account balances updating live. Flutter’s reactive framework and state management tools like Bloc and Riverpod make these real-time interfaces possible without performance lag.
Scalability for Growing Fintech Companies
Your first 100 users look nothing like your first million users. Flutter for fintech apps scales with you, handling growth without requiring architectural overhauls.
The framework’s modular architecture lets you build different services independently. Want to add investment tools to your payment app? Build it as a separate module that integrates cleanly with existing features. Need to roll out cryptocurrency trading? Add it without touching your core banking features.
This modularity makes testing easier. You can A/B test new features with specific user segments without risking your stable features. It speeds up deployment since teams can work on different modules simultaneously without stepping on each other’s code.
Flutter supports microservices architecture on the backend. As your user base grows, you scale specific services independently rather than your entire infrastructure. API caching, load balancing, and continuous deployment tools work seamlessly with Flutter, ensuring your app remains responsive even during traffic spikes.
Companies like Axis Bank built enterprise-grade banking apps on Flutter that handle millions of transactions without lag or downtime. The framework proves itself at scale, not just for MVPs.
Real-World Success Stories
The proof sits in production apps serving millions of users daily. These aren’t experiments, they’re billion-dollar businesses trusting Flutter with their core products.
Nubank transformed their entire mobile development process with Flutter. Before the switch, features launched at different times on iOS and Android due to separate development teams. After Flutter, they achieved feature parity across platforms, 600% faster pull request processing, and 30% higher merge success rates. Their 100+ million users experience consistent, reliable banking regardless of device.
Google Pay rebuilt their app in Flutter, consolidating Android and iOS development. The result? A 35% smaller codebase despite adding hundreds of features. The app handles sensitive payment data for millions of daily transactions across dozens of countries while maintaining top-tier security and performance.
Tide, the UK business banking app, uses Flutter to manage complex features like invoicing, cash flow tracking, and multi-account management. Their modular Flutter architecture lets them roll out features quickly while maintaining the security and reliability business customers demand.
These companies didn’t choose Flutter because of hype. They chose it because it delivers on three things fintech companies care about most: security, speed, and scale.
Cost Efficiency Without Compromise
Building separate native apps means hiring separate teams. iOS developers command certain salaries. Android developers command similar ones. You need two complete teams for feature development, two for testing, two for maintenance.
Flutter cuts these costs dramatically. One development team builds for both platforms. One set of tests covers both versions. One codebase gets maintained. Companies report cost savings of 60-70% compared to dual native development.
For startups, this means stretching the runway further. For enterprises, it means reallocating budget to features that matter: enhanced fraud detection, better UX research, improved customer support, expanded marketing.
The savings don’t stop at development. Maintenance costs drop because you fix bugs once, not twice. Feature additions take half the time. Updates roll out simultaneously across platforms. Your team stays lean while delivering more.
When FBIP builds Flutter apps for clients, we see these savings firsthand. Projects that would take 12 months native often complete in 6-8 months with Flutter, without sacrificing quality or security.
Integration With Existing Systems
Most financial institutions aren’t starting from scratch. You have core banking systems, payment processors, compliance tools, CRM platforms, and analytics dashboards. Your new app needs to work with all of them.
Flutter handles backend integration smoothly through REST APIs, WebSockets, and GraphQL. Whether you’re connecting to legacy banking systems or modern cloud services, the framework provides the tools you need.
Firebase integration gives you authentication, real-time databases, and cloud storage out of the box. Need AWS, Google Cloud, or Microsoft Azure? Flutter works with all major cloud platforms. Third-party APIs for payment processing, KYC verification, fraud detection, and analytics plug in cleanly.
The framework supports both monolithic and microservices architectures. If you’re running legacy systems, Flutter apps can communicate with them while you gradually modernize. If you’re building cloud-native from the start, Flutter fits perfectly into that architecture too.
The Developer Experience Advantage
Your development team’s productivity directly impacts your time to market. Flutter makes developers more productive through thoughtful tooling and clear documentation.
The hot reload feature we mentioned earlier changes how developers work. Instead of making a change, waiting for compilation, and checking results, they see changes instantly. This tight feedback loop accelerates development and reduces frustration.
Flutter’s widget-based architecture makes code reusable. Build a custom transaction card once, use it everywhere. Create a secure input field, apply it across all forms. This reusability speeds development and ensures consistency.
The framework comes with comprehensive testing tools. Unit tests, widget tests, and integration tests all work smoothly. You catch bugs earlier when they’re cheaper to fix. The testing infrastructure helps meet compliance requirements for financial apps.
Google backs Flutter with consistent updates, security patches, and new features. The global developer community contributes packages, plugins, and solutions to common problems. When your team faces a challenge, chances are someone’s already solved it.
Compliance and Regulatory Support
Financial apps operate under intense scrutiny. Regulators demand transparency, security, and user protection. Non-compliance brings fines, shutdowns, and reputational damage.
Flutter supports the audit trails and logging that regulators require. Every transaction, every data access, every user action can be tracked and reported. The framework’s architecture makes it straightforward to implement the data protection measures GDPR mandates.
Strong Customer Authentication requirements in the European Economic Area? Flutter handles multi-factor authentication flows cleanly. PCI-DSS standards for payment processing? The secure storage and encryption features support compliance. ISO 27001 information security management? Flutter’s security-first design aligns with these standards.
When regulations change and they will Flutter’s single codebase means updating once rather than twice. You push compliance updates to all users simultaneously, reducing risk windows.
When Flutter Makes Sense for Your Fintech Project
Flutter isn’t the right choice for every project, but it shines in specific situations common to fintech companies.
If you need to launch on both iOS and Android quickly, Flutter accelerates your timeline significantly. Startups racing to market with MVPs benefit most. You validate your concept on both platforms without doubling resources.
Budget-conscious projects gain from Flutter’s development efficiency. Whether you’re bootstrapped or watching burn rate carefully, the framework stretches your budget further without cutting corners on security or performance.
Projects requiring frequent updates and iterations match Flutter’s strengths. Fintech moves fast. Regulations change. User expectations evolve. Competitors launch features. Flutter lets you respond quickly across platforms.
Apps with complex, custom UIs work beautifully in Flutter. If your design vision goes beyond standard platform components, Flutter’s widget system and customization options bring that vision to life consistently across devices.
What FBIP Brings to Flutter Fintech Development
Building secure financial applications requires more than just knowing Flutter. It demands understanding financial regulations, security requirements, user expectations, and business realities.
FBIP has been developing Flutter applications since the framework’s early days. We’ve built apps handling sensitive financial data, processing transactions, managing investments, and more. Our team understands both the technical requirements and the business context of fintech applications.
We implement security from the ground up, not as an afterthought. Every app we build includes proper encryption, secure authentication, protected storage, and compliance measures appropriate to your jurisdiction and use case.
Our development process emphasizes testing and quality assurance. We catch issues before users do. We ensure performance under load. We validate security measures. We document everything for audits.
We work with your timeline and budget constraints. Whether you need an MVP in three months or a full-featured platform in a year, we structure our process to deliver value at each milestone. You see working features regularly, not after months of invisible backend work.
The Future of Flutter in Fintech
Flutter’s trajectory in financial services points upward. Adoption has grown 217% since 2021, with finance leading all industries. More banks and fintech companies switch to Flutter each quarter.
The framework continues evolving. Flutter 3 added web and desktop support, expanding beyond mobile. Future updates will bring more performance improvements, additional security features, and better tooling.
AI integration opens new possibilities for fintech apps. Fraud detection powered by machine learning. Personalized financial advice from AI assistants. Predictive analytics for investment recommendations. Flutter supports the APIs and processing needed for these AI features.
Blockchain and cryptocurrency features integrate smoothly with Flutter. As decentralized finance grows, Flutter provides the tools to build crypto wallets, DeFi platforms, and blockchain-powered applications.
The financial industry isn’t slowing down. Users demand more features, better experiences, stronger security. Regulations increase. Competition intensifies. Flutter gives fintech companies the tools to meet these challenges head-on.
Getting Started With Flutter for Your Fintech App
If Flutter matches your needs, starting the right way matters. Here are the first steps:
Define your requirements clearly. What features do you need at launch? What regulatory requirements apply? What integrations are necessary? Clear requirements prevent scope creep and guide development.
Choose a development partner with fintech experience. Generic app developers might understand Flutter, but fintech brings unique challenges. Find a team that understands both.
Start with an MVP that proves your core concept. Don’t try to build everything at once. Get a working version in users’ hands quickly. Gather feedback. Iterate.
Plan for security and compliance from day one. Adding these later costs more and risks oversights. Build them into your foundation.
Test thoroughly before launch. Financial apps leave little room for errors. Test on real devices. Test under load. Test security measures. Test compliance workflows.
The fintech landscape demands speed, security, and scale. Flutter delivers all three without the compromises that plagued previous cross-platform solutions. From startups launching their first MVPs to enterprises serving millions of users, financial companies are choosing Flutter because it works where it matters.
Your users don’t care what framework you used. They care about security, speed, and reliability. Flutter lets you deliver these while building faster, spending less, and scaling confidently. That’s why the biggest names in fintech trust it with their most valuable asset: their users’ financial data.
Ready to explore how Flutter could transform your fintech application? FBIP brings years of Flutter expertise and fintech domain knowledge to every project. We build apps that meet regulatory requirements, protect user data, and scale with your business. Connect with FBIP today to discuss your fintech app development needs.
Frequently Asked Questions
How does Flutter ensure data security in fintech applications?
Flutter compiles to native ARM code rather than running in a browser-like environment, making reverse engineering extremely difficult. The framework supports AES-256 encryption for data storage, certificate pinning for API security, and hardware-backed biometric authentication. Flutter apps can implement secure storage using platform-specific key stores, protecting sensitive information even if a device gets compromised. The framework’s architecture lets developers follow security best practices without fighting against the technology.
Can Flutter handle the transaction volume of large-scale financial apps?
Yes. Nubank serves over 100 million users on Flutter. Google Pay processes millions of daily transactions. Axis Bank handles enterprise-grade banking operations without performance issues. Flutter compiles to native code and uses efficient rendering, giving it performance comparable to native apps. The framework supports microservices architecture and scales horizontally as your user base grows. Load balancing, caching, and optimized API design work seamlessly with Flutter apps.
How long does it typically take to build a fintech app with Flutter?
Timeline depends on complexity and features. A basic MVP with core banking features might take 3-4 months. A full-featured platform with payment processing, investment tools, and advanced security could take 6-12 months. Flutter typically reduces development time by 40-70% compared to building separate native apps. Companies report launching features in weeks instead of months after adopting Flutter for their development process.
Does Flutter support integration with existing banking systems and third-party services?
Flutter integrates smoothly with legacy banking systems through REST APIs, WebSockets, and other standard protocols. The framework works with major cloud platforms like AWS, Google Cloud, and Azure. Third-party services for payment processing, KYC verification, fraud detection, and analytics all have Flutter-compatible SDKs or APIs. Whether you’re connecting to decades-old mainframes or cutting-edge microservices, Flutter provides the integration capabilities you need.
What regulatory compliance standards does Flutter support?
Flutter supports implementing features required by GDPR, PCI-DSS, PSD2, and other financial regulations. The framework enables audit logging, data encryption, secure authentication, and user consent management that these standards require. Flutter’s architecture makes it straightforward to implement region-specific compliance measures for different markets. When regulations change, the single codebase means updating compliance features once rather than maintaining separate implementations for iOS and Android.
How Flutter Reduces Time-to-Market for MVPs
Speed determines survival in today’s startup world. Entrepreneurs race against time to validate ideas, secure funding, and capture market share before competitors do. The framework you choose for building your Minimum Viable Product (MVP) directly impacts how quickly you can test your concept with real users.
Flutter has emerged as a game-changing solution for startups seeking rapid MVP development. This Google-backed framework cuts development time dramatically while maintaining quality and performance. Let’s explore how Flutter accelerates your path from concept to market-ready product.
Understanding MVPs and Time-to-Market Pressure
A Minimum Viable Product represents your product’s simplest version with just enough features to satisfy early users and gather feedback. The goal isn’t perfection but validation. Research shows that 70% of tech startups fail, usually about 20 months after their first round of financing, often due to no market need following a lack of proper market research.
Time-to-market matters because your competitive advantage diminishes with every passing week. Competitors may launch similar solutions, investor interest might shift, or market conditions could change. Getting a working version into users’ hands quickly helps you stay ahead.
Companies like Instagram proved this approach works. They launched with minimal features, focusing on square photos and limited filters on iOS only. This lean strategy helped them capture the market before competitors could react.
Cross-Platform Development with Single Codebase
Flutter’s biggest advantage for MVP development lies in its cross-platform capability. Flutter is a cross-platform mobile app development framework that uses a single codebase to build apps for iOS and Android. You write code once and deploy it across multiple platforms.
This approach eliminates the traditional dilemma of choosing between iOS and Android for your initial launch. Why limit your potential user base when you can reach both markets from day one?
Here’s what this means for your timeline:
- Traditional native development: Build separate iOS and Android apps with different teams, technologies, and codebases. This approach typically requires 16-20 weeks for both platforms.
- Flutter development: Create both apps simultaneously from a single codebase. Typical development time is 6-12 weeks, depending on complexity.
FBIP specializes in Flutter app development, helping startups launch cross-platform MVPs efficiently. The single codebase approach means you can gather feedback from a broader audience faster, refining your product based on diverse user insights.
Hot Reload: Real-Time Development Speed
The Hot Reload feature revolutionizes how developers build apps. This tool allows developers to see code changes reflected immediately in the running application without restarting it. The impact on development speed is substantial.
Flutter’s rapid development cycle, thanks to features like Hot Reload, enables businesses to bring their MVP to market 2-4 weeks faster than traditional methods.
Traditional development requires stopping the app, recompiling code, and relaunching to see changes. This process consumes minutes each time. Over weeks of development, these minutes accumulate into days of lost productivity.
Flutter’s Hot Reload happens in seconds. Developers can:
- Test UI changes instantly
- Fix bugs on the spot
- Experiment with different approaches quickly
- Iterate based on immediate visual feedback
This speed advantage becomes particularly valuable during the critical refinement phase when you’re polishing your MVP based on early testing feedback.
Pre-Built Widgets and UI Components
Flutter comes with an extensive library of pre-built, customizable widgets that match both iOS and Android design standards. These ready-made components accelerate UI development dramatically.
Flutter provides high-performing features and accesses numerous tools to make exceptional web applications, with pre-built customizable widgets and a UI kit.
Instead of designing every button, form, or navigation element from scratch, developers can select from Flutter’s widget collection and customize them to match your brand. The widgets cover:
- Navigation components
- Input fields and forms
- Lists and grids
- Animations and transitions
- Platform-specific design elements
This building-block approach means FBIP developers can construct sophisticated interfaces in days rather than weeks. The widgets also ensure your app looks native on each platform, providing users with familiar, comfortable experiences.
Reduced Testing and Quality Assurance Time
Testing typically consumes 20-30% of development time. With traditional native development, teams must test each platform separately, doubling the QA effort and timeline.
Flutter’s single codebase changes this equation. When you test the Flutter app on one platform, you’re largely testing the codebase that runs on all platforms. Flutter reduces bug fixes by 60% during MVP development.
The framework’s architecture catches many errors during compilation rather than runtime. This means developers identify and fix issues earlier in the development process when corrections are simpler and cheaper.
Automated testing tools work seamlessly with Flutter applications. Teams can write tests once and run them across platforms, creating a comprehensive testing suite without redundant effort.
Firebase Integration for Rapid Backend Setup
Backend development often becomes a bottleneck in MVP projects. Building servers, databases, and APIs from scratch takes weeks. Flutter’s tight integration with Firebase eliminates this obstacle.
Because Flutter is compatible with Firebase, you don’t need to build your own backend for a simple MVP. Firebase provides ready-to-use services including:
- Real-time database
- User authentication
- Cloud storage
- Push notifications
- Analytics
This integration means you can launch an MVP with full backend functionality in days. Firebase Remote Config even allows you to modify app behavior without submitting updates to app stores, enabling rapid A/B testing and feature experiments.
FBIP leverages Firebase integration to deliver complete, market-ready solutions faster. This approach lets startups focus resources on their unique value proposition rather than rebuilding standard infrastructure.
Cost Efficiency and Resource Optimization
Time savings translate directly into cost savings. Every week of reduced development time means:
- Lower developer salaries
- Reduced overhead costs
- Preserved runway for startups
- Faster path to revenue generation
Startups that launch an MVP in less than 8 weeks raise 1.6 times more at pre-seed than those still prototyping when they pitch.
Flutter’s efficiency extends beyond initial development. The single codebase requires only one development team instead of separate iOS and Android teams. This consolidation reduces:
- Team coordination complexity
- Communication overhead
- Training and onboarding time
- Long-term maintenance costs
For startups operating with limited funding, these savings can mean the difference between running out of capital and reaching profitability.
Scalability from MVP to Full Product
Your MVP is just the beginning. The framework you choose should support growth as your product evolves. Flutter for MVP development helps you scale your product to all devices, web, and desktop, as well as even embedded devices, using a single code.
This scalability offers several advantages:
- Platform expansion: When you’re ready to launch web or desktop versions, Flutter supports them with minimal additional development.
- Feature additions: The clean architecture makes adding new features straightforward without restructuring your entire codebase.
- Performance optimization: As your user base grows, Flutter’s native compilation ensures your app maintains speed and responsiveness.
- Team expansion: New developers can onboard quickly thanks to Flutter’s clear documentation and consistent codebase structure.
FBIP builds MVPs with this growth path in mind, ensuring your initial investment remains valuable as your product matures.
Real-World Success Stories
Major companies have validated Flutter’s effectiveness for building successful products. Google has developed Google Ads using Flutter, and Alibaba developed Xianyu based on the Flutter framework.
These examples demonstrate Flutter’s capability to support products at scale. If Flutter handles applications serving millions of users for companies like Google and Alibaba, it certainly meets the demands of MVP development.
Spotify provides another instructive example. After their successful experiment on the desktop, Spotify scaled up to other platforms and developed mobile apps. This gradual, validated expansion represents the ideal MVP journey that Flutter facilitates.
Developer Community and Resources
A strong developer community accelerates problem-solving and learning. Flutter boasts one of tech’s most active communities, with over 153,000 stars on GitHub. This popularity means:
- Abundant tutorials and documentation
- Quick answers to technical questions
- Regular framework updates and improvements
- Extensive third-party packages and plugins
Flutter’s ecosystem offers over 26,000 packages, including pre-built widgets and plugins for Firebase, payment gateways, and analytics.
When developers encounter challenges, they can typically find solutions quickly within the community. This support network reduces development delays and helps teams maintain momentum.
Making the Decision: Is Flutter Right for Your MVP?
Flutter excels for MVPs when you need:
- Quick market entry across multiple platforms
- Cost-effective development with limited budget
- Beautiful, responsive user interfaces
- Easy iteration based on user feedback
- Clear path from MVP to scaled product
The framework might not suit every project. Consider alternatives if you need:
- Extremely heavy device-specific functionality
- Integration with obscure platform-specific APIs
- Support for older device versions
For most modern MVPs, Flutter provides the optimal balance of speed, cost, and quality. The framework’s maturity and Google’s backing ensure it will remain relevant as your product grows.
Partner with Flutter Experts
Building an MVP with Flutter requires expertise in the framework’s best practices and patterns. FBIP brings deep experience in Flutter development, helping startups and businesses launch their products efficiently.
The team at FBIP understands the unique pressures facing MVP projects. They focus on delivering working products quickly while maintaining code quality that supports future growth. Their approach combines technical excellence with business understanding, ensuring your MVP serves both immediate validation needs and long-term product vision.
Take the Next Step
Your innovative idea deserves a launchpad that matches its potential. Flutter provides that foundation, combining speed, cost efficiency, and technical capability in one framework.
The difference between market success and missed opportunity often comes down to timing. Every week spent in development is a week your competitors might be gaining traction. Flutter helps you compress that timeline without compromising quality.
Ready to bring your MVP to life? FBIP specializes in turning concepts into market-ready Flutter applications. Visit FBIP to discuss your project and discover how Flutter development can accelerate your path to market.
Frequently Asked Questions
How long does it take to build an MVP with Flutter?
Most Flutter MVPs take 6-12 weeks to develop, depending on feature complexity. This timeline includes design, development, testing, and deployment. The single codebase approach means you get both iOS and Android versions simultaneously. Flutter’s Hot Reload feature and pre-built widgets accelerate the process compared to native development, which typically requires 16-20 weeks for both platforms.
Is Flutter suitable for complex applications or just simple MVPs?
Flutter handles both simple MVPs and complex, feature-rich applications effectively. Major companies like Google, Alibaba, and BMW use Flutter for production applications serving millions of users. The framework supports advanced features including complex animations, real-time data synchronization, and hardware integrations. Your MVP built with Flutter can grow into a full-scale application without requiring a complete rebuild.
What are the cost savings of using Flutter versus native development?
Flutter typically reduces development costs by 30-50% compared to building separate native iOS and Android apps. You need only one development team instead of two, reducing salary expenses and coordination overhead. The faster development timeline also means lower total project costs. Maintenance costs remain lower long-term since updates apply to both platforms simultaneously through the shared codebase.
Can I add platform-specific features to a Flutter app if needed?
Yes, Flutter provides robust platform channels that allow integration of platform-specific code when necessary. You can access native iOS and Android APIs for device-specific features like camera controls, sensors, or specialized hardware. The framework includes plugins for most common platform features, and developers can create custom platform integrations when unique requirements arise without abandoning the cross-platform benefits.
How does Flutter performance compare to native apps?
Flutter apps achieve near-native performance through direct compilation to machine code. The framework renders at 60fps on most devices, matching native app smoothness. Unlike frameworks that use JavaScript bridges, Flutter communicates directly with platform APIs, eliminating performance bottlenecks. For most use cases, users cannot distinguish between Flutter and native apps in terms of speed and responsiveness.
Top Industries Benefiting from Flutter App Development
Cross-platform mobile development has reshaped how businesses approach digital solutions. Companies now seek frameworks that deliver quality without requiring separate teams for iOS and Android platforms. Google’s Flutter framework addresses this need with a single codebase approach that works across multiple platforms.
Flutter accounts for nearly 30% of all new free iOS apps, showing its widespread adoption among developers worldwide. The framework’s ability to create native-like experiences while reducing development time has made it attractive across diverse sectors. FBIP recognizes this shift and works with businesses to build Flutter applications that meet modern user expectations.
Let’s explore which industries gain the most from this technology and why Flutter continues to grow in popularity.
Why Businesses Choose Flutter App Development
Before examining specific sectors, understanding Flutter’s core strengths helps explain its cross-industry appeal. The framework offers several advantages that translate to business value.
Development speed stands out as a primary benefit. Flutter’s hot reload feature enables developers to capture changes and implement code adjustments, which accelerates the testing process. Teams can iterate faster and launch products sooner.
Cost efficiency matters too. Writing code once for multiple platforms reduces resource requirements. Businesses save money by maintaining one development team instead of hiring separate iOS and Android specialists. This approach appeals to startups with limited budgets and enterprises looking to optimize spending.
User experience remains consistent across devices. Flutter applications deliver smooth animations and native performance on both operating systems. This consistency strengthens brand identity and user satisfaction.
Healthcare: Transforming Patient Care Through Mobile Apps
The healthcare sector faces unique challenges that make Flutter an ideal choice. Flutter apps assist healthcare providers by providing platforms for telehealth, patient management, and encrypted data communication.
Telemedicine has grown rapidly in recent years. Patients expect seamless video consultations, prescription management, and appointment scheduling through mobile apps. Flutter enables developers to build these features with real-time capabilities and secure data transmission.
Patient monitoring applications need to work reliably across different devices. Healthcare providers require apps that maintain HIPAA compliance while offering intuitive interfaces. Flutter prioritizes improved security tools and compliance support to offer secure data storage, encrypted communication, and compliance readiness (HIPAA, GDPR).
FBIP has observed healthcare clients benefit from Flutter’s ability to integrate with existing hospital management systems. The framework supports API connections to electronic health records while maintaining strict security standards.
Wearable device integration represents another growth area. Flutter’s support for IoT devices allows healthcare apps to collect data from fitness trackers and medical monitors. This real-time information helps doctors make informed decisions about patient care.
Fintech: Building Secure Financial Solutions
Financial technology demands the highest security standards and regulatory compliance. When developing a fintech app, developers should implement secure data storage, encrypted communication, and compliance readiness.
Mobile banking applications must handle sensitive transactions while providing smooth user experiences. Flutter enables fintech companies to build apps with biometric authentication, real-time transaction updates, and encrypted data transmission. These features build user trust and meet regulatory requirements.
Payment processing needs instant feedback and reliability. Users expect confirmation within seconds when transferring money or making purchases. Flutter’s native performance ensures transactions process quickly without lag or delays.
Flutter helps developers create apps based on market trends and customer needs, which is particularly relevant in fintech. The industry evolves rapidly with new features like cryptocurrency wallets, digital lending, and buy-now-pay-later services. Flutter’s modular architecture allows teams to add these features without rebuilding entire applications.
FBIP helps fintech clients implement robust security measures while maintaining user-friendly interfaces. The framework’s widget system enables customization that matches brand guidelines while meeting banking regulations.
Startups in the fintech space particularly benefit from Flutter’s cost efficiency. Development budgets can be reduced by 60-80% compared to native app development, allowing new companies to allocate resources toward customer acquisition instead of technical infrastructure.
E-commerce and Retail: Creating Seamless Shopping Experiences
Online shopping has become the primary revenue channel for many retailers. Mobile commerce continues growing as consumers prefer browsing and purchasing through smartphones.
Flutter-based retail and e-commerce applications drive sales with personalized shopping experiences, integrated payment systems, and real-time analytics. Product catalogs need to load quickly and display beautifully across different screen sizes. Flutter’s rendering engine ensures images appear crisp and animations run smoothly.
Shopping cart functionality must work flawlessly. Users abandon purchases when apps crash or payments fail. Flutter’s stable framework reduces technical issues that lead to lost sales.
Inventory management connects to backend systems through APIs. Retail apps need real-time stock updates to prevent customers from ordering unavailable items. Flutter supports these integrations while maintaining fast load times.
Push notifications drive customer engagement. Retailers send personalized offers based on browsing history and purchase patterns. Flutter apps can implement notification systems that increase conversion rates.
FBIP develops e-commerce solutions using Flutter that include features like wishlist management, multiple payment gateways, and order tracking. The framework’s flexibility allows customization for different business models, from marketplace platforms to brand-specific stores.
Education: Building Interactive Learning Platforms
Educational technology has transformed how students learn and teachers instruct. Mobile apps provide access to courses, study materials, and interactive content anywhere students have internet connections.
Learning management systems require video streaming, document viewing, and quiz features. Flutter handles multimedia content efficiently while maintaining responsive interfaces. Students can watch lectures, submit assignments, and participate in discussions through single applications.
Flutter enables features such as real-time predictive analytics, intelligent decision support, and personalized content recommendations when combined with AI tools. Educational apps can adapt content based on student performance and learning styles.
Gamification increases student engagement. Educational apps with progress tracking, achievement badges, and leaderboards motivate learners to complete courses. Flutter’s animation capabilities make these features visually appealing and fun.
Language learning apps particularly benefit from Flutter’s multimedia support. Applications need audio playback, speech recognition, and interactive exercises. The framework handles these requirements while maintaining smooth performance.
FBIP works with educational institutions to create apps that support both synchronous and asynchronous learning. Flutter enables features like live classroom sessions, recorded lectures, and collaborative workspaces.
Travel and Hospitality: Enhancing Customer Journeys
Travel planning involves multiple steps from research to booking to navigation. Mobile apps simplify this process by consolidating information and services in one place.
Flutter applications can be created for travel and hospitality with features like virtual tours and automated operations. Booking engines need to search flights, hotels, and activities while displaying results quickly. Flutter’s performance ensures search results appear without frustrating delays.
Real-time updates matter during travel. Flight status changes, gate assignments, and baggage claim information need immediate delivery. Flutter apps can implement push notifications and real-time data synchronization.
Map integration helps travelers navigate unfamiliar locations. Flutter supports Google Maps and other mapping services with smooth panning and zooming. Location-based recommendations for restaurants and attractions enhance user experiences.
Payment processing must support multiple currencies and international transactions. Travel apps need secure payment gateways that work globally. Flutter’s modular architecture allows integration with various payment providers.
Universal Destinations & Experiences uses Flutter for their iOS and Android Apps at their parks in Orlando, Hollywood, and Osaka, demonstrating the framework’s capability to handle enterprise-scale travel applications.
Gaming: Creating Engaging Mobile Experiences
Mobile gaming represents one of the fastest-growing entertainment sectors. Games need to run smoothly, otherwise users will become frustrated and leave your app. Flutter addresses this challenge with superior performance.
Flutter game development in 2D is gaining popularity and will continue through 2025 and beyond. The framework’s rendering engine delivers smooth animations at 60 frames per second, which is essential for responsive gameplay.
Game developers appreciate Flutter’s hot reload feature during development. Making adjustments to game mechanics, graphics, or user interfaces happens instantly without recompiling the entire project. This speeds up the creative process.
With advancements in AR and VR technology, Flutter is poised to play a significant role in creating immersive experiences. Gaming apps can incorporate augmented reality features that blend digital content with real-world environments.
Multiplayer functionality requires real-time synchronization between players. Flutter supports WebSocket connections and cloud services that enable competitive and cooperative gameplay.
FBIP helps game developers create engaging experiences that work across platforms. Flutter allows teams to reach both iOS and Android users simultaneously, expanding potential player bases.
Logistics and Supply Chain: Optimizing Operations
Supply chain management requires real-time tracking and communication between multiple parties. Flutter applications optimize logistics and supply chain processes with features ranging from route optimization to inventory management.
Delivery tracking apps need GPS integration and map displays. Customers want to see exactly where packages are and when they will arrive. Flutter supports location services that provide accurate real-time updates.
Fleet management requires monitoring vehicle locations, fuel consumption, and maintenance schedules. Mobile apps help dispatchers assign routes and drivers report issues. Flutter enables these features with reliable backend connections.
Warehouse management apps help workers scan barcodes, update inventory counts, and locate products. Flutter apps help businesses manage warehouses better by finding things fast, keeping track of stock, and making shipping easier.
Communication between drivers, dispatchers, and customers happens through in-app messaging. Flutter supports chat features with image sharing and status updates.
FBIP creates logistics applications that connect multiple stakeholders in supply chains. The framework’s cross-platform nature ensures everyone uses consistent interfaces regardless of device preferences.
Entertainment and Media: Delivering Content at Scale
Streaming services and media platforms require robust applications that handle high traffic volumes. NotebookLM, a new AI-powered research and writing assistant made by Google Labs, just launched their mobile apps built with Flutter, showing the framework’s capability for content-focused applications.
Video streaming needs efficient buffering and playback controls. Users expect minimal loading times and smooth playback across different connection speeds. Flutter’s performance optimization ensures satisfying viewing experiences.
Content recommendation engines personalize what users see based on viewing history and preferences. Flutter apps can integrate machine learning models that improve suggestions over time.
Social features encourage user engagement. Commenting, sharing, and creating watchlists build communities around content. Flutter’s UI components make these features intuitive and visually consistent.
Live streaming requires low latency and stable connections. Sports events, concerts, and news broadcasts need reliable delivery. Flutter supports real-time protocols that minimize delays between broadcast and viewing.
FBIP develops media applications that scale to accommodate growing user bases. Flutter’s architecture supports the infrastructure needed for content delivery networks and user management systems.
Food and Restaurant: Simplifying Ordering and Delivery
Food delivery apps have changed dining habits worldwide. Customers expect easy browsing, quick ordering, and accurate delivery tracking.
Menu displays need appetizing photos and clear descriptions. Flutter’s image optimization ensures food looks appealing while apps load quickly. Restaurants can update menus in real-time without app store submissions.
Order customization allows customers to specify preferences and dietary restrictions. Flutter’s form components make it easy to build interfaces for complex orders with multiple options.
Real-time order tracking shows preparation progress and delivery routes. Customers appreciate transparency about when food will arrive. Flutter’s location services and push notifications keep users informed.
Payment integration must support multiple methods from credit cards to digital wallets. Flutter enables secure payment processing that protects customer financial information.
FBIP creates restaurant applications that handle high order volumes during peak hours. The framework’s performance ensures smooth operation when demand spikes.
On-Demand Services: Connecting Providers and Customers
Service marketplaces connect customers with professionals for various needs. On-demand apps connect customers with different service providers, like Uber does for transportation and Zomato for food delivery.
Booking systems need calendar integration and availability management. Service providers update schedules while customers select convenient time slots. Flutter’s date-time components simplify these interactions.
Rating and review systems build trust between parties. Customers share experiences while providers maintain reputations. Flutter enables review displays that influence booking decisions.
In-app communication protects privacy while facilitating coordination. Customers and providers exchange messages without sharing personal contact information. Flutter supports chat features with read receipts and typing indicators.
Payment splitting and tipping options add flexibility. Customers appreciate convenient ways to handle transactions. Flutter’s payment integrations support various scenarios.
FBIP develops on-demand platforms that balance user needs with business requirements. The framework allows customization for different service categories from home repairs to professional consulting.
Real Estate: Modernizing Property Search and Management
Property technology has transformed how people buy, sell, and rent real estate. Flutter solutions in real estate streamline property management, improve client engagement, and offer advanced features like virtual tours.
Property listings need high-quality images and detailed information. Virtual tours allow potential buyers to explore homes remotely. Flutter’s multimedia capabilities support 360-degree photos and video walkthroughs.
Search filters help users find properties matching specific criteria. Location, price range, number of bedrooms, and amenities narrow results. Flutter’s UI components make filtering intuitive and responsive.
Mortgage calculators provide instant affordability estimates. Real estate apps with financial tools help buyers understand budgets. Flutter enables complex calculations that update in real-time as users adjust parameters.
Appointment scheduling connects buyers with agents for property viewings. Calendar integration ensures everyone sees available time slots. Flutter supports synchronization with external calendar services.
FBIP creates real estate applications that serve multiple stakeholders including buyers, sellers, agents, and property managers. Flutter’s flexibility accommodates diverse workflows within single platforms.
Why FBIP Chooses Flutter for Client Projects
As a website development company in Udaipur, FBIP has observed how Flutter transforms project timelines and outcomes. The framework’s single codebase approach reduces development time by 40% compared to building separate native apps.
Clients appreciate consistent experiences across devices. When businesses launch products simultaneously on iOS and Android, they reach wider audiences without staggered releases. This market timing advantage can determine competitive positioning.
Maintenance becomes simpler with unified codebases. Updates and bug fixes apply to all platforms at once. Teams spend less time managing multiple versions and more time adding features users want.
Performance remains comparable to native applications. Users cannot distinguish between Flutter apps and those built with platform-specific tools. This native-like quality maintains professional standards while gaining development efficiency.
FBIP works across industries from healthcare to e-commerce, adapting Flutter’s capabilities to specific business needs. The framework’s widget library allows customization that matches brand guidelines and user expectations.
Getting Started with Flutter App Development
Businesses considering Flutter should evaluate their specific requirements against the framework’s strengths. Projects requiring deep platform-specific features might face limitations, but most applications benefit from cross-platform development.
Startups with limited budgets find Flutter particularly attractive. Lower development costs allow more investment in marketing and customer acquisition. Faster time-to-market helps capture opportunities before competitors.
Established companies benefit from Flutter when expanding mobile presences. Existing web platforms can extend to mobile apps without massive resource allocation. The framework supports gradual adoption through modular integration.
Development teams appreciate Flutter’s learning curve. Dart programming language resembles other modern languages, making onboarding straightforward. Documentation and community resources support developers at all skill levels.
FBIP guides clients through technology decisions based on project goals and constraints. Flutter often emerges as the optimal choice for businesses seeking quality, speed, and cost efficiency.
Future Trends in Flutter App Development
By 2025, Flutter developers will increasingly use tools like Google ML Kit and TensorFlow Lite for features such as real-time predictive analytics, intelligent decision support, and personalized content recommendations. Artificial intelligence integration will become standard rather than exceptional.
The increasing prevalence of IoT devices makes Flutter a preferred framework for developing IoT applications. Smart home controls, wearable devices, and industrial sensors will connect through Flutter-based interfaces.
Flutter implementation in Wear OS demonstrates the framework’s capabilities for wearable app development. Smartwatches and fitness trackers will rely on Flutter for user interfaces.
Desktop and web support continues improving. Flutter 4.0 and subsequent updates are expected to bring refined cross-platform performance, smaller app sizes, and improved web and desktop support. This expansion means truly universal applications become practical.
FBIP stays current with these developments to offer clients cutting-edge solutions. The framework’s evolution ensures today’s investments remain relevant as technology advances.
Conclusion
Flutter app development serves industries ranging from healthcare to entertainment because it solves universal challenges. Businesses need fast development, consistent user experiences, and cost efficiency. The framework delivers these benefits while maintaining professional quality.
Healthcare providers reach patients through telemedicine apps. Financial institutions build secure banking platforms. Retailers create engaging shopping experiences. Educators deliver interactive learning. Each sector finds value in Flutter’s capabilities.
FBIP has seen how Flutter transforms client projects across diverse industries. The technology enables businesses to compete effectively in mobile-first markets. Companies that embrace cross-platform development position themselves for growth as mobile usage continues expanding.
Consider Flutter for your next mobile project. The framework’s maturity, Google’s backing, and widespread adoption make it a reliable choice for businesses of all sizes.
Ready to build a Flutter application that grows your business? Connect with FBIP to discuss how cross-platform development can meet your specific needs. Our team brings technical expertise and industry knowledge to every project, ensuring your mobile presence supports business objectives.
Frequently Asked Questions
Q: What makes Flutter different from other cross-platform frameworks?
Flutter compiles to native code rather than using bridges or interpreters. This approach delivers performance comparable to platform-specific development. The framework includes its own rendering engine, ensuring consistent appearance across devices. Hot reload accelerates development by showing changes instantly. These technical advantages translate to faster development and better user experiences than many alternatives.
Q: How long does it take to develop a Flutter app?
Development timelines depend on complexity and features. Simple applications with basic functionality might take 2-3 months. Complex apps with backend integration, payment processing, and advanced features could require 4-6 months. Flutter typically reduces development time by 30-40% compared to building separate native apps. Reusing code across platforms significantly impacts project schedules and allows faster market entry.
Q: Can Flutter apps access all device features?
Flutter provides plugins for most common device features including camera, GPS, sensors, and notifications. Platform channels allow integration with native code when specialized functionality is needed. Some cutting-edge features might require custom development, but the vast majority of app requirements work directly through Flutter. The plugin ecosystem continues growing as developers contribute new capabilities.
Q: Is Flutter suitable for enterprise applications?
Many large companies including Google, BMW, and Alibaba use Flutter for production apps. The framework handles enterprise requirements like security, scalability, and maintainability. Code sharing reduces long-term maintenance costs for companies managing large app portfolios. Enterprise teams appreciate Flutter’s testing capabilities and CI/CD integration. The framework matures continuously with Google’s ongoing investment and support.
Q: How does Flutter handle app updates and maintenance?
Single codebases simplify maintenance since changes apply to all platforms simultaneously. Bug fixes and feature additions require less effort than managing separate native codebases. App store submission processes remain unchanged, but development work decreases. Teams can respond faster to user feedback and market changes. This efficiency allows businesses to iterate quickly and maintain competitive applications.
Why Enterprises Are Switching to Flutter for Mobile App Development
The mobile app development arena has witnessed a shift in how businesses approach their digital strategies. Companies are now looking beyond traditional development methods and turning to frameworks that deliver speed, quality, and cost savings. Flutter has become the most popular cross-platform mobile framework, with over 46% of developers worldwide choosing it for their projects. This rising adoption signals a broader transformation happening across the business world.
What makes Flutter stand out is not just its technical features but how well it addresses real business challenges. Enterprises want apps that work seamlessly across platforms, require less maintenance, and can adapt quickly to market demands. Flutter checks all these boxes and more. Let’s break down why so many companies are making this switch.
Understanding Flutter for Mobile App Development
Flutter is Google’s open-source UI toolkit that lets developers build natively compiled applications for mobile, web, and desktop from a single codebase. When Google introduced this framework in December 2018, it changed how development teams approached multi-platform projects.
As of 2023, over 2 million developers have embraced this framework, marking a substantial increase in its developer community. The growth trajectory shows no signs of slowing down. Written in the Dart programming language, Flutter provides developers with a fast and expressive way to create visually appealing applications.
What sets Flutter apart is its rendering engine. The framework doesn’t rely on platform intermediaries to display UI elements. Instead, it renders directly on the device, which gives apps that smooth, native-like feel users expect. This approach allows Flutter apps to deliver high performance without the typical compromises seen in other cross-platform solutions.
The Business Case for Flutter App Development
Single Codebase, Multiple Platforms
The most compelling reason enterprises adopt Flutter is straightforward: write once, deploy everywhere. Development teams can create one codebase that runs on iOS, Android, web, and desktop platforms. This approach cuts development time significantly and makes the entire process more manageable.
Companies no longer need separate teams working on different versions of the same app. A unified codebase means coordinated updates, consistent user experiences, and easier maintenance. Developers write one codebase, which can then be deployed on multiple platforms, resulting in a substantial reduction in the cycle time for development.
For businesses watching their budgets, this translates to real savings. You’re paying for one development cycle instead of two or three. The resources previously split between platform-specific development can now focus on improving features and user experience.
Speed to Market with Hot Reload
Time is money in business. The faster you can get your app to users, the sooner you can start generating value. Flutter’s hot reload feature accelerates the development process in ways that traditional methods simply can’t match.
Hot reload lets developers see code changes reflected in the app immediately without restarting it. This means developers can experiment with new features, fix bugs, and iterate based on user feedback at a pace that keeps projects moving forward. Teams can test ideas quickly, discard what doesn’t work, and refine what does.
This speed advantage becomes even more pronounced during the testing and refinement phases. Changes that might take hours in a traditional setup can be done in minutes with Flutter. For enterprises operating in fast-moving markets, this agility can be the difference between leading and following.
Cost Reduction without Quality Compromise
Budget constraints affect every business decision, and app development is no exception. Flutter helps enterprises stretch their development budgets further without cutting corners on quality.
With Flutter for mobile app development, companies can significantly reduce their overall development costs. The single codebase model means fewer developers needed, shorter timelines, and reduced testing requirements. Maintenance becomes simpler too, as updates roll out across all platforms simultaneously.
According to IBM’s Data Breach Report, data breaches cost businesses an average of $4.45 million per incident in 2024. Flutter’s ability to patch vulnerabilities and deploy updates simultaneously across platforms reduces the window of exposure, helping enterprises protect themselves from costly security incidents.
Companies like FBIP understand these economics. As a leading website designing and development company, they’ve seen firsthand how Flutter helps businesses achieve their digital goals while managing costs effectively.
Technical Strengths Driving Enterprise Adoption
Performance That Matches Native Apps
Performance concerns often stop enterprises from considering cross-platform solutions. Flutter addresses this head-on. Apps built with Flutter 3.10 showed a 20% improvement in rendering speed and a 15% reduction in app size, thanks to ongoing optimizations.
The framework compiles directly to native code, which means apps run smoothly without the interpretation layer that can slow down other cross-platform frameworks. Users get the responsive, fluid experience they expect from native apps, while developers get the productivity benefits of a unified codebase.
Complex animations, smooth transitions, and data-intensive operations all run efficiently in Flutter apps. This makes the framework suitable for demanding enterprise applications that need to handle real-time data, complex workflows, and intensive user interactions.
Flexible Architecture for Complex Requirements
Enterprise apps come with complicated requirements. They need to integrate with existing systems, handle sensitive data, and scale to support thousands of users. Flutter’s architecture accommodates these demands.
The framework uses a widget-centric approach where every UI element is a widget. This modular design makes code more maintainable and easier to understand. Teams can work on different parts of the app without stepping on each other’s toes.
Flutter supports common architectural patterns like BLoC (Business Logic Components), which helps separate business logic from UI code. This separation makes apps easier to test, maintain, and scale as requirements grow. Large development teams can work efficiently because the code structure remains clear and organized.
Rich Ecosystem and Community Support
Flutter has a war chest of over 4,000 libraries that developers can use to build apps. This extensive ecosystem means teams don’t have to build everything from scratch. Need authentication? There’s a package for that. Want to add analytics? Multiple options exist.
The Flutter community is active and responsive. When developers encounter problems, they can find solutions in forums, documentation, and code examples. This strong support network reduces the learning curve and helps teams solve issues quickly.
Google continues investing in Flutter’s development, regularly releasing updates that add new features and improve performance. This ongoing support gives enterprises confidence that the framework will remain relevant and well-maintained for years to come.
Real-World Enterprise Success with Flutter
Major companies like BMW, Google Pay, and Credit Agricole Bank have successfully deployed Flutter for large-scale production applications. These aren’t simple apps. They handle complex features, serve millions of users, and meet strict enterprise standards.
Credit Agricole Bank Polska developed a completely new application with many features in just one year using Flutter technology. By 2024, over 1 million customers use their digital channels, demonstrating that Flutter can handle the demands of high-traffic, feature-rich enterprise applications.
According to research, 71.2% of technology leaders agree that Flutter has been ready for enterprise apps over the past three years, while 85% believe Flutter will be even more suitable for large-scale projects in the next two years. This growing confidence among decision-makers reflects Flutter’s proven track record.
Security and Compliance Considerations
Security cannot be an afterthought for enterprises. Flutter provides the tools and capabilities needed to build secure applications that meet regulatory requirements.
The framework supports controlled app distribution through private app stores and Mobile Device Management platforms. This ensures only authorized users can access sensitive enterprise applications. Companies can implement encryption, secure data storage, and other security measures using Flutter’s native capabilities or third-party packages.
When vulnerabilities are discovered, maintaining one codebase makes patching faster and more reliable. Updates can be deployed simultaneously across all platforms, reducing the window of exposure. This unified approach to security maintenance helps enterprises stay compliant and protect sensitive data.
For companies like FBIP, which provides web development and IT services, understanding these security considerations is part of delivering quality solutions that enterprises can trust.
Integration Capabilities with Existing Systems
Enterprises don’t operate in isolation. Their apps need to communicate with existing databases, APIs, and legacy systems. Flutter makes these integrations possible through its flexible architecture and extensive package ecosystem.
The framework can work with REST APIs, GraphQL, and other common data exchange formats. It supports integration with cloud services, on-premise systems, and hybrid setups. Teams can gradually incorporate Flutter into existing applications using platform-specific modules when necessary.
This flexibility means enterprises don’t have to replace their entire technology stack to benefit from Flutter. They can introduce Flutter apps that work alongside existing systems, creating a smooth transition path that minimizes disruption.
The Future of Flutter in Enterprise Development
Flutter-powered apps now account for 16% of the complete app market, a testament to the framework’s growing acceptance and effectiveness. This market share continues expanding as more companies recognize Flutter’s benefits.
Looking ahead, Flutter is well-positioned to incorporate emerging technologies. The framework already supports machine learning integrations through TensorFlow Lite and other libraries. As augmented reality and Internet of Things applications become more common, Flutter’s adaptability will help enterprises stay current with technological trends.
Large organizations increasingly recognize the benefits of Flutter, leading to the development of specialized tools, frameworks, and best practices tailored for enterprise-level app development. This maturing ecosystem makes Flutter an even more attractive option for companies planning their long-term digital strategies.
Making the Switch: What Enterprises Should Know
Transitioning to a new development framework requires planning. Enterprises considering Flutter should start by assessing their current needs and future goals. What platforms do you need to support? What are your performance requirements? How important is time to market?
Teams will need time to learn Dart and understand Flutter’s widget-based approach. The good news is that developers with experience in JavaScript or other C-like languages can pick up Dart relatively quickly. The extensive documentation and active community make the learning process smoother.
Starting with a smaller project or proof of concept lets teams gain experience before committing to larger initiatives. This approach reduces risk and builds confidence in the framework’s capabilities.
Working with experienced development partners like FBIP can accelerate the transition. Their expertise in website designing, development, and mobile app solutions helps businesses make informed decisions about their Flutter adoption strategy.
Conclusion
The shift toward Flutter for mobile app development reflects a broader change in how enterprises approach digital transformation. Companies need solutions that deliver quality quickly without breaking the budget. Flutter meets these needs while providing the flexibility and performance modern applications require.
From single codebase efficiency to hot reload speed, from cost savings to robust security, Flutter offers tangible benefits that directly impact business outcomes. The framework has matured beyond its startup roots to become a reliable choice for enterprise-scale applications.
As more companies share their success stories and the ecosystem continues growing, Flutter’s position in enterprise development will only strengthen. For businesses planning their mobile strategy, now is the right time to consider what Flutter can offer.
Ready to take your mobile app development to the next level? FBIP brings years of experience in web development, mobile solutions, and digital services to help your business succeed. Our team understands the challenges enterprises face and can guide you through every step of your Flutter journey. Connect with FBIP today to discuss how we can bring your app vision to life with cutting-edge technology and expert development services.
Frequently Asked Questions
Q1: Is Flutter suitable for large enterprise applications with complex requirements?
Yes, Flutter handles complex enterprise applications effectively. The framework supports sophisticated architectural patterns, integrates with existing systems, and scales to serve millions of users. Companies like BMW and Google Pay use Flutter for their production apps, proving it can meet demanding enterprise standards. The widget-based architecture keeps code organized even as apps grow in complexity.
Q2: How does Flutter app development compare in cost to native development?
Flutter typically costs 30-50% less than native development because you maintain one codebase instead of separate iOS and Android versions. You need fewer developers, shorter development timelines, and simplified testing processes. Maintenance costs decrease too since updates deploy simultaneously across platforms. These savings add up significantly over an app’s lifetime without sacrificing quality or performance.
Q3: Can existing native apps be migrated to Flutter?
Yes, you can migrate existing apps to Flutter gradually or completely. The framework supports incremental adoption, letting you replace parts of native apps with Flutter modules step by step. Some companies rewrite their apps entirely in Flutter to take full advantage of its features. The best approach depends on your app’s complexity, business requirements, and timeline constraints.
Q4: What kind of performance can enterprises expect from Flutter apps?
Flutter apps deliver near-native performance because they compile directly to machine code. The framework handles complex animations, real-time data processing, and intensive user interactions smoothly. Recent versions showed 20% improvements in rendering speed and reduced app sizes. For most use cases, users won’t notice any performance difference between Flutter and native apps.
Q5: Does Flutter provide adequate security for handling sensitive enterprise data?
Flutter offers strong security capabilities for enterprise applications. You can implement encryption, secure storage, authentication, and other security measures using native features or trusted packages. The framework supports controlled distribution through private app stores and Mobile Device Management platforms. Single codebase maintenance makes patching vulnerabilities faster across all platforms, reducing security risks for enterprise data.

Flutter + Blockchain: Building Decentralized Apps (DApps)
Mobile app development has changed dramatically over the past few years. Developers now combine Flutter’s cross-platform capabilities with blockchain technology to create decentralized applications that work seamlessly across devices. This shift opens new possibilities for building secure, transparent apps that give users control over their data and digital assets.
Blockchain networks and mobile frameworks like Flutter create a powerful combination. Developers can build apps that run on Ethereum, Solana, or Polygon while maintaining a single codebase. This approach saves time and resources while delivering native-like performance on both Android and iOS platforms.
What Makes Flutter Blockchain Development Different
Traditional app development relies on centralized servers that store and manage user data. Blockchain changes this model completely. When you build a DApp with Flutter, you create applications that interact directly with distributed networks. Smart contracts handle business logic, and users maintain ownership of their information.
Flutter supports multiple blockchain platforms through specialized packages. Developers use web3dart for Ethereum-based networks, while the Solana package handles Solana blockchain interactions. Each blockchain offers different features, transaction speeds, and cost structures that affect your app design decisions.
Flutter brings several strengths to blockchain development. The framework provides hot reload functionality, letting you test blockchain interactions quickly without rebuilding your entire app. You get consistent UI components across platforms, and Flutter’s widget system makes it simple to display complex blockchain data like transaction histories and wallet balances.
Companies like FBIP recognize these advantages and specialize in Flutter development, helping businesses build modern mobile solutions that integrate with emerging technologies.
Core Components of Flutter DApps
Building a DApp requires understanding several key elements that work together. Let’s break down each component and see how they fit into your Flutter application.
Smart Contracts and Their Role
Smart contracts serve as the backbone of any DApp. These self-executing programs run on blockchain networks and contain the rules for your application. When users interact with your Flutter app, they trigger smart contract functions that process transactions, update states, or transfer tokens.
You can use the web3dart library to interact with blockchain platforms and deploy and execute smart contracts. Smart contracts written in Solidity for Ethereum-based networks define what actions users can take and how the system responds.
Your Flutter app never stores sensitive business logic locally. Everything runs on the blockchain, making it tamper-proof and transparent. Users can verify exactly what happens when they press a button in your app by reading the smart contract code.
Wallet Integration Fundamentals
Every DApp needs wallet functionality. Wallets store private keys, sign transactions, and manage digital assets. Flutter apps connect to existing wallet providers or implement custom wallet solutions.
Popular libraries like web3dart for Ethereum simplify wallet integration, handling the cryptographic operations required to sign transactions securely. Your app communicates with these wallets through standardized protocols, requesting user approval before executing any blockchain transaction.
Users appreciate when apps support multiple wallet options. Some prefer MetaMask for its widespread adoption, while others use Trust Wallet or WalletConnect for mobile-first experiences. Your Flutter app should accommodate these preferences through flexible integration patterns.
Connecting to Blockchain Networks
Flutter apps don’t directly access blockchain networks. Instead, they connect through RPC (Remote Procedure Call) endpoints that serve as gateways. These endpoints let your app read blockchain data, submit transactions, and listen for events.
You configure RPC connections in your Flutter project by specifying network URLs. Mainnet connections interact with live blockchains where real money and assets exist. Testnets provide safe environments for development and testing without financial risk.
Network selection affects your app’s performance. Public RPC endpoints work for prototypes but may have rate limits. Production apps often use dedicated RPC providers that offer faster response times and higher reliability.
Building Your First Flutter Blockchain App
Creating a DApp involves specific steps that differ from traditional mobile development. Here’s how to get started with your first Flutter blockchain project.
Setting Up Your Development Environment
Start by installing Flutter and setting up your IDE. Android Studio and Visual Studio Code both work well for Flutter development. You’ll also need Node.js and npm to install blockchain development tools.
Add the required packages to your Flutter project’s pubspec.yaml file. The web3dart package provides Ethereum integration, while http handles network requests. Install Truffle or Hardhat for smart contract development and testing.
Configure your development blockchain using Ganache, which creates a local Ethereum network. This lets you test transactions without spending real cryptocurrency or waiting for network confirmations.
Creating Smart Contract Interfaces
Your Flutter app interacts with smart contracts through ABI (Application Binary Interface) definitions. The ABI describes available functions, their parameters, and return types. Generate these files when you compile your Solidity contracts.
Load ABI files into your Flutter app using asset loading. Parse the JSON structure to create contract instances that you can call from Dart code. Each contract function becomes a method you invoke with appropriate parameters.
Error handling becomes critical when working with blockchain. Network failures, insufficient gas, or rejected transactions require proper user feedback. Implement try-catch blocks around blockchain calls and provide clear error messages.
Implementing Transaction Logic
Transactions change blockchain state and cost gas fees. Your Flutter app must prepare transactions, get user approval, submit them to the network, and wait for confirmation.
Build transaction objects that specify the contract address, function to call, and parameters. Calculate gas estimates to show users the expected transaction cost. Sign transactions with the user’s private key through their connected wallet.
Monitor transaction status by polling the network or subscribing to transaction events. Show loading indicators while transactions process, and update your UI once confirmations arrive. Users need to know when their actions complete successfully.
Advanced Flutter Blockchain Techniques
Moving beyond basic DApps requires mastering more sophisticated patterns and tools. These techniques help you build production-ready applications.
State Management for Blockchain Data
Blockchain data updates differently than typical REST APIs. You need state management that handles asynchronous updates, pending transactions, and network events. Provider and Riverpod work well for Flutter blockchain apps.
Create state classes that track wallet connection status, network selection, and pending transactions. Update state when blockchain events occur, triggering UI rebuilds that reflect current data. Cache blockchain queries to reduce RPC calls and improve app responsiveness.
Listen to smart contract events to detect state changes. When other users interact with your contract, your app should update automatically. WebSocket connections provide real-time event streams that keep your app synchronized with blockchain state.
Optimizing Gas Costs
Gas fees directly impact user experience. High transaction costs discourage users from interacting with your DApp. Optimize your smart contracts to minimize computational complexity and storage operations.
Batch multiple operations into single transactions when possible. Instead of making three separate token transfers, combine them into one function call. This reduces the overall gas cost and improves efficiency.
Let users customize gas prices based on transaction urgency. Show current network gas prices and let users choose between fast, standard, and slow processing. Display the estimated fee in familiar currency denominations alongside native token amounts.
Security Considerations
Security takes on new dimensions in blockchain development. Your Flutter app handles private keys and valuable assets, making it a target for attacks. Implement security best practices at every layer.
Never store private keys in plain text or app preferences. Use secure storage solutions provided by the platform, or better yet, let dedicated wallet apps manage keys. Your app should only request signatures, never expose raw private keys.
Validate all user inputs before sending them to smart contracts. Malicious data could trigger unintended contract behavior or drain user funds. Implement input sanitization and range checks in your Flutter code.
Audit your smart contracts before deployment. Professional security reviews catch vulnerabilities that could compromise your users. Even small mistakes in contract code can lead to permanent loss of funds.
Real-World Applications and Use Cases
Flutter blockchain development powers diverse applications across industries. Understanding practical use cases helps you identify opportunities for your own projects.
DeFi and Financial Services
Decentralized finance applications let users trade, lend, and borrow without intermediaries. Flutter apps provide intuitive interfaces for complex DeFi protocols. Users can swap tokens, provide liquidity, or stake assets through mobile-friendly experiences.
Payment apps built with Flutter and blockchain offer global transfers without traditional banking infrastructure. Users send money across borders with lower fees and faster settlement times. The combination of Flutter’s UI capabilities and blockchain’s transparency creates trustworthy financial tools.
NFT Marketplaces and Digital Collectibles
NFT platforms require responsive interfaces that display digital art and collectibles. Flutter’s rich widget library makes it easy to build galleries, detail views, and trading interfaces. Connect to NFT smart contracts to handle minting, transferring, and marketplace functions.
Gaming applications integrate NFTs as in-game assets that players truly own. Flutter handles the game interface while blockchain manages item ownership and trading. This creates new economic models where players can buy, sell, and trade game items freely.
Supply Chain and Verification Systems
Track products from manufacture to delivery using Flutter apps that read blockchain records. Each step in the supply chain creates an immutable record that users can verify. Flutter interfaces make complex supply chain data accessible and understandable.
Certificate verification apps use blockchain to prevent fraud. Educational credentials, professional licenses, or product authenticity certificates stored on-chain become instantly verifiable through Flutter mobile apps.
Choosing Between Blockchain Networks
Different blockchains offer different trade-offs. Your choice affects transaction costs, speed, and available features.
Ethereum remains the most established platform with extensive tooling and community support. Network congestion can cause high gas fees during peak times. Layer 2 solutions like Polygon provide Ethereum compatibility with lower costs and faster transactions.
Solana offers high throughput and low transaction fees. The network processes thousands of transactions per second, making it suitable for high-frequency applications. Solana’s programming model differs from Ethereum, requiring different development approaches.
Binance Smart Chain provides EVM compatibility with faster block times. Many developers choose BSC for its balance between cost, speed, and compatibility with Ethereum tooling.
Working with Professional Flutter Developers
Complex blockchain projects benefit from experienced development teams. Companies like FBIP bring expertise in both Flutter development and blockchain integration, helping you avoid common pitfalls and implement best practices.
Professional developers understand the nuances of different blockchain platforms. They can recommend the right network for your use case and implement efficient integration patterns. This expertise accelerates development and produces more reliable applications.
When evaluating development partners, look for portfolios that demonstrate blockchain experience. Ask about their approach to security, testing, and ongoing maintenance. Quality Flutter blockchain development requires knowledge of both mobile development and distributed systems.
Testing and Deployment Strategies
Thorough testing prevents costly mistakes in production. Blockchain applications require testing at multiple levels.
Smart Contract Testing
Test smart contracts extensively before deployment. Write unit tests that verify each contract function behaves correctly. Use test networks to validate contract interactions under realistic conditions.
Security testing catches vulnerabilities that could compromise user funds. Run automated security scanners and conduct manual code reviews. Consider professional security audits for contracts handling significant value.
Flutter App Testing
Test your Flutter app’s blockchain integration using mock contracts and test networks. Verify that transaction submission, status monitoring, and error handling work correctly. Test edge cases like network failures and rejected transactions.
Conduct user acceptance testing with real users on testnets. Gather feedback on the user experience when connecting wallets, signing transactions, and viewing blockchain data. Iterate based on this feedback before mainnet launch.
Deployment Process
Deploy smart contracts to mainnet after thorough testing. Use contract verification services to publish your source code, building user trust. Initialize contract parameters carefully, as many settings become immutable after deployment.
Release your Flutter app through standard app stores. Include clear documentation about network requirements and wallet setup. Provide customer support channels for users encountering blockchain-related issues.
Future Trends in Flutter Blockchain Development
The intersection of Flutter and blockchain continues evolving. Several trends shape the future of DApp development.
Cross-chain applications that work across multiple blockchains become increasingly common. Flutter’s single codebase approach aligns well with multi-chain strategies. Developers build once and support Ethereum, Solana, and other networks simultaneously.
Layer 2 scaling solutions improve blockchain performance while maintaining security. Flutter apps can target these faster, cheaper networks without sacrificing Ethereum’s security guarantees. This makes DApps more accessible to mainstream users.
Improved wallet standards simplify authentication and transaction signing. WalletConnect and similar protocols provide consistent experiences across different wallet providers. Flutter apps benefit from these standardized integration points.
Why Choose FBIP for Flutter Blockchain Development
Building DApps requires specialized knowledge that combines mobile development expertise with blockchain understanding. FBIP offers comprehensive Flutter development services, including emerging technologies like blockchain integration. Their team stays current with the latest development practices and can guide your project from concept to deployment.
Whether you’re creating a DeFi platform, NFT marketplace, or supply chain solution, professional development support ensures your app meets security standards and delivers excellent user experiences. FBIP’s experience with Flutter development positions them to help you navigate the technical challenges of blockchain integration.
Ready to build your next decentralized application? Connect with FBIP to discuss your Flutter blockchain project and learn how professional development support can bring your vision to life. Visit https://fbipool.com/ to explore their Flutter development services and start your DApp journey today.
Frequently Asked Questions
What are the main benefits of using Flutter for blockchain app development?
Flutter lets you build blockchain applications for both Android and iOS from a single codebase, cutting development time and costs in half. The framework’s hot reload feature speeds up testing of blockchain interactions, and its rich widget library creates polished interfaces for displaying complex blockchain data like transactions and wallet balances.
Which blockchain platforms work best with Flutter applications?
Ethereum and its compatible networks work particularly well with Flutter through the web3dart package. Solana offers another strong option with dedicated Flutter packages. Binance Smart Chain and Polygon provide EVM compatibility with lower transaction costs, making them popular choices for cost-sensitive applications that need Ethereum’s ecosystem.
How secure are Flutter-based decentralized applications?
Flutter DApps can be highly secure when developers follow best practices. Never store private keys in the app itself; instead, integrate with established wallet providers that handle key management. Always validate inputs before blockchain interactions, audit smart contracts thoroughly, and use secure storage mechanisms for sensitive data. Security depends more on implementation than the Flutter framework itself.
What development tools do I need to build Flutter blockchain apps?
You’ll need the Flutter SDK, an IDE like Android Studio or Visual Studio Code, and Node.js for blockchain tooling. Install packages like web3dart for Ethereum integration. Use Truffle or Hardhat for smart contract development, and run Ganache for local blockchain testing. These tools create a complete development environment for building and testing DApps.
How much does it cost to develop a Flutter blockchain application?
Development costs vary widely based on complexity, features, and blockchain choice. Simple wallet apps might cost less, while complex DeFi platforms with multiple smart contracts require larger investments. Factor in smart contract audits, RPC service subscriptions, and ongoing maintenance. Network choice affects operational costs, with Ethereum gas fees being higher than alternatives like Polygon or Solana.

Secure Your Flutter App: Best Practices for Data Protection
Mobile app security has become a non-negotiable priority for developers and businesses. With cyber threats growing more sophisticated each day, protecting user data in your Flutter application demands attention and action. Cybercrime damages are projected to exceed $10.5 trillion annually by 2025, making security measures a business necessity rather than an optional feature.
Flutter security goes beyond basic password protection. It encompasses everything from data encryption to secure authentication methods. Whether you’re building a fintech platform, healthcare app, or e-commerce solution, understanding how to protect sensitive information can mean the difference between user trust and a data breach that damages your reputation.
This guide walks you through proven strategies to strengthen your Flutter app’s defenses. You’ll discover practical techniques for safeguarding user data, securing network communications, and preventing common vulnerabilities that attackers exploit.
Why Flutter Security Matters for Your Mobile App
Mobile applications handle increasingly sensitive information. Banking details, health records, personal communications, and authentication tokens all flow through apps daily. A single security flaw can expose thousands of users to identity theft, financial fraud, or privacy violations.
Flutter’s cross-platform nature brings unique security considerations. Code compiled for iOS and Android must protect data consistently across different operating systems. Each platform has native security features, but developers need to implement them correctly.
User trust drives app success. People abandon apps after security incidents, and negative reviews spread quickly. Conversely, apps with strong security reputations attract users who value their privacy. Companies like FBIP understand that security isn’t just technical debt, it’s a competitive advantage that influences user retention and growth.
Understanding Flutter App Vulnerabilities
Before securing your app, you need to know what threats exist. Common vulnerabilities in Flutter applications include insecure data storage, weak authentication, unencrypted network traffic, and reverse engineering attempts.
Insecure data storage happens when developers save sensitive information in plain text or use standard storage methods for confidential data. Attackers with device access can extract API keys, user credentials, and personal information stored improperly.
Man-in-the-middle attacks target network communications. Without proper encryption, attackers intercept data traveling between your app and backend servers. They can read, modify, or steal information during transmission.
Code obfuscation weaknesses allow reverse engineering. Skilled attackers decompile Flutter apps to understand logic, find security flaws, or extract hardcoded secrets. Apps without code protection reveal their inner workings to malicious actors.
Implementing Secure Data Storage in Flutter
Protecting data at rest starts with choosing the right storage solution. Flutter developers should never store sensitive information in shared preferences or standard file storage. These methods leave data vulnerable to extraction.
The flutter_secure_storage package provides encrypted storage for sensitive data. It uses Keychain on iOS and EncryptedSharedPreferences on Android. This package encrypts keys and values before storing them, adding a security layer that standard storage lacks.
Here’s what secure storage protects:
- Authentication tokens and session identifiers
- User credentials and API keys
- Personal identification numbers
- Payment information and financial data
- Private encryption keys
Runtime secrets require special handling. Debug builds should never contain production API keys or database credentials. Use environment variables and build configurations to separate development secrets from production values. This practice prevents accidental exposure when sharing code or during testing phases.
Biometric authentication adds another security layer. Flutter’s local_auth package enables fingerprint and face recognition features. Users appreciate biometric options because they balance security with convenience.
Securing Network Communications
All network traffic must use HTTPS. Never send sensitive data over unencrypted HTTP connections. SSL/TLS encryption protects data during transmission and verifies server authenticity.
Certificate pinning strengthens HTTPS security. Standard SSL connections trust any valid certificate, but certificate pinning ensures your app only accepts specific certificates. This prevents man-in-the-middle attacks even with compromised certificate authorities.
API security requires authentication tokens rather than embedded credentials. Implement OAuth 2.0 or similar protocols for user authentication. Tokens expire and can be revoked, unlike hardcoded passwords that remain permanent vulnerabilities.
Request validation happens on both client and server sides. Validate input formats, check data types, and sanitize user input before processing. These checks prevent injection attacks and data corruption.
Code Obfuscation and App Hardening
Code obfuscation makes reverse engineering difficult. Flutter’s built-in obfuscation renames classes, functions, and variables during compilation. Enable obfuscation for release builds using the –obfuscate flag with the –split-debug-info parameter.
Obfuscation doesn’t guarantee complete protection, but it raises the bar for attackers. Combined with other security measures, it creates multiple obstacles that discourage most threats.
Root and jailbreak detection protect against compromised devices. Rooted Android devices and jailbroken iPhones bypass operating system security features. Apps handling sensitive data should detect these conditions and either warn users or restrict functionality.
Debug mode detection prevents running production apps with debugging enabled. Debug builds expose logging information and allow runtime modifications. Check for debug mode and disable sensitive features when detected.
Authentication and Authorization Best Practices
Strong authentication methods form your first defense line. Multi-factor authentication (MFA) combines something users know (password) with something they have (phone) or something they are (biometric). MFA dramatically reduces unauthorized access risks.
Password policies matter despite widespread password fatigue. Enforce minimum length requirements, character variety, and regular password updates. Consider passwordless authentication options like magic links or biometric-only access for improved security.
Token management requires careful attention. Store tokens securely, implement proper expiration, and refresh tokens before they expire. Never store refresh tokens alongside access tokens, and always transmit tokens over encrypted connections.
Firebase Authentication and similar services offer robust authentication frameworks. These platforms handle security concerns like token management, session handling, and password storage. FBIP often recommends Firebase for projects requiring reliable authentication without building everything from scratch.
Regular Security Updates and Dependency Management
Flutter framework updates include security patches. Keep your Flutter SDK current to benefit from the latest security improvements. Outdated Flutter versions may contain known vulnerabilities that attackers exploit.
Package dependencies create security risks. Third-party packages might contain vulnerabilities or malicious code. Audit dependencies regularly, review package permissions, and prefer packages with active maintenance and security records.
Automated scanning tools identify vulnerabilities in your code and dependencies. Tools like Snyk, OWASP Dependency-Check, and GitHub’s security alerts flag known issues. Address critical vulnerabilities immediately and monitor for new threats.
Security testing should happen throughout development, not just before release. Penetration testing, code reviews, and vulnerability assessments catch issues early when they’re easier to fix. FBIP incorporates security testing into development workflows to catch problems before they reach production.
Mobile App Security for Different Industries
Fintech applications require heightened security measures. Financial apps must comply with regulations like PCI DSS and protect transaction data rigorously. Implement transaction signing, fraud detection algorithms, and secure payment gateways.
Healthcare apps handle protected health information subject to HIPAA and similar regulations. Encrypt all health data, implement audit logging, and restrict access based on user roles. Privacy isn’t optional in healthcare, it’s legally mandated.
E-commerce platforms protect customer payment information and personal details. Secure checkout processes, encrypt stored payment methods, and implement fraud prevention measures. Customer confidence drives online purchases, and security breaches destroy that confidence quickly.
Monitoring and Incident Response
Security doesn’t end at deployment. Monitoring tools track suspicious activities, failed authentication attempts, and unusual data access patterns. Real-time alerts enable quick responses to potential security incidents.
Logging practices balance security with privacy. Log security-relevant events like authentication attempts and data access, but avoid logging sensitive information itself. Logs help investigate incidents without creating new vulnerabilities.
Incident response plans prepare teams for security breaches. Document procedures for containing breaches, notifying affected users, and restoring services. Quick, organized responses minimize damage when incidents occur.
Building Security Into Your Development Process
Security by design incorporates protection measures from project inception. Requirements should include security specifications, and architecture reviews should identify potential vulnerabilities before coding begins.
Developer training keeps teams current with security practices. Regular workshops, security champions within teams, and code review processes spread security knowledge. Every developer should understand basic security principles.
Companies like FBIP recognize that security isn’t a single person’s responsibility. Development teams, QA engineers, and project managers all contribute to secure applications. Building security culture ensures consistent attention to protection measures throughout projects.
Partner With Experts for Flutter App Development
Securing Flutter applications requires expertise, time, and vigilance. While these best practices provide a foundation, professional development partners bring specialized knowledge and experience that accelerates secure app development.
FBIP offers Flutter development services with security built into every project phase. From initial planning through deployment and maintenance, security considerations guide development decisions. The team stays current with emerging threats and evolving best practices to protect client applications.
Whether you’re starting a new Flutter project or enhancing existing app security, expert guidance helps avoid costly mistakes and potential breaches. Professional developers understand the nuances of platform-specific security features and cross-platform challenges.
Ready to build or secure your Flutter application? Connect with FBIP to discuss your project requirements and learn how professional development services protect your app and your users. Visit https://fbipool.com/ to explore services and start a conversation about your mobile app security needs.
Frequently Asked Questions About Flutter Security
What is the most secure way to store sensitive data in Flutter apps?
The flutter_secure_storage package provides the most secure storage option for sensitive data. It uses platform-specific encryption with iOS Keychain and Android EncryptedSharedPreferences. This approach encrypts both keys and values, protecting information like authentication tokens, API keys, and user credentials even if someone gains device access.
How often should I update my Flutter app for security purposes?
Update your Flutter app whenever new SDK versions release with security patches, typically every few months. Check dependencies monthly for vulnerabilities using automated scanning tools. Critical security issues require immediate updates regardless of your regular release schedule. Staying current with updates prevents attackers from exploiting known vulnerabilities in outdated versions.
Can Flutter apps be reverse engineered, and how do I prevent it?
Yes, Flutter apps can be reverse engineered by skilled attackers. Prevent this by enabling code obfuscation during release builds using the obfuscate flag. Combine obfuscation with root detection, certificate pinning, and never hardcode sensitive information. While complete protection is impossible, these measures make reverse engineering significantly more difficult and time-consuming for attackers.
What authentication method provides the best security for Flutter apps?
Multi-factor authentication combined with biometric verification offers the strongest security. This approach requires users to provide something they know, something they have, and something they are. For practical implementation, combine secure password requirements with biometric authentication using Flutter’s local_auth package. Consider Firebase Authentication or OAuth providers for robust, tested authentication frameworks.
How do I secure API communications in my Flutter application?
Always use HTTPS for all network communications to encrypt data in transit. Implement certificate pinning to prevent man-in-the-middle attacks by accepting only specific certificates. Use OAuth tokens rather than embedded credentials, validate all API responses, and implement proper error handling that doesn’t expose sensitive information. Never trust client-side validation alone, always validate data on your backend servers.

Flutter and AR: Creating Augmented Reality Experiences
Augmented reality has changed how users interact with mobile applications. Flutter can be combined with AR frameworks to create interactive cross-platform experiences. Developers now build AR applications faster while maintaining high performance across Android and iOS devices.
The combination of Flutter AR capabilities with modern development practices opens new possibilities for businesses. Whether you need virtual furniture placement, interactive education tools, or gaming features, Flutter provides the foundation for building these experiences. Companies like FBIP help businesses transform AR concepts into working applications through expert mobile development services.
What Makes Flutter AR Different
Flutter AR refers to building augmented reality applications using Flutter’s cross-platform framework. Third-party plugins integrate AR into Flutter apps since the Flutter engine doesn’t directly support AR functionality. This approach allows developers to write code once and deploy AR experiences on both major mobile platforms.
The beauty of Flutter AR lies in its accessibility. Developers don’t need to learn separate AR frameworks for each platform. Instead, they use unified plugins that connect Flutter apps to native AR capabilities. ARCore handles Android devices while ARKit powers iOS experiences.
Why Businesses Choose Flutter AR Development
Cost savings drive many companies toward Flutter AR solutions. Building separate native apps for Android and iOS doubles development time and budget. Flutter AR cuts this work significantly while maintaining quality.
Speed matters in competitive markets. Flutter’s hot reload feature lets developers see changes instantly during AR app creation. This rapid iteration cycle means faster launches and quicker responses to user feedback.
Cross-platform consistency becomes simpler with Flutter AR. Users expect similar experiences whether they open your app on an Android phone or iPhone. Flutter helps maintain that consistency without duplicating effort.
Core Technologies Behind Flutter AR
Understanding the foundation helps developers make better choices. AR overlays digital elements in the real world while VR immerses users in entirely simulated environments. Flutter AR focuses on blending digital content with physical surroundings.
ARCore and ARKit Integration
Google’s ARCore powers Android AR experiences. It handles environmental understanding, motion tracking, and light estimation. Apps built with ARCore can detect flat surfaces, understand spatial relationships, and place virtual objects convincingly.
Apple’s ARKit serves the same purpose for iOS devices. ARKit works only on mobile devices with A9 or later processors on iOS 11 and newer. This includes iPhone 6s and later models, plus recent iPad versions. Some advanced features require iOS 12 or newer versions.
Popular Flutter AR Plugins
Several plugins bridge Flutter with native AR capabilities. The ar_flutter_plugin_engine stands out as a popular choice. This plugin creates collaborative augmented reality experiences across ARKit and ARCore platforms. Developers can build once and support both ecosystems.
Other options include separate arkit_plugin and arcore_flutter_plugin packages. These work well when targeting single platforms or when apps need platform-specific features. Teams at FBIP evaluate these options based on project requirements and help clients choose the right approach.
Building Your First Flutter AR Application
Creating a basic Flutter AR app follows clear steps. Start with environment setup, add necessary dependencies, then implement core AR features.
Setting Up Your Development Environment
Install Flutter SDK on your development machine first. Download it from the Flutter website and follow installation guides for your operating system. Verify installation by running flutter doctor in your terminal.
Add Android Studio for Android development or Xcode for iOS development. Both IDEs provide emulators and build tools. Real device testing matters more for AR apps since emulators often lack AR capabilities.
Create a new Flutter project using the command line or your preferred IDE. Run flutter create my_ar_app to generate the starter project structure.
Adding AR Dependencies
Open your project’s pubspec.yaml file. Add the ar_flutter_plugin_engine package under dependencies. This plugin supports both ARCore and ARKit from one codebase.
dependencies:
flutter:
sdk: flutter
ar_flutter_plugin_engine: ^latest_version
Run flutter pub get to download the package. Check the plugin documentation for platform-specific setup requirements. Android apps need minimum SDK version updates while iOS apps require camera permissions in Info.plist.
Implementing Core AR Features
Start with plane detection to identify flat surfaces. This feature lets users place virtual objects on floors, tables, or walls. AR frameworks scan the environment continuously, updating detected planes as the camera moves.
Add 3D object placement next. Users tap detected planes to position virtual items. Your code handles the conversion from screen coordinates to world space positions. The AR framework maintains these objects’ positions as users move their devices.
Light estimation improves realism. AR frameworks analyze real-world lighting and apply similar lighting to virtual objects. This makes digital content blend naturally with physical surroundings.
Practical Flutter AR Use Cases
Real-world applications demonstrate Flutter AR’s versatility. Different industries adopt AR for specific benefits.
Retail and E-Commerce
Furniture retailers let customers visualize products in their homes before purchasing. Users point their phone cameras at empty spaces and see how sofas, tables, or lamps fit their rooms. This reduces return rates and increases buyer confidence.
Fashion brands offer virtual try-on experiences. Customers see how clothes, glasses, or accessories look on themselves through AR. This bridges the gap between online shopping and physical stores.
Education and Training
Medical students study anatomy using AR overlays on physical models. Complex structures become easier to understand when students can view them from multiple angles and see inside layers.
Automotive technicians learn engine repair through guided AR instructions. Virtual arrows and labels highlight specific parts, reducing training time and errors.
Gaming and Entertainment
Location-based AR games engage players outdoors. Virtual characters and objects appear in real locations, encouraging exploration and social interaction.
Interactive storytelling apps bring books alive. Characters jump off pages, animations play in physical spaces, and narratives respond to user environments.
Industrial Applications
Warehouse workers locate inventory faster with AR navigation. Virtual paths and labels guide them through complex storage facilities.
Maintenance technicians receive real-time equipment information. AR overlays display specifications, warning indicators, and repair instructions directly on machinery.
Optimizing Flutter AR Performance
Performance directly affects user experience in AR applications. Smooth frame rates prevent motion sickness while maintaining immersion.
Managing 3D Assets
Keep 3D models lightweight. High polygon counts slow rendering and drain batteries. Optimize meshes before importing them into your app. Tools like Blender help reduce vertex counts while preserving visual quality.
Compress textures appropriately. Balance image quality with file size. Modern compression formats maintain appearance while using less memory.
Load assets asynchronously. Don’t block the main thread while loading large 3D files. Show loading indicators when necessary to manage user expectations.
Reducing Battery Drain
AR apps consume significant power through constant camera use and processing. Implement efficient rendering techniques to extend session durations.
Lower rendering resolution when full quality isn’t needed. Users often accept slightly reduced visuals for longer battery life.
Pause AR sessions when apps move to background. Continue tracking only when users actively view the AR experience.
Common Challenges in Flutter AR Development
Every technology presents obstacles. Understanding these challenges helps teams prepare solutions.
Device Compatibility
Not all devices support AR features equally. Older phones lack necessary sensors or processing power. Check device capabilities before enabling AR features. Provide graceful fallbacks for unsupported devices.
Testing across various devices reveals compatibility issues. Physical device testing beats emulators for AR apps. Maintain a diverse test device collection.
Environmental Conditions
AR tracking struggles in poor lighting. Apps need fallback modes or clear user guidance about optimal conditions.
Reflective or plain surfaces confuse plane detection. Apps should handle these situations gracefully, perhaps suggesting users move to different locations.
User Experience Design
AR interfaces differ from traditional mobile apps. Users need clear instructions about moving their devices for plane detection.
Onboarding tutorials help users understand AR interactions. Show simple animations demonstrating required movements.
Flutter AR Market Growth and Opportunities
The AR market continues expanding rapidly. Analysts project the AR market to reach over $50 billion by the end of 2024. This growth creates opportunities for developers and businesses.
Early adopters gain competitive advantages. Companies launching AR features before competitors attract attention and build user bases.
Flutter AR development offers cost-effective entry into this market. Businesses can test AR concepts without massive native development investments.
Getting Professional Flutter AR Development Support
Building production-quality AR apps requires expertise. Development teams need Flutter proficiency, AR framework knowledge, and UX design skills.
FBIP specializes in Flutter application development including AR implementations. Their team understands both technical requirements and business goals. When you need to transform AR concepts into functioning applications, working with experienced developers saves time and resources.
Professional development teams handle complex integrations. They manage plugin updates, optimize performance, and ensure apps meet platform guidelines. This support proves valuable when launching AR products.
Future Trends in Flutter AR
AR technology evolves continuously. New capabilities emerge as hardware improves and frameworks mature.
Shared AR experiences will become more common. Multiple users will interact with the same virtual objects simultaneously. Collaborative features open new application categories.
AI integration will enhance AR capabilities. Machine learning will improve object recognition, spatial understanding, and content adaptation.
Wearable AR devices will expand beyond phones. Flutter’s flexibility positions it well for supporting emerging form factors.
Taking Your Next Steps with Flutter AR
Start small when entering Flutter AR development. Build simple prototypes testing core concepts before committing to full applications.
Learn from existing examples. Many open-source Flutter AR projects demonstrate best practices and common patterns.
Connect with the Flutter community. Active developers share solutions to common problems and discuss emerging techniques.
Consider partnering with experienced teams for your first production AR app. Companies like FBIP provide the expertise needed to avoid common pitfalls while delivering quality results.
Ready to explore how Flutter AR can transform your business? The technology has matured enough for serious commercial applications. Whether you need customer engagement tools, training solutions, or completely new experiences, Flutter AR provides the foundation to build them.
Frequently Asked Questions About Flutter AR
What devices support Flutter AR applications?
Flutter AR apps work on Android devices running ARCore (Android 7.0 or higher with compatible hardware) and iOS devices with ARKit support (iPhone 6s and newer, iPad 2017 and newer running iOS 11 or higher). Not all devices within these categories support AR, so apps should check capabilities before enabling AR features.
How difficult is it to learn Flutter AR development?
Developers familiar with Flutter can pick up AR development relatively quickly. The main learning curve involves understanding AR concepts like plane detection, anchors, and 3D coordinate systems rather than Flutter itself. Starting with simple projects and gradually adding complexity works well for most developers.
Can Flutter AR apps work offline?
Yes, Flutter AR apps can function offline once installed. The AR frameworks process data locally on devices without requiring internet connections. However, apps that download 3D models or sync data with servers need connectivity for those specific features.
What makes Flutter AR better than native AR development?
Flutter AR development allows teams to maintain a single codebase for both Android and iOS platforms, reducing development time and costs significantly. While purely native development might offer slightly more control, Flutter AR provides excellent performance and faster iteration cycles for most use cases.
How much does it cost to develop a Flutter AR application?
Costs vary widely based on complexity, features, and team expertise. Simple AR experiences might take a few weeks while complex applications require months of development. Working with established development companies like FBIP helps ensure accurate project scoping and budget estimates based on your specific requirements.

Building Scalable Apps with Flutter and Microservices Architecture
Modern app development demands more than pretty interfaces and basic functionality. Your application needs to grow alongside your user base, adapt to changing requirements, and remain maintainable as your team expands. This is where combining Flutter with microservices architecture creates a powerful solution for building truly scalable applications.
Understanding the Foundation: What Makes Apps Scalable?
Scalability means your application can handle increased workload without performance degradation or complete redesign. When you build scalable Flutter apps, you’re preparing for growth from day one. The architecture you choose determines whether your app will thrive or struggle when facing thousands (or millions) of users.
Traditional monolithic applications bundle all functionality into a single codebase. While simple initially, this approach creates bottlenecks. A small change requires redeploying the entire application. Team members step on each other’s code. Performance optimization becomes a nightmare. Microservices solve these problems by breaking your application into smaller, independent services.
How Microservices Transform Flutter Development
Flutter microservices architecture separates your application into distinct services, each handling specific business functions. Think of it like a restaurant kitchen: instead of one cook handling everything, you have specialized stations for appetizers, entrees, and desserts. Each station operates independently but contributes to the complete meal.
Here’s how this applies to your Flutter app: authentication lives in one service, payment processing in another, user profiles in a third. Each service maintains its own database, business logic, and deployment cycle. Your Flutter frontend communicates with these services through REST APIs or GraphQL endpoints.
Breaking down the benefits reveals why developers increasingly choose this approach. Each service can be developed, tested, and deployed independently. Your payment team can ship updates without waiting for the profile team. Different services can use different technologies based on their specific needs. When one service experiences high traffic, you scale only that service rather than your entire application.
Architectural Components for Scalable Flutter Apps
Building scalable applications requires understanding the architectural components working together. Let’s break down the structure.
Frontend Layer with Flutter
Flutter serves as your universal frontend, delivering consistent experiences across iOS, Android, and web platforms. The framework’s widget-based architecture naturally supports modular development. You create reusable components that communicate with various backend services.
State management becomes critical here. Choose solutions like Riverpod, Bloc, or Provider based on your app’s complexity. Small applications benefit from Provider’s simplicity. Medium-sized projects find Bloc’s predictable state transitions helpful. Large-scale applications often combine Bloc with layered architecture for better separation of concerns.
API Gateway Pattern
The API gateway acts as a single entry point for all client requests. Your Flutter app doesn’t need to know which specific microservice handles each request. The gateway routes requests, handles authentication, rate limiting, and response aggregation. This pattern simplifies client-side code while providing flexibility to modify backend services without affecting the mobile app.
Service Communication
Microservices need to communicate with each other. REST APIs work well for synchronous communication. Message queues like RabbitMQ or Apache Kafka handle asynchronous tasks. When a user places an order, the order service might send a message to the inventory service, which then notifies the shipping service. Your Flutter app only interacts with the initial service through the API gateway.
Data Management
Each microservice maintains its own database. This separation prevents services from becoming coupled through shared data structures. The user service manages user data in PostgreSQL. The analytics service stores metrics in MongoDB. The cache layer uses Redis for rapid data retrieval. Your Flutter app doesn’t care about these implementation details.
Implementing Flutter Microservices: Step-by-Step Approach
Creating a microservices architecture requires careful planning. Here’s a practical approach to get started.
Step 1: Identify Service Boundaries
Start by mapping your application’s functionality. Look for natural boundaries based on business capabilities. User authentication forms one service. Product catalog becomes another. Payment processing stands alone. Order management operates independently. Each service should represent a complete business capability.
Step 2: Design Your API Contracts
Before writing code, define how services communicate. Create API specifications using OpenAPI or GraphQL schemas. Clear contracts prevent miscommunication between teams and enable parallel development. Frontend developers can start building Flutter screens while backend teams implement services.
Step 3: Implement Service Discovery
As you add services, tracking their locations becomes challenging. Service discovery mechanisms like Consul or Eureka automatically register services and provide lookup capabilities. When your Flutter app needs the user service, it queries the discovery service rather than hardcoding URLs.
Step 4: Build Your Flutter Client Layer
Structure your Flutter code to mirror your service architecture. Create separate repository classes for each microservice. A UserRepository handles authentication calls. A ProductRepository manages catalog operations. This organization makes your code maintainable as services evolve.
Step 5: Implement Error Handling and Resilience
Microservices introduce network complexity. Services might be temporarily unavailable. Network calls can timeout. Build retry logic into your Flutter app. Cache data locally when possible. Provide meaningful error messages to users. Circuit breakers prevent cascading failures when services go down.
Real-World Benefits of This Architecture
Companies adopting Flutter microservices report measurable improvements. Development velocity increases because teams work independently. FBIP has observed that clients implementing this architecture can deploy updates 3-4 times faster compared to monolithic applications.
Fault isolation prevents complete application failures. When the recommendation service experiences issues, users can still browse products and place orders. Only the personalized recommendations temporarily disappear. This resilience builds user trust and maintains revenue during partial outages.
Team scaling becomes manageable. New developers can understand and contribute to individual services without comprehending the entire system. Documentation remains focused and relevant. Code reviews happen faster because changes affect smaller codebases.
Performance Optimization Strategies
Building scalable apps means optimizing for performance from the start. Here are proven strategies.
Caching Layers
Implement multiple caching levels. Your Flutter app caches frequently accessed data locally using shared preferences or Hive. The API gateway caches common responses using Redis. Individual microservices cache database queries. This multi-layered approach dramatically reduces response times.
Lazy Loading and Pagination
Don’t load everything at once. Implement pagination for lists. Load images as users scroll. Fetch detailed product information only when users view specific items. Your Flutter app remains responsive even when interacting with services managing millions of records.
Background Processing
Move time-consuming tasks off the main thread. Use Flutter’s compute function for heavy calculations. Process images in background isolates. Make network calls asynchronously. Users experience smooth interfaces while your app handles complex operations behind the scenes.
Database Optimization
Each microservice optimizes its own data storage. Use database indexes for frequently queried fields. Implement read replicas for services handling more queries than writes. Consider NoSQL databases for services requiring flexible schemas. The right database choice for each service improves overall system performance.
Security Considerations
Microservices introduce new security challenges. Address these concerns proactively.
Authentication and Authorization
Implement JWT (JSON Web Tokens) for stateless authentication. Your Flutter app receives a token after successful login. Include this token in subsequent requests. The API gateway validates tokens before routing requests to microservices. Individual services can extract user information from tokens without additional database calls.
API Security
Protect your API endpoints. Implement rate limiting to prevent abuse. Use HTTPS for all communications. Validate input data rigorously. Sanitize user inputs to prevent injection attacks. Monitor API usage patterns to detect anomalies. These measures protect both your services and user data.
Secure Communication Between Services
Services communicate through secure channels. Use service mesh technologies like Istio for encrypted service-to-service communication. Implement mutual TLS authentication. Services verify each other’s identities before exchanging data. This internal security prevents unauthorized access even if attackers breach your network perimeter.
Monitoring and Observability
You can’t improve what you don’t measure. Monitoring becomes essential with distributed systems.
Centralized Logging
Aggregate logs from all services into a central location. Tools like ELK Stack (Elasticsearch, Logstash, Kibana) or Splunk provide searchable log data. When users report issues, trace their journey across multiple services. Structured logging with correlation IDs links related events across services.
Performance Metrics
Track response times, error rates, and resource usage for each service. Identify bottlenecks before they impact users. Set up alerts for abnormal patterns. Dashboards provide real-time visibility into system health. Teams can respond quickly when metrics indicate problems.
Distributed Tracing
Understand request flows across services. Tools like Jaeger or Zipkin show how a single user action triggers multiple service calls. Identify which service causes delays. Optimize the slow components. Distributed tracing reveals hidden performance issues in complex service interactions.
Testing Strategies for Microservices
Testing distributed systems requires comprehensive strategies.
Unit Testing
Test individual components in isolation. Mock external dependencies. Flutter’s testing framework makes widget testing straightforward. Backend services benefit from extensive unit tests covering business logic. High unit test coverage catches bugs early when they’re cheapest to fix.
Integration Testing
Verify services work together correctly. Test API contracts between your Flutter app and backend services. Ensure services handle expected and unexpected inputs appropriately. Integration tests catch issues that unit tests miss.
End-to-End Testing
Simulate real user workflows across your entire system. These tests verify complete features from user interaction to data persistence. While slower and more brittle than other test types, end-to-end tests provide confidence that your application works as users experience it.
Chaos Engineering
Intentionally introduce failures to test system resilience. Temporarily shut down services. Inject network latency. Verify your application handles these scenarios gracefully. Chaos engineering reveals weaknesses before they cause production outages.
When to Choose This Architecture
Flutter microservices aren’t suitable for every project. Small applications with limited requirements work better as monoliths. The overhead of managing multiple services outweighs benefits when your team consists of two developers building a simple app.
Choose this architecture when building complex applications with multiple business domains. When your team has (or plans to have) multiple developers working simultaneously. When different parts of your application have different scaling requirements. When you need the flexibility to update features independently.
FBIP recommends evaluating your project’s complexity, team size, and growth trajectory. The company’s experience with web development and app development demonstrates that thoughtful architecture choices early in development prevent expensive refactoring later.
Getting Started with Your Scalable Flutter App
Ready to build your scalable application? Start with these steps.
Begin with a modular monolith if you’re uncertain. Organize your Flutter code into feature modules. Separate business logic from UI code. Design clear interfaces between modules. This structure makes future migration to microservices easier if needed.
Choose your state management solution based on expected complexity. Learn the patterns deeply before implementing. Invest time in setting up proper project structure. These foundation decisions impact development velocity for years.
Plan your API design carefully. Document endpoints thoroughly. Version your APIs from the start. Design for evolution because requirements always change. Good API design makes the difference between smooth scaling and painful rewrites.
Partner with Experts for Your Next Project
Building scalable Flutter apps with microservices architecture requires expertise across multiple domains. From Flutter development to backend architecture, from DevOps practices to security implementation, successful projects benefit from experienced guidance.
FBIP, a website designing and development company based in Udaipur, brings years of experience helping clients build robust, scalable applications. Whether you’re starting a new project or refactoring an existing application, professional guidance ensures you avoid common pitfalls and implement best practices from day one.
If you’re ready to build an application that grows with your business, consider partnering with experienced developers who understand both Flutter and microservices architecture. Connect with FBIP to discuss your project requirements and discover how modern architecture patterns can transform your application’s scalability, maintainability, and user experience.
Frequently Asked Questions
Q: What is the difference between monolithic and microservices architecture for Flutter apps?
Monolithic architecture bundles all functionality into a single codebase and deployment unit, making initial development simpler but scaling and maintenance harder. Microservices split applications into independent services, each handling specific business functions. This separation enables independent development, deployment, and scaling of different features, though it introduces complexity in service coordination and communication.
Q: How does microservices architecture improve Flutter app performance?
Microservices improve performance through independent scaling of high-traffic services, specialized database optimization for each service’s needs, parallel processing of different features, and better fault isolation that prevents one failing component from crashing your entire application. Each service optimizes its own performance without being constrained by other parts of the system.
Q: What are the best state management solutions for scalable Flutter apps?
The best solution depends on your app’s complexity. Provider works well for small applications with simple state needs. Bloc offers predictable state transitions suitable for medium-sized projects. Riverpod provides modern, compile-safe state management for various app sizes. Large applications often combine these with clean architecture patterns for better code organization and testability.
Q: How do I secure API communication between Flutter apps and microservices?
Secure API communication through several layers: implement JWT tokens for authentication, use HTTPS for encrypted data transmission, validate all input data rigorously, apply rate limiting to prevent abuse, and implement proper authorization checks in each microservice. Additionally, use API gateways to centralize security policies and monitor for suspicious patterns.
Q: When should I migrate from a monolithic Flutter app to microservices?
Consider migration when your monolithic app faces scaling bottlenecks, when different features have vastly different traffic patterns, when your team grows large enough that developers interfere with each other, or when you need to update different features independently. Small applications rarely benefit from microservices complexity. Evaluate your specific scaling needs before committing to migration.
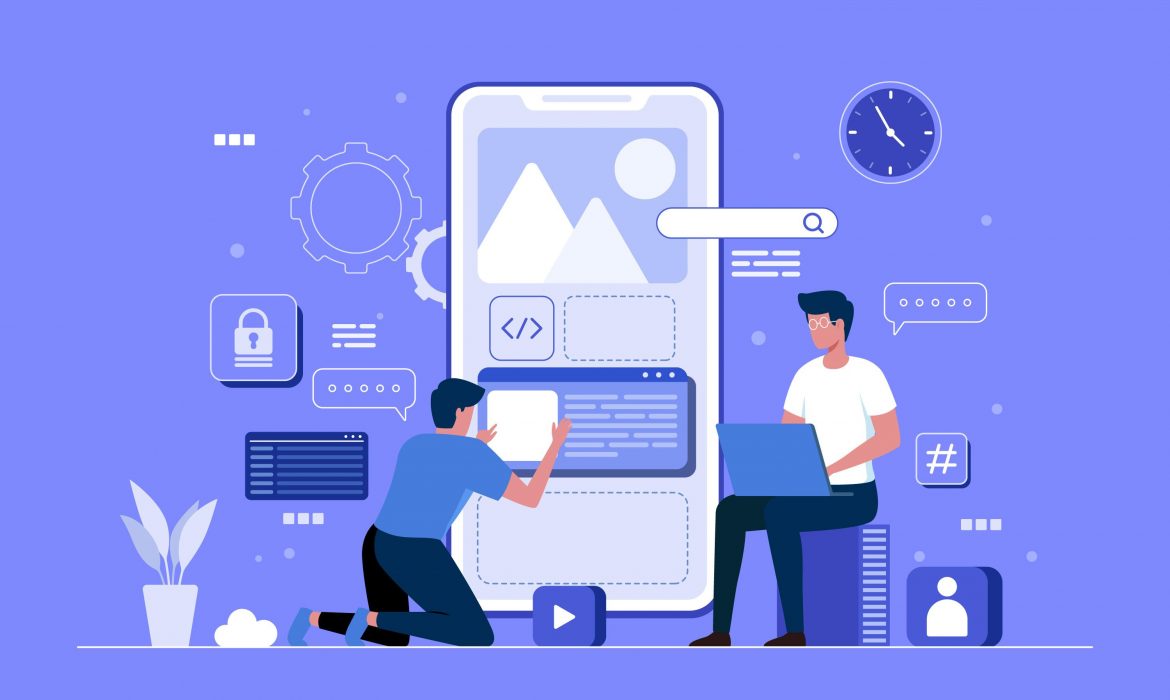
Creating Animations and Transitions in Flutter Like a Pro
Flutter has changed how developers approach mobile app development. The framework gives you the power to build smooth, eye-catching animations that keep users engaged. Whether you’re building your first app or refining an existing project, mastering animations can set your work apart from the competition.
Let’s break down everything you need to know about creating professional animations and transitions in Flutter.
Why Animations Matter in Modern Apps
Users expect apps to feel alive and responsive. Static interfaces feel outdated and can make even well-designed apps seem unpolished. Animations guide users through your app, provide feedback on their actions, and create a sense of polish that builds trust.
Studies show that users are 40% more likely to stay engaged with apps that have smooth, purposeful animations. The right motion can reduce perceived loading times, clarify navigation, and make complex interactions feel natural.
Understanding Animation Types in Flutter
Flutter offers two main approaches to creating animations and transitions: implicit and explicit. Each serves different purposes and knowing when to use each one will save you time and code.
Implicit Animations
Implicit animations handle the heavy lifting for you. When you change a property value, Flutter automatically animates the transition. These animations require minimal code and are perfect for straightforward effects.
The framework includes several built-in implicit animation widgets:
- AnimatedContainer: Smoothly transitions between size, color, padding, and other properties
- AnimatedOpacity: Fades widgets in and out
- AnimatedPositioned: Moves widgets within a Stack
- AnimatedAlign: Changes widget alignment with smooth motion
- AnimatedCrossFade: Smoothly switches between two child widgets
Here’s why implicit animations work well: They manage their own controllers behind the scenes. You change a value, and the animation happens automatically. No manual controller setup required.
Explicit Animations
When you need complete control over timing, sequencing, or complex choreography, explicit animations are your answer. These require more setup but give you precision control over every aspect of the motion.
Creating explicit animations means working directly with AnimationController. This controller manages the animation’s duration, progress, and playback. You can start, stop, reverse, or repeat animations on demand.
The Flutter SDK provides built-in explicit animation widgets like FadeTransition, SlideTransition, and ScaleTransition. These widgets respond to animation values you provide, giving you control over exactly when and how the animation plays.
Getting Started with AnimationController
The AnimationController is the foundation of explicit animations in Flutter. Think of it as the conductor of an orchestra, keeping time and coordinating all the moving parts.
Creating an AnimationController requires three things:
- A duration for the animation
- A vsync parameter for performance optimization
- Proper disposal when the widget is removed
The vsync parameter prevents offscreen animations from consuming resources. You provide it by adding SingleTickerProviderStateMixin to your State class. This tells Flutter to sync the animation with the screen refresh rate.
Controllers give you methods to control playback: forward(), reverse(), repeat(), and stop(). You can also check the animation’s current status or value at any time.
At FBIP, our Flutter development team uses AnimationController extensively to create custom interactions that match each client’s unique brand identity. The control it provides makes it possible to craft exactly the experience you envision.
Working with Tweens and Curves
Raw animation values typically run from 0.0 to 1.0. Tweens transform these values into something useful for your widgets. A ColorTween maps the animation progress to colors. A SizeTween maps it to dimensions.
Curves add character to your animations. Instead of linear motion, curves create acceleration, deceleration, or bouncing effects. Flutter includes dozens of preset curves:
- Curves.easeIn: Starts slowly, then accelerates
- Curves.easeOut: Starts quickly, then decelerates
- Curves.elasticOut: Creates a bouncing effect
- Curves.fastOutSlowIn: Smooth, natural feeling motion
Combining Tweens with Curves gives you animations that feel natural and polished. A button that bounces slightly when pressed feels more responsive than one that moves linearly.
Creating Custom Page Transitions
Default route transitions work fine, but custom transitions make your app memorable. Flutter’s PageRouteBuilder lets you define exactly how screens transition.
You can create transitions that slide from any direction, fade between screens, or combine multiple effects. The animation object provided by PageRouteBuilder works with standard Tween and Curve objects.
Here’s a common pattern: Use SlideTransition to move the new screen in from the bottom while the old screen stays put. Or try a scale transition that makes the new screen grow from the center. Experiment to find what fits your app’s personality.
Route transitions should typically run between 200 and 400 milliseconds. Shorter feels snappy but can seem jarring. Longer gives users time to understand what’s happening but shouldn’t drag.
Hero Animations for Smooth Navigation
Hero animations create visual continuity between screens. When you tap a product image, it smoothly expands and moves to its position on the detail screen. This shared element transition helps users understand where they are and how screens relate.
Implementing Hero animations is straightforward. Wrap the widget on both screens with a Hero widget and give them matching tags. Flutter handles the rest, automatically animating the widget between screens.
These animations work best for images, icons, or other visual elements that appear on both screens. They create a sense of flow that makes navigation feel natural and intuitive.
Building Complex Animation Sequences
Sometimes you need multiple animations to run in sequence or simultaneously. TweenSequence lets you chain multiple tweens together, creating complex motion from simple building blocks.
You define each segment with its own Tween and timing. One segment might move a widget while the next changes its color. The controller plays through the entire sequence smoothly.
For parallel animations, use multiple animation widgets that listen to the same controller. Or create separate controllers and coordinate their timing. The flexibility lets you build virtually any effect you can imagine.
Performance Considerations for Smooth Animations
Animations need to run at 60 frames per second to feel smooth. Anything slower and users notice the jitter. Here’s how to keep your animations performing well:
Keep widget rebuilds minimal. Use const constructors where possible. Avoid rebuilding widgets that don’t need to change. The AnimatedBuilder widget helps by rebuilding only the parts of your tree that actually animate.
Dispose of controllers properly. Leaving controllers running wastes resources and can cause memory leaks. Always call dispose() in your State class’s dispose method.
Test animations on real devices. What runs smoothly in the simulator might stutter on older hardware. Profile your animations to find bottlenecks before they reach users.
Practical Animation Patterns
Certain animation patterns appear repeatedly in professional apps. Loading indicators, button feedback, list item interactions, and pull-to-refresh effects all follow established patterns.
For loading states, subtle animations keep users engaged while content loads. A pulsing opacity or rotating icon reassures users that something is happening.
Button presses should provide immediate feedback. Scale the button down slightly when pressed, then return to normal size. This micro-interaction confirms the user’s action.
List items can animate in as they appear on screen. A slight fade and slide creates polish without overwhelming the interface. Stagger the timing so items appear in sequence rather than all at once.
The development team at FBIP has refined these patterns across hundreds of Flutter projects. We know which animations enhance user experience and which ones distract from your app’s goals.
Tools and Packages for Animation Development
Flutter’s animation system is powerful on its own, but several packages extend its capabilities. The animations package from Google provides pre-built transitions that follow Material Design motion guidelines.
Lottie integration lets you use complex animations created by designers in After Effects. These animations would be difficult to code by hand but integrate smoothly into Flutter apps.
Rive (formerly Flare) offers interactive animations that respond to user input in real time. These are perfect for character animations, interactive illustrations, or engaging loading screens.
Testing and Debugging Animations
Animations can be tricky to debug because they involve timing and state changes. Flutter DevTools includes an animation inspector that lets you slow down animations and step through them frame by frame.
Use the timeDilation property during development to slow animations down. This makes it easier to spot timing issues or awkward transitions. Just remember to remove it before shipping.
Write tests for animation logic separately from visual effects. Test that controllers start and stop correctly, that state changes trigger the right animations, and that animations clean up properly.
Common Mistakes to Avoid
New Flutter developers often make predictable mistakes with animations. Here are the big ones to watch for:
Don’t forget to dispose of controllers. This is the most common memory leak in Flutter apps. Every controller you create needs a corresponding dispose() call.
Avoid over-animating. Just because you can animate something doesn’t mean you should. Too many animations create visual chaos and slow down your app. Be intentional about which elements move.
Don’t use implicit animations where explicit ones would work better. Implicit animations are great for simple state changes, but they’re not designed for complex choreography. Use the right tool for the job.
Test animations on multiple devices and operating systems. What looks smooth on a high-end Android phone might stutter on an older iPhone. Performance varies, so test across your target device range.
Making Animations Accessible
Not everyone wants or can process animated interfaces. Some users have vestibular disorders that make motion sickness worse. Others simply prefer reduced motion for focus or battery life.
Flutter provides the MediaQuery.disableAnimationsOf() method to check user preferences. Respect these preferences by reducing or eliminating animations when the setting is enabled.
You can provide alternative feedback for important animations. Instead of a sliding transition, switch to an instant cut. Replace a pulsing loader with a static icon. The functionality remains, but the motion is reduced.
Taking Your Skills Further
Mastering Flutter animations takes practice. Start with simple implicit animations and gradually work toward complex, choreographed sequences. Study apps you admire and try to recreate their animation effects.
The Flutter community shares countless animation examples on GitHub and in blog posts. Don’t reinvent the wheel when someone has already solved your animation challenge. Learn from others and adapt their techniques to your needs.
FBIP specializes in Flutter development and has helped businesses across industries create engaging, animated experiences. Our team stays current with the latest animation techniques and performance optimizations. Whether you’re starting a new project or enhancing an existing app, professional Flutter developers can help you create animations that delight users and achieve your business goals.
Ready to elevate your Flutter app with professional animations? Connect with FBIP’s experienced Flutter development team. We create custom animations that align with your brand and engage your users. Visit our website to explore our Flutter development services and start building something exceptional.
Frequently Asked Questions
What is the difference between implicit and explicit animations in Flutter?
Implicit animations automatically handle animation details when property values change, requiring minimal code. Explicit animations give you complete control through AnimationController, allowing complex sequencing and precise timing. Choose implicit for simple state changes and explicit when you need fine control over animation behavior.
How long should page transitions typically last in a Flutter app?
Page transitions should run between 200 and 400 milliseconds for optimal user experience. Durations under 200ms feel too abrupt and can cause confusion. Animations longer than 400ms make the app feel sluggish and can frustrate users who want quick navigation between screens.
Can I use animations created in After Effects in my Flutter app?
Yes, you can integrate After Effects animations using the Lottie package for Flutter. Designers export animations as JSON files, which Flutter renders at runtime. This approach lets you use complex animations without coding them manually, bridging the gap between design and development.
How do I prevent animations from affecting app performance?
Keep performance high by minimizing widget rebuilds with const constructors and AnimatedBuilder. Always dispose of AnimationControllers when done. Use the Flutter DevTools performance overlay to identify bottlenecks. Test on real devices, especially older models, to catch performance issues before users encounter them.
What are Hero animations and when should I use them?
Hero animations create smooth transitions for shared elements between screens. They work best for images, icons, or visual elements that appear on multiple screens. Use Hero animations to maintain visual continuity and help users understand navigation flow, making your app feel more connected and intuitive.
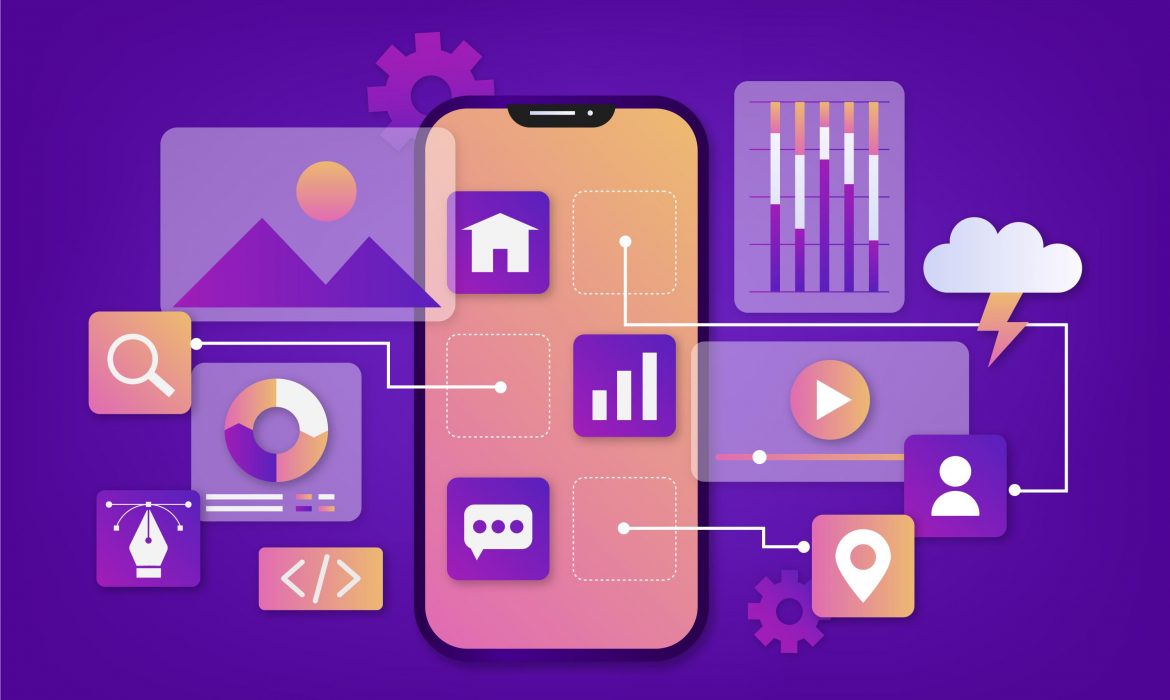
Using Flutter for IoT Applications – Is It Possible?
Ever wondered if that shiny Flutter for IoT Applications could actually control your smart home devices or industrial sensors?
You’re not alone in this curiosity.
Most developers think Flutter is just for building pretty mobile apps. But here’s the thing – the IoT world is expanding faster than your morning coffee gets cold, and traditional development approaches are struggling to keep up.
What if I told you that Flutter might just be the missing piece in your IoT puzzle?
Let’s dive deep into whether Flutter can actually handle the complex world of Internet of Things applications, and more importantly, whether it’s worth your time and effort.
What Makes Flutter Interesting for IoT Development?
The Cross-Platform Advantage
Flutter’s biggest selling point isn’t just about making apps look good. It’s about writing code once and running it everywhere.
Think about a typical IoT setup:
- Mobile app for users
- Web dashboard for administrators
- Desktop application for technicians
- Maybe even embedded interfaces
Traditional development would require separate teams, different codebases, and months of coordination. Flutter changes this equation completely.
Here’s what makes it compelling:
- Single codebase across mobile, web, and desktop platforms
- Consistent UI/UX regardless of the device
- Faster development cycles with hot reload functionality
- Native performance without compromise
Real-Time Data Handling Capabilities
IoT applications live and breathe real-time data. Sensor readings, device status updates, alert notifications – everything happens in milliseconds.
Flutter handles this through:
- Stream-based architecture for continuous data flow
- WebSocket support for instant communication
- Efficient state management using providers and bloc patterns
- Background processing capabilities for continuous monitoring
Flutter for IoT Applications: Technical Deep Dive
Communication Protocols Support
The backbone of any IoT system is communication. Devices need to talk to servers, servers need to talk to apps, and everything needs to happen seamlessly.
MQTT Integration: Flutter supports MQTT (Message Queuing Telemetry Transport) through dedicated packages. This lightweight protocol is perfect for IoT devices with limited bandwidth.
HTTP/HTTPS REST APIs: Standard web communication works flawlessly with Flutter’s built-in networking capabilities. Perfect for cloud-based IoT platforms and device management systems.
WebSocket Connections: For real-time bidirectional communication, Flutter’s WebSocket support ensures instant data exchange between devices and applications.
State Management in IoT Contexts
IoT applications deal with constantly changing data. Device status, sensor readings, connection states – everything updates frequently.
Provider Pattern: Excellent for simple IoT apps with straightforward data flows. Perfect when you’re building a basic smart home controller.
BLoC (Business Logic Component): Better suited for complex industrial IoT applications. Handles multiple data streams and complex business logic efficiently.
Riverpod: The modern approach for scalable IoT applications. Provides better performance and testing capabilities.
Real-World IoT Use Cases Where Flutter Shines
Smart Home Applications
Imagine controlling your entire home from a single, beautiful interface.
Flutter excels here because:
- Unified control panel across phone, tablet, and web
- Real-time device status updates without lag
- Offline functionality when internet connectivity is spotty
- Custom widgets for different device types (lights, thermostats, cameras)
Industrial IoT Monitoring
Manufacturing plants need robust monitoring solutions.
Flutter delivers through:
- Dashboard applications for real-time factory floor monitoring
- Alert systems with push notifications and email integration
- Data visualization using charts and graphs
- Multi-tenant support for different factory locations
Agricultural IoT Solutions
Farmers are increasingly tech-savvy, and they need tools that work.
Flutter provides:
- Weather monitoring integration
- Soil sensor data visualization
- Irrigation control interfaces
- Crop monitoring through image processing
Challenges and Limitations of Flutter in IoT
Hardware Integration Constraints
Let’s be honest – Flutter isn’t perfect for every IoT scenario.
Direct hardware access remains limited. You can’t directly control GPIO pins or communicate with specific sensors without platform channels.
Embedded device deployment is currently not possible. Flutter runs on mobile and desktop platforms, not on microcontrollers or embedded systems.
Platform-specific features still require native code bridges. Bluetooth Low Energy, NFC, and specialized sensors need additional implementation.
Performance Considerations
IoT applications often handle large amounts of data continuously.
Memory management becomes crucial when dealing with streaming sensor data. Flutter’s garbage collection can occasionally cause hiccups in real-time applications.
Battery optimization is essential for mobile IoT controllers. Background processes and continuous network communication drain batteries quickly.
Network handling needs careful implementation. Poor network conditions are common in IoT environments, requiring robust retry mechanisms and offline capabilities.
Best Practices for Flutter IoT Development
Architecture Patterns
Clean Architecture works exceptionally well for IoT applications. Separate your data sources, business logic, and presentation layers clearly.
Repository Pattern helps manage multiple data sources. Your app might get data from REST APIs, MQTT brokers, and local storage simultaneously.
Dependency Injection ensures testable and maintainable code. IoT applications grow complex quickly, and proper architecture prevents technical debt.
Security Implementation
IoT security isn’t optional – it’s critical.
End-to-end encryption for all data transmission. Use TLS/SSL for HTTP communications and encryption for MQTT messages.
Authentication and authorization with proper token management. Implement OAuth 2.0 or similar protocols for secure device access.
Input validation and sanitization at every level. IoT devices can be compromised, so never trust incoming data blindly.
Testing Strategies
Unit testing for business logic components. Mock your IoT data sources and test different scenarios thoroughly.
Widget testing for UI components. Ensure your interfaces work correctly with various data states and network conditions.
Integration testing with real IoT devices. Nothing replaces testing with actual hardware and network conditions.
How FBIP Transforms IoT Dreams into Reality
While exploring Flutter for IoT Applications, you’ll quickly realize that theory only gets you so far. The real magic happens when experienced developers translate your vision into working solutions.
FBIP has been quietly revolutionizing how businesses approach IoT development. Their team understands that IoT isn’t just about connecting devices – it’s about creating seamless experiences that users actually want to use.
What sets FBIP apart:
Their Flutter expertise goes beyond basic app development. They’ve crafted IoT solutions for industrial monitoring, smart agriculture, and home automation systems.
Cross-platform mastery means your IoT dashboard works identically on phones, tablets, web browsers, and desktop applications. One codebase, multiple platforms, consistent experience.
Real-time communication expertise ensures your applications respond instantly to device changes. Whether it’s a temperature spike in a manufacturing plant or a security alert at home, users get notified immediately.
Security-first approach protects both your devices and user data. IoT security breaches make headlines regularly, but FBIP implements enterprise-grade security from day one.
Scalable architecture grows with your IoT network. Start with a few devices, scale to thousands without rebuilding your application foundation.
Their proven track record includes successful deployments across various industries. From simple smart home controllers to complex industrial monitoring systems, FBIP delivers solutions that actually work in real-world conditions.
The Verdict: Is Flutter Right for Your IoT Project?
Flutter for IoT Applications works brilliantly when you need:**
- Multi-platform user interfaces for IoT systems
- Real-time data visualization and monitoring
- Rapid development with consistent UI/UX
- Cloud-connected IoT applications
- Consumer-facing IoT controllers
Consider alternatives when you need:
- Direct embedded system programming
- Ultra-low latency real-time control
- Specialized hardware protocol implementations
- Resource-constrained edge computing
The sweet spot for Flutter in IoT lies in creating the user-facing applications that connect people to their IoT ecosystems. While you won’t program microcontrollers with Flutter, you’ll create stunning interfaces that make IoT systems accessible and enjoyable to use.
The future looks bright for Flutter in IoT development. As edge computing grows and IoT devices become more powerful, Flutter’s cross-platform advantages become even more valuable.
Ready to explore how Flutter for IoT Applications can transform your next project? The technology is ready, the tools are available, and the possibilities are endless.
Ready to Build Your Next IoT Solution?
Transform your IoT vision into reality with expert Flutter development. Connect with FBIP’s experienced team to discuss your project requirements and discover how Flutter for IoT Applications can accelerate your development timeline while delivering exceptional user experiences.
Frequently Asked Questions
Can Flutter directly communicate with IoT devices?
Flutter can communicate with IoT devices through protocols like HTTP, WebSocket, and MQTT, but requires platform channels for direct hardware access like Bluetooth or GPIO pins.
Is Flutter suitable for real-time IoT monitoring applications?
Yes, Flutter handles real-time data excellently through streams and WebSocket connections, making it perfect for monitoring dashboards and alert systems in IoT environments.
What are the main advantages of using Flutter for IoT user interfaces?
Flutter offers cross-platform deployment, consistent UI/UX, rapid development with hot reload, and excellent performance for creating IoT control panels and monitoring applications.
Can Flutter applications work offline for IoT control?
Flutter supports offline functionality through local storage and caching mechanisms, allowing IoT applications to work when internet connectivity is intermittent or unavailable.
How does Flutter compare to native development for IoT applications?
Flutter provides faster development cycles and cross-platform compatibility, while native development offers better hardware access and platform-specific optimizations for IoT applications.

